Gamebuino: A Handheld Arduino Gaming Console Ready For Prime Time

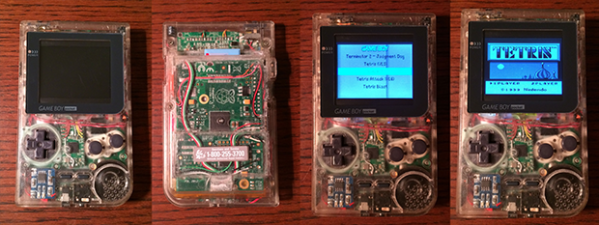
[Rodot] wrote in to tell us about the Gamebuino, a very nicely designed and easily reproducible version of his handheld Arduino gaming console. We originally featured [Rodot’s] Arduino based gaming console over a year ago.

With the Gamebuino, you too can build your own games and gaming hardware around the Arduino. While there is a lot of information currently missing from the site’s Wiki, such as the layout and game code, [Rodot] plans on making everything open source. The console includes a rechargeable lithium battery, a micro SD card, and I2C expansion connectors. This is one project to keep an eye (and two hands) on, especially since a full game library is going to be provided, letting you easily create your own games. See what the console can do in the demo video after the break.

It would be amazing so see some old Game Boy games ported to run on the Arduino, or maybe one of our readers can make an Game Boy emulator for the Arduino!
Continue reading “Gamebuino: A Handheld Arduino Gaming Console Ready For Prime Time”

Spoofing Pokemon Trades

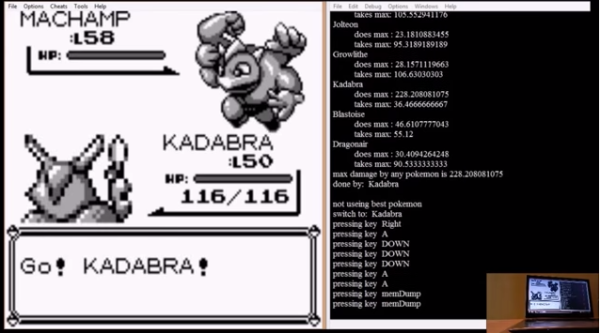
[Adan] had an old Game Boy sitting around, and without anything better to do decided to investigate the link cable protocol with a microcontroller. He had a Stellaris Launchpad for the task, but initially had no project in mind. What he came up for this adventure in serial protocols is a first gen Pokemon trade spoofer that allows him to obtain pokemon without having two Game Boys, or for the weird ones out there, “friends.”

The Game Boy link protocol is extremely well documented (dead link, try Internet Archive), so getting data from the Game Boy to the Launchpad was as simple as a soldering up an old link cable connector to a piece of perf board. After figuring out the electronics, [Adan] looked at what happened when two Pokemon games tried to trade pokemon. When two Game Boys are linked, there are two in-game options: trade or battle. Looking at the data coming after the ‘trade’ option, [Adan] found something that could possibly be the data structure of the Pokemon being sent. He reverse-engineered this all by himself before discovering this is also  well documented.

Bringing everything together, [Adan] figured out how to trade non-existent Pokemon with a small dev board. Right now he’s only transmitting Pokemon that are hard-coded on the Launchpad, but it’s very possible to transmit the Pokemon values in real-time over USB.

Thanks [Dan] for sending this in, and no, we don’t know what’s up with the influx of Pokemon posts over the last week. Video of the spoof below.

Continue reading “Spoofing Pokemon Trades”

Pokemon Blue Becomes An IDE

With WiFi, Wonder Trade, and new Pokemon that are freakin’ keys, you’d think the latest generation of everyone’s reason to own a Nintendo portable is where all the action is, right? Apparently not, because Pokemon Blue just became a development tool for the Game Boy.

Despite all notions of sanity, this isn’t the first time we’ve seen someone program a Game Boy from inside a first generation Pokemon game. Around this time last year, [bortreb] posted a tool assisted run that deposited and threw away in-game items to write to the Game Boy’s RAM. Using this method, [bortreb] was able to craft a chiptune version of the My Little Pony theme inside Pokemon Yellow.

A year later, [TheZZAZZGlitch] has gone above and beyond what [bortreb] did. Instead of a tool assisted run, [ZZAZZ]’s hack can be done manually on a real Game Boy. This trick works by using an underflow glitch to obtain item ‘8F’ in the player’s inventory. Here’s a great tutorial for doing that. With this 8F item, a few items can be tossed and a ‘programming’ mode is activated where code can be written to RAM by walking to an X Y position on the map, using the 8F item, and writing a program byte by byte.

The maximum amount of code that can be written to the Game Boy RAM is 254 bytes, just large enough for [TheZZAZZGlitch] to write a very, very simple version of Akranoid, Breakout, or one-player Pong. Not much, but very, very impressive.

Video of [ZZAZZ] ‘jailbreaking’ his copy of Pokemon Blue available below.

Continue reading “Pokemon Blue Becomes An IDE”

A Modular Game Boy Synthesizer

Euro

Synth heads and electronic music aficionados the world over love a good rackmount synth. These days, though, synthesis tends more toward small, digital, and ‘retro’ rather than the monstrous hulking behemoths of the 60s and 70s. [gieskes] might be ahead of the curve, here, as he’s built a Game Boy module for his eurorack synthesizer.

The software running on [gieskes]’s Game Boy is the venerable Little Sound DJ (LSDJ), the last word in creating chiptunes on everyone’s favorite 8-bit handheld. As with any proper Game Boy used in chiptunes, there are a few modifications to the 1980s era hardware. [gieskes] tapped into the cartridge connector with a ‘repeat’ signal that provides slowed down, noisy signals for LSDJ. There’s also pitch control via CV, and the audio output is brought up to 10Vpp

In the video below, you can see [gieskes]’ euroboy in action with a few Doepfer synth modules. There’s also a very cool pulse generator made from an old hard drive in there, so it’s certainly worth the watch.

Continue reading “A Modular Game Boy Synthesizer”

How The Game Genie Works

Those of us old enough to remember blowing into cartridges will probably remember the Game Genie – a device that plugs in to an NES, SNES, Sega Genesis, or Game Boy that gives the player extra lives, items, changes the difficulty, or otherwise modifies the gameplay. To someone who doesn’t yet know where the 1-up is in the first level of Super Mario Bros., the Game Genie seems magical. There is, of course, a rhyme and reason behind the Genie and [The Mighty Mike Master] put together a great walkthrough of how the Game Genie works.

There are two varieties of Game Genie codes – 6-character codes and 8-character codes. Both these types of codes translate into a 15-bit address in the game ROM (from 0x8000 to 0xFFFF for the 6502-based NES) and a data byte. For the 6-character codes, whenever the address referenced by the Game Genie code is accessed, a specific data byte is returned. Thus, infinite lives become a reality with just a 6-character code.

Some games, especially ones made in the late years of their respective systems, use memory mapping to increase the code and data provided on the cartridges. Since areas of data are constantly being taken in and out of the CPU’s address space, merely returning a set value whenever a specific address is accessed would be disastrous. For this bank-switching setup, the Game Genie uses an 8-bit code; it’s just like the 6-bit code, only with the addition of a ‘compare’ byte. Using an 8-bit code, the Game Genie returns a specific byte if the compare bytes are equal. Otherwise, the Genie lets hands off the original data to the CPU.

Of course, all this information could be gleaned from the original patent for the Game Genie. As for the circuitry inside the Game Genie, there’s really not much aside from an un-Googleable GAL (general array logic) and a tiny epoxied microcontroller. It’s an amazingly simple device for all the amazement it imbued in our young impressionable minds.

Continue reading “How The Game Genie Works”

How To Play A Game Boy Emulator On Chromecast

gameboy-on-chromecast

It’s small, it’s blurry, but it’s working. Here’s a proof of concept for playing emulators on a Chromecast which uses the original Game Boy as an example.

Notice that there are two screens shown in the demo. Out of focus in the background is the television with the Chromecast displaying the game play. In the foreground is a computer with a browser open which lists off the control setup. These are the button mappings for an Xbox 360 controller. The emulator is a JavaScript Game Boy emulator. This is loaded on the Chromecast through a simple html file (called the receiver in the repo). The sender — also a simple html file — loads another JavaScript package on the computer which translates the controller’s button presses to keyboard inputs and sends them out to the receiver.

This puts stars in our eyes about emulator hacks. We’d love to see this boiled down to smartphone and Chromecast as the two pieces of hardware, with the touchscreen as the gaming input.

Continue reading “How To Play A Game Boy Emulator On Chromecast”

Reading Game Boy Carts With I2C

rasgame

After seeing a Game Boy emulator for the first time, [Thijs] was amazed. A small box with just a handful of electronics that turns a Game Boy cartridge into a file able to be run on an emulator is simply magical. [Thijs] has learned a lot about GB and GBC cartridges in the mean time, but still thinks the only way to really learn something is to roll up your sleeves and get your hands dirty. Thus was born [Thijs]’ Game Boy cartridge dumper, powered by a pair of I2C port expanders and a Raspberry Pi.

Inspired by a build to dump ROMs off Super Nintendo games with the help of a Raspberry Pi, [Thijs] grabbed all the hardware necessary to create his own GB cart dumper. A DS Lite cartridge adapter provided the physical connection and a pair of MCP23017 I/O expanders – one soldered to a Slice of PI/O board – provided the electrical connections.

In the end, [Thijs] managed to dump the ROMs off the Japanese editions of Pokemon Yellow and Gold in about 13 minutes. This is a much slower transfer rate of 26 minutes per SNES cart in the post that gave [Thijs] the inspiration for this build. Still, [Thijs] will probably be the first to say he’s learned a lot from this build, especially after some problems with dumping the right banks from the cartridge.