A Blinky Fedora To Ring In The New Year

[Garrett Mace] decided to dress festive for New Year’s Eve. What he came up with is a fedora ringed in LEDs that react to music. The hardware uses 5050 LEDs on strips. Three of them encircle the head-gear providing a total of 114 RGB pixels. Each is a WS2811 module — a part which we’re seeing more and more of lately.

The video clip after the break starts off with a few minutes of demonstration. [Garrett] managed to code all kinds of animations for the hardware including several different styles of color sweeps and fades. You may start to think that the three bands always display the same patterns but keep watching and you’ll see a sparkle pattern that proves each dot can be addressed individually.

About 2:20 seconds into the video [Garrett] explains how he pulled it off and shows off the driver hardware. The strips are glued to a band of webbing that slides over the hat. The wires that drive the lights were fed through the center of some paracord and connect to an Arduino housed in a 3D printed case. Power is provided by a portable USB battery with a ShiftBrite shield and an MSGEQ7 chip complete the parts list.

Continue reading “A Blinky Fedora To Ring In The New Year”

Thinking Cap Is Also Party Hat

The Thinking Cap is a piece of wearable signage that lets you display what’s on your mind. The hat uses a Teensy 2.0 connected to a Bluetooth radio to allow the wearer to update the message on the fly, letting the room know what their thinking at that instant.

This hack is based off of LPD8806 controlled LED strips, which are becoming very popular for adding lots of LEDs to anything. There are five strips that need to be controlled over SPI, but the Teensy only has one SPI peripheral.

This lead to the use of multiplexer to allow for controlling each strip individually. The hat uses an interesting and low cost scheme to multiplex five channels using two 744052 dual 4 channel multiplexors and a 7400 inverter.

The Teensy can receive messages using the Bluetooth serial port protocol. The 5 x 7 pixel characters are stored in a framebuffer, and shifted around the hat to create the animation.

The result is a bright message circling around the user’s head, which can be updated with a smartphone over Bluetooth. Check out a video demo of the hat after the break.

Continue reading “Thinking Cap Is Also Party Hat”

Nyan Cat Hat Will Be The Hit Of The Party…. For About One Minute

Seriously, this Nyan Cat hat is the only part needed for a fantastic Halloween costume. It looks pretty good in this still image, but we dare you to watch the clip of it in action (embedded after the break) without letting a beaming grin creep onto your face. Everyone’s going to just love this… until it starts to get really annoying.

When switched on, the iconic meme rotates around the headgear, bobbing its head and tail as she sings the song of her people. There are also stars made of white LEDs that twinkle very brightly in the process. The presentation is quite good, but even better is seeing the build process. Luckily [Ben Katz] posted a series of detailed articles during the adventure. The mechanism responsible for driving the cat around the hat was laser cut from acrylic. It includes a large gear with teeth on the inside, which is interface by a continuously rotating servo motor with a much smaller gear. The head and tail bobbing are purely mechanical, using the revolving motion to turn a spindle as the cat makes its way around the brim.

Continue reading “Nyan Cat Hat Will Be The Hit Of The Party…. For About One Minute”

Blinky Headgear

This hat has a chasing LED feature thanks to our old friend the 555 timer. [BananaSlug] even built in the option to change the speed at the push of a button.

His design starts out with a costume hat. Each of the 25 LEDs is soldered to a 2×4 hole chunk of protoboard. The LED package is pushed through a slit in the hat, but the protoboard remains on the inside where it can be sewn in place. From there [BananaSlug] soldered one negative bus around the circumference, and an individual positive lead from each module back to the control board. They’re addressed by a set of CD4017 decade counters which are clocked by the 555 timer circuit.

This is a great little analog/logic project and the style is perfect if you’ve got the coat to go along with it.

Head-mounted Memory Catcher

A picture’s worth a thousand words so what is a hat that can take 360 degree pictures worth? Just make sure you put it on whenever leaving the house and capturing that next memorable moment will be just one click of a button away.

[Mikeasaurus] recently put together this… special… headgear. He used film-based disposable cameras and this choice presented a few interesting challenges. But the choice is not necessarily a bad one, as you can get six of these without really blowing your budget. He cut the top off of a plastic garbage can to serve as a headband on which to mount the hardware (zip-ties to the rescue). But things get hairy when it comes to triggering all of the shutters at once. These are spring-loaded shutter releases and you can’t just patch into them electrically like you could a digital camera. His solution is a group of six servo motors which do the button pushing for him.

A thirty-six exposure trial run turned out okay. Several times the shots didn’t come out, but at the end of his post he shares a few of the good ones that did. We’re going to stear clear of this one as we can’t abide manually winding all six cameras between each shot. But it does give us an idea for a single-camera hat that uses a 45-degree mirror which swivels. We’ll just put that one in the growing pile of ideas we need to make time for.

Hackaday Links: December 25, 2011

Ah, Christmas. That wonderful time of year when you can roll out of bed to the screams and wails of children, grab a hot cocoa, and spend several hours arguing with an 8-year-old about which LEGO set to build first. Simply magical. While you’re waiting for the Doctor Who Christmas special to come on, settle down with these wonderful Christmas-themed builds that came in over the last few weeks.

One step closer to Robot Santa

Here’s an interesting way to spice up your seasonal headwear. [Mark] took a Santa hat and added a string of multicolored LEDs to the brim. The lights were picked up at a drug store for a dollar. Control is through a simple push button connected to an ATtiny13. Press the button, the lights cycle in a different pattern. Very cool, so check out the video.

A holographic holiday tree

[Auger] posted this very cool light up Christmas tree decoration on Instructables. This tree is made up of three pieces of acrylic. Different designs were laser cut into each piece of plastic – candy canes for the ‘red’ piece, stars and tinsel for the ‘yellow’ piece, and the tree for the ‘green’ piece. LEDs of the respective colors are cemented to the bottom of each bit of plastic. It’s called light piping and is used everywhere. This is the first time we’ve seen three colors, though.

This is what nerds do, and it’s awesome

[Rickard Dahlstrand] was playing around with his phone trying to take deliberately fuzzy pictures of his tree. He noticed the dashes produced from the LED Christmas lights must be produced from PCM dimming. Going through the EXIF data in the picture, he found the exposure time was 1/17th of a second. 1/17 of a second = ~ 58 ms / 5 (cycles on the picture) = ~11 ms per cycle = ~100 Hz frequency on the PCM dimming. Of course this is just about 2 times the line frequency in [Rickard]’s native Sweden, so we’ll call this confirmed. There’s no blog post for this, but we’ve never seen a clearer example of applied geekery. Simply awesome.

Yeah, we measured [Rickard] on a nerd meter

In the spirit of giving, [Johannes] decided to tell the entire world exactly how nerdy he is. He built a ‘Nerd Alert’ meter out of an old 1950s Japanese multimeter. The old guts of the meter were chucked, and a simple amp made out of a transistor amplifies the current flowing through the user’s fingers. A neat scale ([Johannes] measures somewhere between Amiga Workbench and Space invaders) replaces the old, boring, number-based one. Again, no write-up, but here’s some awesome build pictures.

Finally a use for all those old radio tubes

[AUTUIN] took apart a vacuum tube with a blow torch and a diamond cutting wheel. Surprisingly, he was able to put it back together, but not before making a wonderful Christmas ornament. There are two copper wires inside the envelope that are the leads to a single orange-red LED. The whole thing is powered by a watch battery. We’ll be sure to reference [AUTUIN] next time we have to take apart a glass bulb, because he managed not to burn, cut or blind himself.

Six things in a links post? It’s a Christmas miracle!

[Darryl] sent in a nice tool to select and display all of the hacker/maker merit badges available from Adafruit. Oh, we’re still trying to figure out who to give 10 badges to. We’re giving away skull ‘n wrench badges to the top ten hacks ever featured here. Leave a note in the comments, or tell us who should win.

Holiday wishes

Now put the computer down and go spend some time with your families, or failing that, strangers. Of course there’s an all day Doctor Who marathon, and that thing isn’t going to watch itself…
LED Headgear Is Marvel Of Free-formed Circuitry

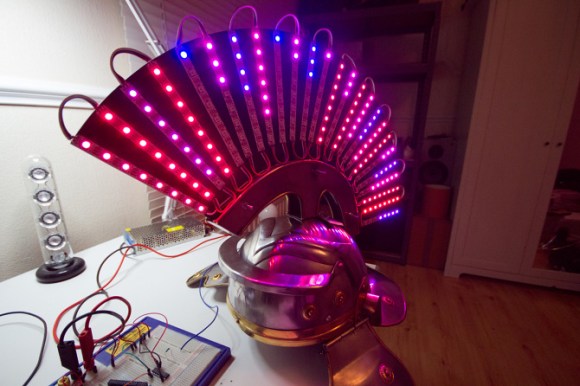
Hackaday contributor [Nick Schulze] popped out an impressive set of LED headgear for a hat-themed party.

[Nick] is no stranger to working with LEDs. Previously he built a blue 8x8x8 cube something like this other 512 node full color version. He had a bunch of LEDs left over from that project and decided to put them to good use.

The first part of the build is the frame itself, made from thick fencing wire. He just started bending it around his head and got an uncomfortable head-shaped hoop to which he could solder. From there, enameled copper wire wraps its way through the system, supplying logic levels to all of the LEDs. Everything is done without a circuit board of any kind. The LED drivers themselves are attached by first using a zip tie to affix a resistor to the frame, then by soldering the TLC5916 chip to that resistor. Even the ATmega8 is included dead-bug style by soldering it to the frame which we think servers as ground. Program it with the free-floating female pin header and you’ll get the fantastic animations seen in the video after the break.

Continue reading “LED Headgear Is Marvel Of Free-formed Circuitry”