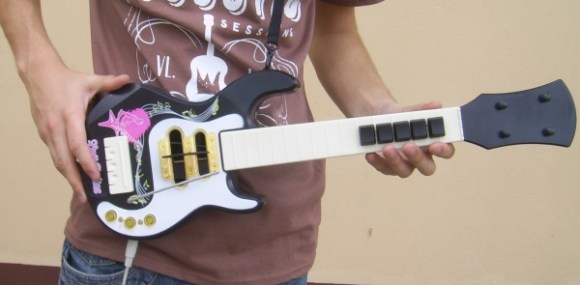
Guitar Hero Controller Built From Toy Guitar And Keyboard

frets-on-fire-custom-controller

[Heinrich Laue] was kind of a latecomer to the fake guitar playing video game phenomenon. He played Frets on Fire — an open source clone of the game — on PC and eventually bought a copy of Guitar Hero World Tour. But playing on the keyboard was a drag. Instead of buying a controller he built his own hacked Guitar Hero controller from a scrapped keyboard and a toy guitar.

The plastic toy he started with was screwed together. This is a really nice since it’s almost impossible to open toys that have been welded together. There was plenty of room inside for all his components and even some space to run the wires.

He started the electronic portion of the build by tracing out the keyboard matrix to figure out which solder pads he could tap into. The strum bar uses a door hinge with buttons on either side of it. When you move it back and forth it hits the buttons, with the spring mechanism in each returning it back to center. The fret buttons are keys from the keyboard, but the switches uses were pulled from a few computer mice. But the real innovation comes into play when he added the Star Power tilt sensor and whammy bar. Follow the link above to find out how he did it.

Building A Velocity Sensitive Keyboard

keys

Cheap toy pianos don’t usually have MIDI, and getting a velocity-sensitive keyboard from something out of the toy aisle at Walmart is nearly out of the question. If you’re willing to tear one of these toy pianos apart and build your own control electronics, though, the sky is the limit, as [JenShen] shows us with his home built velocity sensitive keyboard.

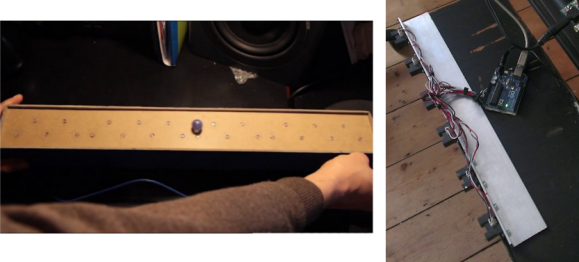
Usually, velocity-sensitive keyboards have two buttons underneath each key. By having a microcontroller measure the time difference between when each button is pressed, it’s possible to sense how fast each key was pressed. [JenShen] took the idea of a velocity-sensitive keyboard in another direction and instead used a force sensitive resistor strip, cut up into many pieces to provide velocity and aftertouch data.

[JenShen]’s keyboard adds these resistive buttons to the button matrix he already made. The result is a very inexpensive velocity sensitive keyboard with aftertouch, an impressive feat for an Arduino and only a few components.

You can check out the keyboard in action after the break.

Continue reading “Building A Velocity Sensitive Keyboard”

Type4me Is A Hardware Clipboard For Your Digital Copy And Paste Needs

type4me-hardware-clipboard

It doesn’t happen often, but every now and again we find ourselves wanting for a more extensible cut and paste experience. Most notably we’ve searched for something that makes is very easy to keep multiple things in the clipboard and paste them as needed. Although we’ve tried several software offerings nothing really made it up to grade, but this hardware clipboard looks very promising. [Luca Dentella] calls it Type4me as it functions as a USB keyboard.

The PIC 18F14K50 enumerates as a USB keyboard, allowing it to send characters anywhere the cursor is located. It sends whatever string is stored inside, with an optional return character at the end. In addition to its keyboard properties it also establishes a serial connection, which allows you to push new strings to the device. This setup does require you to do copy or type your strings into a serial terminal, along with one of four special commands which are parsed by the microcontroller. One of these commands allows you to save the string to EEPROM so that it will be persistent through a power cycle.

The pasting back to the computer takes a mere push of the button. We’ve embedded the video demo after the break. It’s in Italian but there are English subtitles. Near the end [Luca] shows off the device as a macro button for gaming.

Continue reading “Type4me Is A Hardware Clipboard For Your Digital Copy And Paste Needs”

Kitchen Scale Key Transplant

kitchen-scale-key-transplant

[Markus] is quite happy with his kitchen scale. It’s one of the tools he uses most frequently when cooking. But recently the button has begun to give him problems. He figures the years of spilling a little bit of this and that has mucked up the contacts. His solution was to bypass the button using a Cherry MX switch.

Really any replacement should do since the switch merely completes an electrical connection. But there’s a subset of hackers who swear by the Cherry MX switches that come in some keyboards. [Markus] had just such a keyboard on hand, which he was already using for parts, so he pulled out the switch and cut a hole in the scale’s case where he could mount it. After temporarily super gluing the switch in place he completed the task by filling the gap on the outside with hot glue, then running another bead of it along the inside. The addition of the ‘T’ key finishes the hack. The plastic key is easy to clean and will help shed flour, oil, or anything else he might spill during his culinary adventures.

This hack was fast and easy and may have convinced [Markus] to roll his own controller board for the device. We’ll keep a lookout for a follow-up post detailing those alterations.

Put That Headphone Jack Anywhere You Want It

yamaha-keyboard-headphone-jack-hack

Check out this brand new Yamaha keyboard. The fact that we’re seeing the guts means that [Todd Harrison] can kiss his warranty goodbye. But by now you should know that he doesn’t look to others when something goes wrong with his electronics. This time around he’s not repairing anything. He didn’t like having to plug in headphones on the rear of the keyboard. He cracked it open and relocated the headphone jack to a more convenient location.

As you can see, there’s a ton of room inside once the MDF base which holds the speakers and some sounding boxes has been removed. While he’s in there he takes a good look at the mechanics of the keys. They’re weighted with metal rods (seen above) to help the electronic instrument feel more like an acoustic version to the player. But he doesn’t neglect the chance to gawk at all the electronics as well.

After pulling out the PCB that has the headphone jack on it he goes to work with a solder sucker. With the solder gone he cuts through the glue that holds the jack on the board. All that’s left is to solder some wire in its place and give it a nice project box as an enclosure. To complete the hack he mounts the box on the MDF base and now the headphones connect on the front. See the entire process in the video after the break.

Continue reading “Put That Headphone Jack Anywhere You Want It”

USB NeXT Keyboard

USB NeXT Keyboard

[Ladyada] and [pt] had an old keyboard from NeXT, but since it used a custom protocol it wasn’t usable with modern hardware. So they built a custom device to convert the NeXT protocol to USB.

The device uses a Arduino Micro to read data from the keyboard and communicate as a HID device over USB. It connects to the keyboard using the original mini-DIN connector, and is housed in the classic Altoids tin enclosure.

Since the protocol used by NeXT isn’t standard, they had to figure it out and write some code to interpret it. The keyboard communicates bidirectionally with the computer, so they needed to send the correct frames to key data back.

Fortunately, they hit on a Japanese keyboard enthusiast’s site, which had protocol specifications. They implemented this protocol on the Micro, and used the Keyboard library to create a HID device.

The final product is an adapter for NeXT to USB, which allows for the old keyboards to be used on any computer with USB. It’s a good way to bring back life to some otherwise unusable antique hardware.

Turning Toy Pianos Into MIDI Keyboards

Building a MIDI device is always a great microcontroller project, and nearly everyone has an old toy keyboard lying around in the back of a closet or in the basement. [JenShen] decided to take one of these toy keyboards and build a MIDI keyboard.

The keyboard [JenShen] used was a simple Casio keyboard with built-in voices. After tearing out the guts of the keyboard, the only thing that remained is the row of push buttons underneath the keys. These buttons were laid out in a row/column matrix, so [JenShen] needed to decode this matrix before sending the result to an Arduino for processing.

A 74HN595 shift register was used to read the 8 rows of buttons underneath the keys, while the rows were tied to different input pins on the ‘duino. This allowed [JenShen] to scan the keyboard matrix with an Arduino and generate MIDI notes and send them to other synths.

In the video after the break, you can check out [JenShen]’s circuit and code that allowed him to turn a toy keyboard into a proper 32-note MIDI keyboard. It’s not velocity sensitive, but he says he’ll show everyone how to accomplish that in a future post.

Continue reading “Turning Toy Pianos Into MIDI Keyboards”