Turning An Old Keyboard Into A Work Of Art


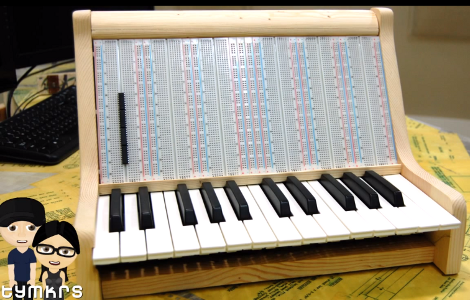
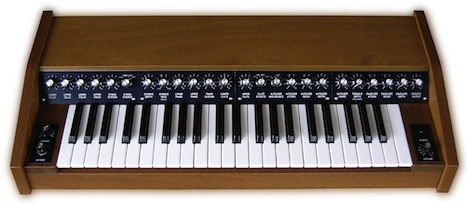
The 1970s were the glory days for analog synthesizers, and for [Stefan] listening to huge modular Moogs and ARPs resulted in a wondrous seething jealousy. In 2009, wanting to relive just a little bit of his childhood, [Stefan] picked up a PAiA Stringz’n’Things from eBay. It’s a great little keyboard, but [Stefan] his new purchase to look little classier than a tolex-covered flight case. After getting rid of the old tolex case, [Stefan] made a new enclosure and added some extra circuitry to expand the capabilities of this classic synth.

After replacing the electrolytic capacitors and fixing a voltage regulator issue, [Stefan] made a new enclosure for his keyboard out of beautifully lacquered mahogany. A new key bed stolen from an old Yamaha organ was brought in, and new control panels above the keys provide a more sensible organization than the keyboard’s previous incarnation.

The original Stringz’n’Things was laid out more like an organ than a synthesizer, a reflection of its polyphonic nature. This meant there wasn’t a very diverse tonal palette, but [Stefan] remedied that with a wave folder to generate extra harmonics, a tremolo, and an envelope generator to provide attack and decay for each note.

Now [Stefan] has a lovely polyphonic synth that has found its place on top of an old Hammond organ. As a bonus, the synth sounds really good. Not bad for an instrument generally regarded as being very limited.


Key-covered Textiles

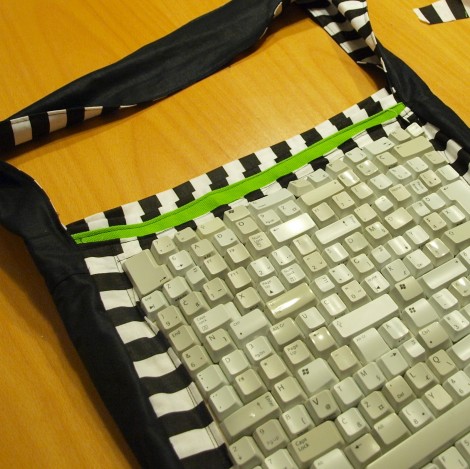
[Karolina] has been hard at work adding a little flair to her bag. Well, a lot of flair actually. She rolled several keyboards worth of keys into one of the panels for this bag. She had seen the idea in a magazine and decided to give it a try. The secret is to use staples.

The first issues is gather enough keys, so if you give this a try make sure to let your friends know you’re looking for old keyboards. Next she wanted each of the keys to lay flat on the fabric panel, which meant cutting away the plastic pegs that extend past the edges of the key. From there [Karolina] laid out her design with each key face down. Notice how careful she was to make sure there were no gaps between them. Now it was time to link them all together. She used heavy-duty staples as connecting brackets. They were bent to provide a large gluing surface on the underside of the face of each key. With the staples in place, each can be sewn to the fabric with a loop of thread. Although she started the project in the fall she’s just now showing off the finished bag.

Chorded Keyboard For Touchscreens

For over a hundred years, good typists didn’t ‘hunt and peck’ but instead relied on keeping their fingers on the home row. This technique relies on physical buttons, but with on-screen keyboards used on tablets and other touch screen devices touch typists have a very hard time. [Zach] is working on a new project to bring a chorded keyboard to these devices called ASETNIOP.

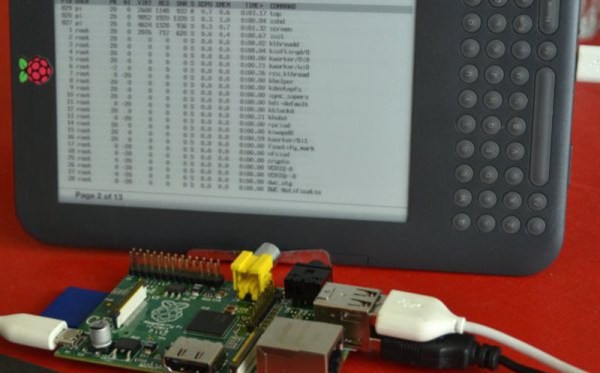
Instead of training a typist where to place their finger – the technique used in most other keyboard replacements, ASETNIOP trains the typist which fingers to press. For example, typing ‘H’ requires the typist to press the index and middle fingers of their right hand against the touchscreen. In addition to touchscreens, ASETNIOP can be used with projection systems, Nintendo Power Glove replicas, and extremely large touchpads that include repurposed nooks and Kindles.

If you’d like to try out ASENTNIOP, there’s a tutorial that allows you to try it out on a physical keyboard as well as one for the iPad. It’s a little weird to try out but surely no more difficult to learn than a Dvorak keyboard.

Custom Starcraft Controller

This Starcraft controller was designed as a contest entry. The goal of the contest was to provide a custom controller for the Starcraft Real-Time-Strategy game that shared some of the features seen in First Person Shooter controllers.

The design started as rough sketches. From the there button layout was prototyped before actually building a virtual model of the entire controller. A rendering of the model was submitted as a contest entry, and we’re glad it was also seen through to a physical device. This involved sending the design files off for 3D printing. What came back was painted and assembled to achieve the beautiful look seen above.

On the right is a stick that acts as the mouse controller. The buttons on the left are just the most necessary of Starcraft control keys. They all map to the appropriate keyboard keys and the device enumerates as an HID keyboard so no button mapping is necessary. That being said, a player does have the option of remapping if the layout doesn’t suit.

[Via Reddit with more info at Shoryuken]

Update: Many Improvements To Optical-sensor-based Piano

[Sebastian] wrote in to update us about the optical sensor project he started a couple of years ago. You’ll find his most recent update here, but there are four different post links after the break that document various parts of his progress.

You may not recall the original project, but he was looking to add resolution and sensitivity to the keystroke of an electric keyboard. With the sensors built, he started experimenting with using the force data to affect other parts of the sound. His post back in January shows this bending the pitch as the keys receive more force from the player.

In March he installed the sensor array in an old piano. The video he posted where he plays the piano, but we hear the sound generated from the sensor inputs. We’ve embedded it after the break.

Last week he published two posts. They cover a redesign of the sensor boards, and the panelization work he’s done to help bring down manufacturing costs. The base unit was redesigned to use an AT90USB microcontroller which consolidates the separate chips used in the previous version.

Continue reading “Update: Many Improvements To Optical-sensor-based Piano”

Moppy Lets You Play Your Floppy Drives

Get ready to join a band. Just follow the guide over at the Moppy project page and you’ll have your very own floppy drive instrument.

The name is a mashup between Musical and Floppy. By using an Arduino UNO as a translator, you can command an array of floppy drives with a musical keyboard (think piano). The head on each floppy drive is controlled by a stepper motor which will put out some sweet sounds if driven at just the right frequency. The lower notes tend to fair a bit better than the high range. One great example of this is the Imperial March theme as heard after the break.

Once you get the base system up and running, it’s time to think of some alternate interfaces. Sure, you can obvious things like toy keyboards. But wouldn’t it be more fun to make it fruit controlled?

Continue reading “Moppy Lets You Play Your Floppy Drives”

Simple Mod To Keep Your Downstairs Neighbors From Hearing You Pound The Keys

[Mesoiam] managed to pick up a Viscount hammer weighted keyboard for pretty cheap. For those who are unfamiliar, Viscount makes keyboards that feel like you’re playing a piano, hammers and all. The only problem with this, as [Mesoiam] discovered, is that even when he’s jamming with headphones in, his friends down stairs can still hear the keyboard banging due to the vibration going through the stand to the floor. His resolution to this problem was to build some custom dampers to reduce the vibration. He built two brackets that fit over the stand and suspend the keyboard on two strips of flexible rubber. Quite a simple solution to a possibly annoying problem.