Classic Game Of Snake On An ARM Controller

Every now and again we take a break from looking at all of your awesome projects and get to work on our own. I thought I’d take a minute to show off my game of Snake. It’s a classic that I remember playing on a graphing calculator (TI-83) back in high school. I had never written my own version and decided it would be a good reason to spend some more time on the ARM platform.

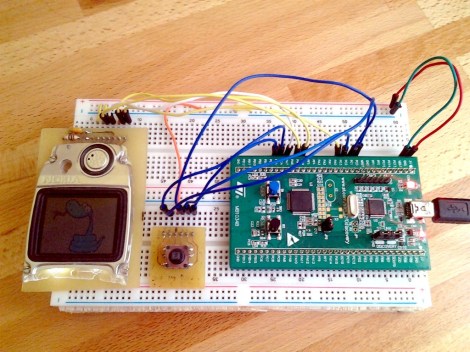
The dev board I’m using is the STM32 F0 Discovery board. Once I had a usable template for compiling the code on a Linux box everything else just started to fall into place. The screen is from a Nokia 3595. Several years back I cut off the keypad and made a breakout board for it. It’s pretty dim but it’s small and uses SPI so it tends to be my go-to display for prototyping. But I did get my hands on an SSD1289 TFT screen (after writing about this project) for about $16 and I’ve had some success with that. It uses a parallel interface so it’s not as easy to hook up and I’ve had some crosstalk issues when running at 24 MHz.

But I digress. Check out the demo video of my simple game after the break. There are more details about my programming choices at post link above. You will see this hardware again soon. I’m working on an On Chip Debugging primer and these ARM dev boards are perfect for it!

Continue reading “Classic Game Of Snake On An ARM Controller”

How To Build Your Own Dedicated Pandora Radio

This mix of modern and retro acts as a standalone Pandora client. It’s certainly a radio upgrade, falling somewhere in between the passive listening of traditional broadcasts, and the complete control of music players that use playlists.

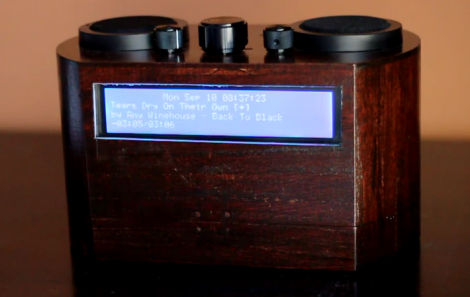
Inside the wooden case a BeagleBoard does most of the work. It’s running Ubuntu 12.04 on which pianobar, a command line interface package for Pandora is running. Those components alone would make a pretty nice listening experience, but since Pandora rolls different music into the mix it’s nice to be able to see what you’re listening to. The four-line LCD is wide enough to display plenty of information. It’s being controlled by a PIC24 microcontroller which also monitors the controls on the top. As you can see in the video after the break, the user interface offers almost everything you could want. It’s easy to switch stations, and you can still register your preferences on each track being played.

Continue reading “How To Build Your Own Dedicated Pandora Radio”

Sculpting With LCD Pixels

Each one of the small squares in this sculpture is actually an LCD cell, and this is just the tip of the iceberg. What you see here is just a small portion of the sculpture that spans multiple floors of the atrium at the North Carolina Museum of Natural Sciences. It’s made up of multiple panels hosting a total of 3600 LCD cells. We first saw it way back in April, but now there is a ‘making of’ video which you can see embedded after the break.

The project took about 18 months to complete, starting with a 256 pixel prototype. That served as proof that the non-lit hardware would achieve the look they were going for. From there they designed the code which would generate patterns on the sculpture and used it to drive a digital model (we’d bet that was to get the go-ahead and funding). The fast-motion footage of the three-man assembly line formed when soldering up the circuits is fun to watch, the real nail-biting stuff comes when they start mounting the fragile panels in the space.

Continue reading “Sculpting With LCD Pixels”

Hackathon Results In The Facebook Book

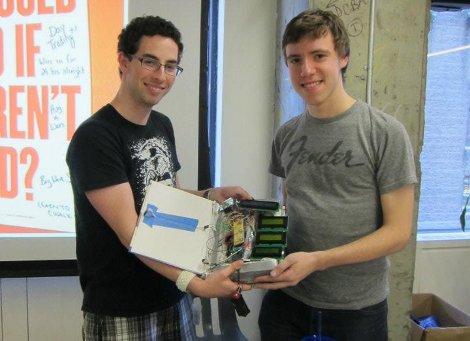
[Jeremy Blum] and [Jason Wright] pose with their project at the end of a 24 hour hackathon. The Facebook headquarters in New York City held the event as part of their Summer of Hack program. As an homage to the hosts, the hacking duo decided to create a physical book and populate it with the virtual Facebook. And what do you call such a creation? The Face(book)^2.

The video after the break gives the best overview of the hardware, but here’s the gist of it: They started with the largest hardcover book they could find, hollowing out its pages to house their own hardware. When you open the book it calls back to a computer over an Xbee link with a request for data. The python script on the computer pulls the newest from a Facebook feed, sending it back to the book to be displayed. There is a graphic LCD and four character LCDs built in for this purpose. There’s also an accelerometer which is used for detecting page turns when the cover is jostled. The rest of the interactivity is provided by a few tactile switches mounted next to the smaller LCD screens for navigation and the ‘like’ feature.

Continue reading “Hackathon Results In The Facebook Book”

Library For Driving SSD1289 LCD Displays With Small Microcontrollers

[H. Smeitink] got his hands on a 320×240 color TFT LCD screen. He set out to drive it with a small PIC microcontroller but didn’t find a lot of help out there to get up and running quickly. This is surprising since it’s a really nice display for quite a low price (under $16 delivered on eBay at the time of writing). He decided to write his own library and support tools to help others.

The display includes an SPI touch screen, but since that works separately from the LCD controller, touch input is not supported in this package. The driver that he wrote is coming from a mikroC toolchain point of view, but it shouldn’t be too hard to port to your platform of choice. We took a quick look at the code and it seems all you need to do is tweak the defines to match your hardware registers, and implement your own delay_ms() function.

But he didn’t stop with the driver. You’ll also find a C# program which converts images to an array for easy use on the display. Incidentally, this is the same display which [Sprite_TM] got working with the Raspberry Pi.

Using An HD44780 Character LCD With The Raspberry Pi

[Tech2077] is one of the lucky ones who already got his hands on a Raspberry Pi. He’s been looking into different interface options with the GPIO header and just posted a guide to using an HD44780 character display with the RPi. We like this approach because instead of doing some hard-core LCD work he’s using prototyping equipment you probably already have on hand.

Getting a character LCD running should be really simple. The gotcha is the logic level gap between the devices. If you’ve been working with Arduino, your add-ons are probably meant for a 5V power rail  and logic levels. The RPi outputs 3.3V logic. You could use a level converter (you’d need at least 7 pins to be converted in this case) or you can be a bit more clever. [Tech2077] grabbed an I2C port expander that uses just 2 of the RPi lines to address even lines of the display (four data bits plus three control bits). This is a bit of a hack, as the 3.3V logic is 0.2V below the recommended minimum for a digital 1 on the port expander. But it seems to work just fine! If it didn’t, a couple of NPN transistors would do the trick as well.

Addressing the new peripheral is just a matter of loading the i2c module and writing some Python.

[Sprite_tm] Connects An LCD To A Tiny Linux Board

One of [Sprite_tm]’s colleagues recently challenged him to connect a small LCD touch screen to a Raspberry Pi. Sadly, [Sprite_tm] has yet to take delivery of a Raspberry Pi, but he did manage to connect an LCD to a Linux board without video capabilities.

Because [Sprite_tm]’s display has a 16-bit parallel interface, and 16 GPIO pins are hard to come by on the Carambola Linux board, a few shift registers had to be brought into the build to make the LCD work. These shift registers are connected to the Carambola board via an SPI interface; a very simple way to connect all the LCD pins to the Linux board.

Of course, there’s no way for Linux to speak to the LCD without a kernel driver; [Sprite_tm] wrote a framebuffer driver so the LCD can be used as a console, an X session, or used by any other program that can write to a framebuffer device.

Like all good driver authors, [Sprite_tm] is giving away the patch to enable SPI-ified LCD panels on the Carambola along with the shift register schematic. With any luck we’ll also see the Raspi drivers when [Sprite_tm] takes delivery of his Raspberry Pi.