One Dimensional PONG Is A Great Use For LED Strips

[Jason] has had a five meter addressable RGB LED strip lying around for a while, and only recently came up with a good idea of what to use it for. He came up with One Dimensional PONG, and it looks like it’s a blast to play. Instead of moving a paddle up and down, [Jason]’s 1D PONG game requires the players to stomp on a switch to send the ball back to the other player.

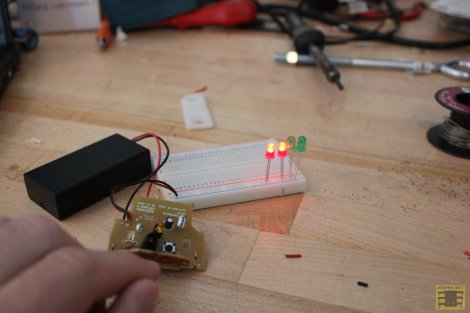
The LED strip [Jason] used has an SPI interface, but needed to be PWM clocked to a microcontroller to operate. After whipping up an Arduino library for his LED strip, [Jason] built an ATMega328-based controller board and a pair of seven segment display boards to keep track of the score. There’s a technical overview in another one of [Jason]’s videos.

[Jason] will be taking his 1D PONG game to the Brighton Mini Maker Faire on September 8th. We’re sure his game will be very popular there, so if you see him, tell him Hackaday sent you.

Continue reading “One Dimensional PONG Is A Great Use For LED Strips”

Lite Brites Fade, But LED Clocks Are Forever

litebrite-clock

Ahh, the Lite Brite.

What could be more fun than pushing dozens of little plastic pegs through a piece of black paper in order to create a pixelated, though colorful image? Well, I can think of quite a few things more engaging than that, and luckily so can [Lonnie Honeycutt] over at MeanPC.

While contemplating what to build with a pile of LEDs, his daughter came into the room with her portable Lite Brite. He thought that the pegs she was using looked awfully similar to the LEDs on his desk, so he did some test fitting and was surprised to see that they fit almost perfectly.

[Lonnie] thought that the toy would make an excellent clock, and his daughter happily agreed to let Dad do some tinkering. A few hours, an Arduino, and some Charlieplexing later, he had a nice looking clock that his kids were sure to enjoy.

If you’re interested in seeing more about how constructed, be sure to check out his YouTube channel and Instructable, where he happily provides all of the build details.

Building An LED Suit

[Rob] has been hard at work designing and building this LED suit which he can wear to parties. He’s got it working, although right now it’s just a pair of pants. It reacts to sound, and has the potential to be controlled from a smartphone via Bluetooth. You’ll find a video description of the build embedded after the break.

The planning started off by selecting driver hardware for the LEDs. [Rob] wanted the suit to pulse to the music in the room so he grabbed an MSGEQ7 chip. When connected to a microphone and opamp this chip will output a signal which can be used as a VU meter. He built the hardware into an Arduino shield, then got to work on the LED driver board. He’s using LED strips, but they’re not individually addressable. Instead he cut loops which wrap around the wearer’s legs. Each loop connects the pins of a TLC5947 LED driver chip which sinks a constant current and offers PWM abilities. He’s using PNP transistors on the high side.

For anyone that’s ever worked in a Tyvek suit before you’ll know they don’t breathe. Sweat will literally be pouring off of you. And we’d bet that’s what cause the short that burned the back of [Rob’s] leg at a recent party. Then again, your light-up pimp coats are going to be hot to wear too.

Continue reading “Building An LED Suit”

Summer And Tailgating DIY Projects Roundup

tiger-paw-cornhole

If you live in the Southeastern United States as I do, you’ve probably been enjoying a summer of grilling out and going to the beach or lake. You’re also may be getting ready to enjoy football tailgating season, especially if you attend or live near a college town. Here’s a couple of DIY items that should be welcome at any outdoor event you choose to attend.

How to Make a Cornhole Board:

cornhole toss board

Although there are no LEDs or an Arduino on this one (we’d love to see your pimped boards in the comments), these instructions should work well for making your basic cornhole set. Of course you can always add some folding legs to it, but they fit together pretty well as is.  As for the paint, there are many ways to do this, but check out the pic after the break to see the laser-cut stencil that the Tiger Paw in the first picture was made from.  Thanks [Essam]!

PVC Ladder Toss Set:

ladder toss game PVC

These instructions should tell you all you need to make your own ladder toss (or whatever less-PC name you decide call it). As for the golf ball “bolas,” you’ll have to figure out how to put a hole in the middle of them. This technique (as seen in a links post earlier) should cover it, but best to be careful that you’re not plunging into a liquid-core ball. Eye protection is recommended.

LED Glow Cubes:

solar LED glow cube

Although not a traditional tailgate item, these glowing solar LED cubes could serve as an alternative to the normal LED path lights. What’s in these instructions is how to simply take the parts source, a solar path light, apart and insert it into a translucent cube. We could see this made with several different colored LEDs and an Arduino for some other cool effects.  A logo of your favorite team could be added with a laser cutter or CNC router for tailgate use. Continue reading “Summer And Tailgating DIY Projects Roundup”

POV Bike Wheels With The MSP430

Being an intern a Texas Instruments isn’t all fun and games, but from [George], [Valerie], and [Ryan]’s TI intern design project, it sure looks like it. They built a persistence of vision display for a bicycle using the ever popular MSP430 Launchpad board.

The team of interns created a POV display by combining the power of the TI Launchpad with a row of 32 RGB LEDs soldered onto a booster pack. Once the whole circuit is fastened securely to the bike wheel, a hall effect sensor mounted to the bike frame allows the MSP430 to detect how fast it is going. From there, it’s just a matter of flashing LEDs at the right time to create a stationary display inside a rotating wheel.

Although the display will theoretically work with just one Launchpad/Booster pack combo, the team decided to use three of these circuits, totaling 96 LEDs per wheel, to create a really nice RGB display. The video (available after the break) shows a little bit of flicker but this is an artifact of the camera. In real life, the POV bike wheel display is simply stunning.

Continue reading “POV Bike Wheels With The MSP430”

Developing A Better Way To Control 10,000 LEDs

The SoundPuddle project drives thousands of LEDs based on audio input. The team is working on a replacing the controller for this wire-filled setup with something more robust. They took the mess seen above to the Apogaea Festival and were plagued by loose wires and unreliable communications due to noise and interference. The aim of the new system is to reliably control up to 10,000 LEDs.

The red PCB seen at the center of the rats-nest is a Papilio FPGA board. They still want to use it to drive the installation, but a new hardware interface is necessary. The solution is to design what they call a megawing (wings are to Papilio as shields are to Arduino).  The LEDs will be in RGB strip form, so one of the requirements is to supply enough connectors to drive 16 channels of SPI devices. The wing will also include the 48V power source and connectors for the condenser microphone that serves as an input for the SoundPuddle. There are also two other options for audio input, one via a Bluetooth module (which can double as a control device) and the other via MIDI.

After the break you can see a lighting demo. Be ready with the volume controls as most of the sounds used in the test are quite annoying.

Continue reading “Developing A Better Way To Control 10,000 LEDs”

Writing On LEDs With A Laser Pointer

After [Ch00f] got his hands on an 8×8 LED display, he didn’t make a 64-pixel video game or VU meter. He made a laser doodler, allowing him to draw on this display with only a laser pointer.

Using LEDs as light sensors is nothing new; [Forrest Mims III] discovered that LEDs can also detect light way back in the late 60s. [Ch00f] played around with this concept before creating a circuit that uses an LED as both a light emitter and sensor that reacts to the ambient brightness.

[Ch00f]’s laser doodler takes this phenomena and applies it to an Adafruit bicolor LED matrix. When a light shines on an individual pixel in the display, the ATMega48 senses the current and turns that pixel on. Since this these pixels have two colors, [Ch00f] used a latch circuit and a button to cycle between what color the ‘Mega writes to the display.

In the video after the break, [Ch00f] shows off his display by having the LEDs light up in response to a laser pointer. It may be a bit small, but we can see a lot of potential for something like this as a gigantic art installation.

Continue reading “Writing On LEDs With A Laser Pointer”