Ultra-Wide Gaming Handheld Channels The Nintendo DS

“The Nintendo DS isn’t wide enough!” said nobody, ever. Most players found Nintendo’s form factor to be perfectly acceptable for gaming on the go, after all. Still, that doesn’t mean a handheld gaming rig with a more… cinematic aspect ratio couldn’t be fun! [Marcin Plaza] built just that, with great results.

The initial plan was to build a Steam Deck-like device, but using laptop trackpads instead of joysticks. [Marcin] had a broken Lenovo Yoga 730-13 to use as the basis for the build. That caused the plan to diverge, as the only screen [Marcin] could find that was easily compatible with the laptop’s eDP interface was an ultrawide unit. From there, a clamshell enclosure was designed specifically to rehouse all the key components from the Lenovo laptop. The top half of the clamshell would hold the screen, while the base would feature a small custom keyboard, some buttons, and the aforementioned trackpad. This thing reminds us of the Nintendo DS for multiple reasons. It’s not just the clamshell design—it’s the fact it has a touch control on the lower deck, albeit without a screen.

It’s an original concept for a handheld gaming device, and it makes us wish there were more games built for the ultrawide aspect ratio. This is one project that has us browsing the usual websites to see just what other oddball screens are out there… round screens in a makeup compact clamshell, anyone? Video after the break.

Continue reading “Ultra-Wide Gaming Handheld Channels The Nintendo DS”

Running Stock MS-DOS On A Modern ThinkPad

It might seem like the days of MS-DOS were a lifetime ago because…well, they basically were. Version 6.22 of the venerable operating system, the last standalone release, came out back in 1994. That makes even the most recent version officially 30 years old. A lot has changed in the computing world since that time, so naturally trying to run such an ancient OS on even a half-way modern machine would be a waste of time. Right?

As it turns out, getting MS-DOS 6.22 running on a modern computer isn’t nearly as hard as you’d think. In fact, it works pretty much perfectly. Assuming, that is, you pick the right machine. [Yeo Kheng Meng] recently wrote in to share his experiments with running the final DOS release on his Intel-powered ThinkPad X13 from 2020, and the results are surprising to say the least.

To be clear, we’re not talking about some patched version of DOS here. There’s no emulator at work either. Granted [Yeo] did embrace a few modern conveniences, such as using a USB floppy drive emulator to load the disk images instead of fiddling with actual floppies, and installing DOS onto an external drive so as not to clobber his actual OS on the internal NVME drive. But other than that, the installation of DOS on the ThinkPad went along just as it would have in the 1990s.

Continue reading “Running Stock MS-DOS On A Modern ThinkPad”

USB-C Charging On Your ThinkPad, One Step At A Time

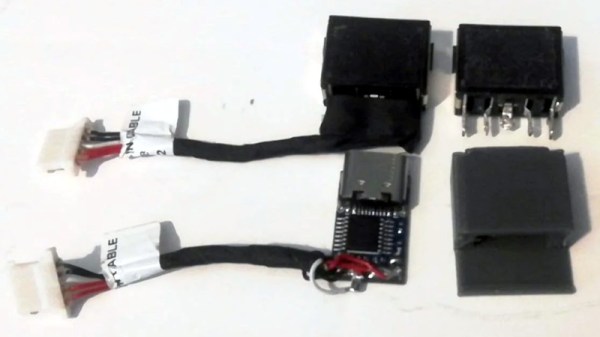
Hackers love their ThinkPads. They’re easy to work on, well documented, and offer plenty of potential for upgrades. For the more daring, there’s also a wide array of community-developed modifications available. For example, [Berry Berry Sneaky] has recently put together a step-by-step guide on swapping the common ThinkPad rectangular charging port (also used on ThinkBooks and other Lenovo machines) for USB-C Power Delivery.

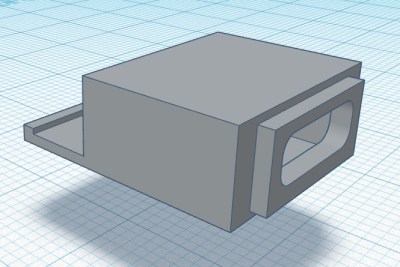
Now to be clear, this is not a new concept. But between freely sharing the STL for the 3D printed adapter, providing a full parts list, and providing clear instructions on how to put it all together, [Berry Berry Sneaky] has done a fantastic job of making this particular modification as approachable as possible. For the cost of a common PDC004 Power Delivery “trigger” module and a bit of PETG filament, you can add yet another device to the list of things that work with your shiny new USB-C charger.

While not strictly necessary, [Berry Berry Sneaky] recommends getting yourself a replacement DC input cable for your particular machine before you crack open the case. That will let you assemble everything ahead of time, making the installation a lot quicker. It will also let you keep the original rectangular power jack intact so you can swap it back in if something goes wrong or you decide this whole unified charging thing isn’t quite what you hoped for.

Not a member of the ThinkPad Army? No worries. We’ve seen a lot of interest in using these configurable USB-C trigger modules to upgrade all manner of devices to the new Power Delivery standard or sometimes put together custom battery chargers for their older mobile gadgets.

Hacking A ThinkPad USB-C Adapter

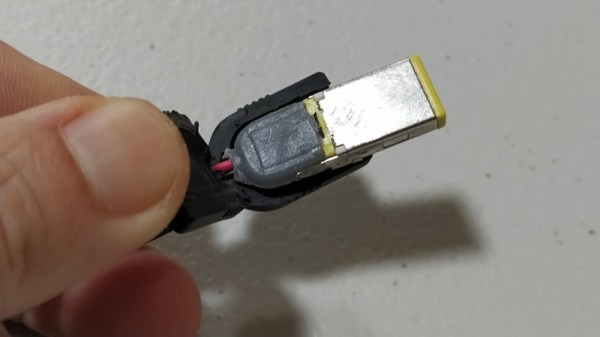
USB-C has brought the world much more powerful charging options in a slimline connector. With laptop chargers and portable battery packs using the standard, many with older hardware are converting their devices over to work with USB-C. [victorc] was trying to do just that, purchasing an adapter cable to charge a ThinkPad. Things didn’t quite work out of the box, so some hacking was required.

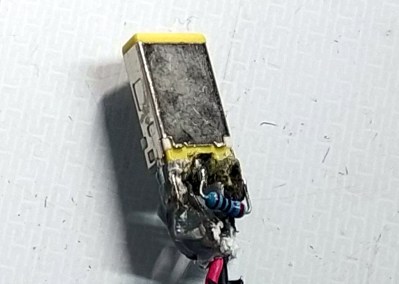
The problem was the power rating of the adapter cable, versus the battery pack [victorc] was trying to use. In order to allow the fastest charging rates, the adapter cable features a resistor value which tells the attached Lenovo laptop it can draw up to 90 W. The battery pack in question could only deliver 45 W, so it would quickly shut down when the laptop tried to draw above this limit.

To rectify this, [victorc] looked up the standard, finding the correct resistor value to set the limit lower. Then, hacking open the cable, the original resistor on the Lenovo connector was removed, and replaced with the correct value. With this done, the cable works perfectly, and [victorc] is able to charge their laptop on the go.

For all the benefits USB-C has brought, there’s been plenty of consternation, too. Whether this clears up, only time will tell!

Thinkpad T25 Gets Less Retro With Hardware Swap

For many, the Thinkpad T25 was something of a dream come true. Celebrating the 25th anniversary of the venerable business-oriented laptop that hackers love so much, it featured a design inspired by “retro” Thinkpads of yore, but with modern hardware inside. Unfortunately, as it was more fan service than a serious revitalization of classic Thinkpad design, the T25 was only ever available in a single hardware configuration.

[kitsunyan] liked the look and feel of the T25, but in 2019 was already feeling a bit let down by the hardware. The screen wasn’t up to snuff, and while the CPU is an i7, it only has dual cores. To make sure the T25 is still viable down the road, it seemed the only option was to try to transplant the hardware from one of the current Thinkpad models into the anniversary chassis. It certainly wasn’t easy, but given the fact that the T25 was more of a redress than a completely new product to begin with, everything came together a lot better than you might expect.

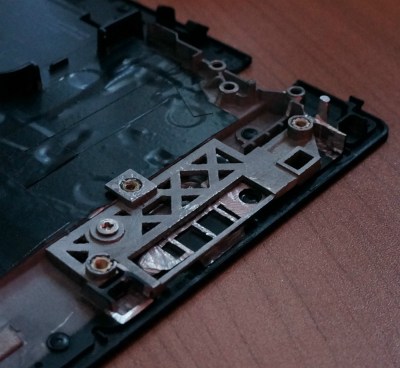
A custom mount installed in the T25

To help put things into perspective, the T25 is basically a modified version of the T470. Last year, Lenovo replaced the T470 with the new T480 that has just the sort of hardware improvements that [kitsunyan] wanted. The T480 was more of a refresh than a complete revamp, so the actual chassis of the machine didn’t change much compared with its predecessor. That being the case, it seemed like it should be possible to transplant the newer T480 components into the T470 derived T25. Got all that straight?

[kitsunyan] was able to put this theory to the test when the opportunity to connect a T25 keyboard to the newer T480 presented itself. Since the 7-row keyboard on the anniversary edition was one of its biggest selling points, seeing if it would work on another machine was kind of a big deal. It didn’t fit physically, and some of the keys didn’t work as expected, but it at least had the same connector and didn’t let out the magic smoke. It represented the first tiny step of a much larger journey.

In the end, it took a lot of trimming, gluing, hacking, and fiddling to get all the new hardware from the T480 to fit into the T25. But if you’re brave enough, the process has been detailed exquisitely by [kitsunyan]. Not only are the part numbers listed for everything you need to order, but there’s plenty of pictures to help illustrate the modifications that need to be made to all the clips, brackets, and assorted widgets that go into a modern laptop.

While we’re very impressed by this project, we can’t say it comes as a complete surprise. We’re well aware of the incredible lengths Thinkpad aficionados will go to keep their machines running into the 21st century. But don’t just take our word for it, you too can join the ranks of the Thinkpad elite.

[Thanks to Pierre for the tip.]

Add A Trackpoint To A Mechanical Keyboard

People love their tech, and feel like something’s missing when it’s not there. This is the story of one person’s desire to have the venerable trackpoint in their new keyboard.

[Klapse] loves a Lenovo old-style non-chicklet keyboard, so, despite the cost, five were ordered. They very quickly ended up with keys that didn’t work, although the trackpoints still did. After buying a sixth which ended up the same, [Klapse] decided that maybe giving up on the Lenovo keyboards was the best idea. A quick stop at a local store scored a fill-in mechanical keyboard, but in the back of [klapse]’s mind the need for a trackpoint remained. Maybe one could be frankensteined in to the keyboard that was just purchased?

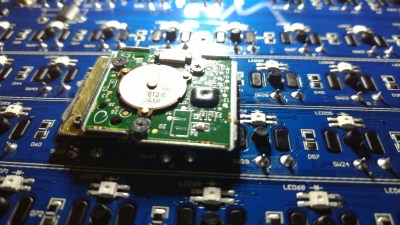
Underside of the trackpoint, fitted to the keyboard PCB

The keyboard’s circuit board had traces everywhere, with nowhere to drill through between the correct keys, typically between the G, H and Y keys. But there was a hole used for mounting the PCB nearby. between the H, J, U and Y keys. The trackpoint needed to be extended to reach all the way through the key caps, so [klapse] searched the house looking for something that might do. Turns out that a knitting needle fits perfectly.

At this point a side-hack emerged. [Klapse] found a drill bit small enough to make the necessary hole in the trackpoint shaft to fit the needle. But the bit was too small for the drill chuck. In true hacking style, the bit was wrapped with duct tape and held in the drill. Sure, it wobbled a lot and it was really difficult to get it to drill in the center of the shaft, but it worked, eventually. The needle was cut off and glued into the hole, the key caps were modified a bit to allow the trackpoint through and the rubber tip put back on.

They say, “desire to cram old tech into new is the mother of invention.” Or something similar, anyway. Check out how a Teensy liberated a Lenovo laptop keyboard trackpoint and all. Also, check out this custom keyboard with integrated trackpoint, of course.

Homemade Subaru Head Unit Is Hidden Masterpiece

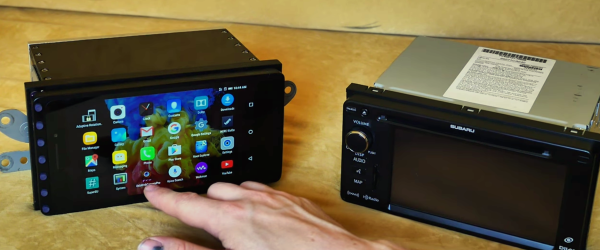
The Subaru BRZ (also produced for Toyota as the GT86) is a snappy sportster but [megahercas6]’s old US version had many navigation and entertainment system features which weren’t useful or wouldn’t work in his native Lithuania. He could have swapped out the built in screen for a large 4G Android tablet/phone, but there’s limited adventure in that. Instead, he went ahead and built his own homemade Navigation system by designing and integrating a whole bunch of hardware modules resulting in one “hack” of an upgrade.

The system is built around a Lenovo 4G phone-tablet running android and supporting GPS, GLONASS as well as the Chinese BeiDou satellite navigation systems. He removed the original daughter board handling the USB OTG connection on the tablet, and replaced it with his version so he could connect it to his external USB board via a flat ribbon cable. The USB board contains a Cypress 4-port USB hub. One port is used as the USB HID device to allow external buttons for system control — Power, Volume Up/Down, Fwd/Rev, Play/Pause, and Phone Answer/Hangup. The second port is used as a regular USB input to allow connecting external devices such as flash drives. The third one goes to a reversing camera while the fourth port goes to a USB DAC.

The USB DAC is another hardware board by itself and also includes a Bluetooth module which integrates his phone’s audio and control functions with the on-board system. There’s also an audio mixer which allows him to use the phone audio without having to miss out on the navigation prompts from the tablet. Both boards also contain several peripheral circuits such as amplifiers and DC power supplies. Audio to the speakers is routed through six LM3886 based power amplifier boards. And the GPS module receives its own special low-noise amplifier board to ensure extremely strong reception at all times. That’s a total of ten boards custom built for this project. He’s also managed to source all the original harness connectors so his system is literally a snap in replacement. The final assembly looks pretty dashing.

For some strange reason, the Lenovo tablet uses 4.35V as the ‘fully charged” value for its LiPo instead of the more common 4.20V, so even with the whole system connected to a hefty 12V lead acid battery from which he’s deriving the 4.20V charging voltage for the tablet, it still complains about “low battery” — and he’s looking for advice on how he can resolve that issue short of blowing up the LiPo by using the higher charge voltage. Besides that, he’s (obviously a kickass) hardware designer and a little bit rusty on the software and programming side of things, for which he’s looking for inputs from the community. His introductory video is almost 30 minutes long, but the shorter demo video after the break shows the system after installation in his car. He’s posted all of his Altium hardware source files on the project page, but until he shares PDF versions, it would be difficult for most of us to look at his work.

Continue reading “Homemade Subaru Head Unit Is Hidden Masterpiece”