3D-Printed Extension For Extreme Macro Photography Includes Lens Electronic Control

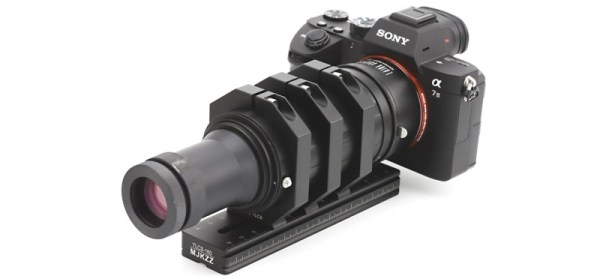
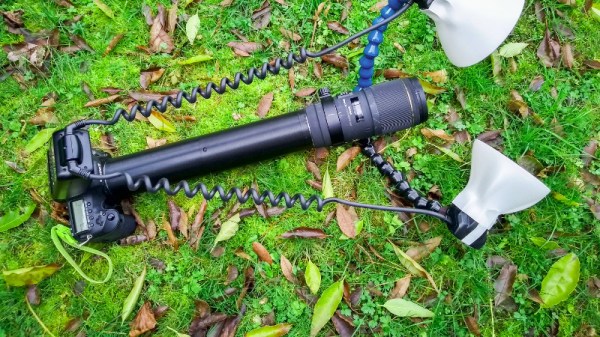
Macro photography — the art of taking pictures of tiny things — can be an expensive pastime. Good lenses aren’t cheap, and greater magnification inflates the price even further. One way to release a bit more performance from your optics comes in the form of an extension tube, which mounts your lens further from the camera to zoom in a little on the image. Back in the day with a film SLR you could make a rough and ready tube with cardboard and tape, but in the age of the digital camera the lens has become as much a computer peripheral as an optical device. [Nicholas Sherlock] has solved this problem by creating a 3D-printed extension tube for his Canon that preserves connections between camera and lens.

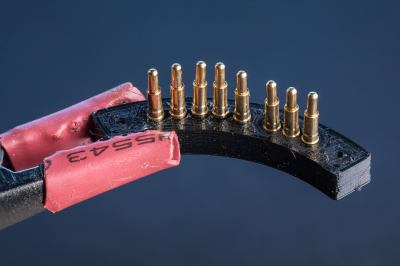
More details of this 300mm monster’s construction go so far beyond a plastic tub formed of two threaded sections with adapter plates at the ends. He’s using off-the-shelf metal rings to fit camera and lens just right, but making the electronic contacts is where it gets interesting. On end uses pogo pins, the other provides a contact block made of nail heads. In both cases the 3D-printed parts are designed to provide mounting points for the pins and nails. The assembly technique is worth a look both because of the design and as an example of how to document all the juicy details we’re constantly looking for in a great hack.

The results speak for themselves, in that the photography provides an impressive level of close-up detail. If you would like to build your own tube, it is available on Thingiverse.

Macro extensions seem far between here, but we’ve brought you a few lens repairs in our time.

[via /r/photography]

Expensive Sony Lens Repair Reveals Shims & Shifts

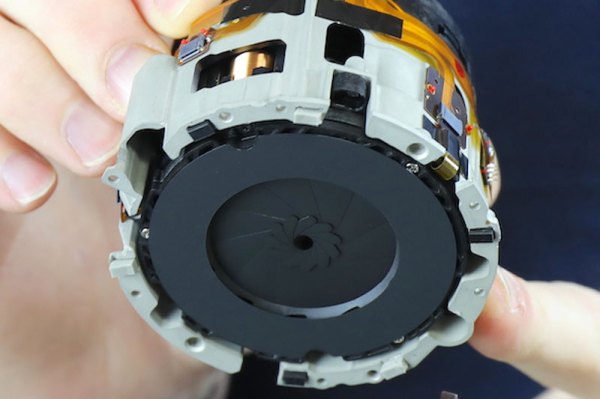
The photographic hire company Lensrentals had a $2k Sony FE 135mm f1.8 GM camera lens returned with a problem: it was having issues focusing. So, they decided to do the obvious thing and take it apart. It’s a fascinating insight into some of the engineering that goes into a high-end camera lens.

That is perhaps a rather scary thing to do, because this is a very new lens that doesn’t even have a service manual yet. That’s akin to rechipping a Ferrari when you’ve never even opened the hood before.

One of the interesting things inside is the presence of a number of shims that adjust the placement between the groups of lens elements. It seems that however good their manufacturing tolerances are, sometimes you just have to put a shim or two in there to align things.

Continue reading “Expensive Sony Lens Repair Reveals Shims & Shifts”

Hold 3500 Volts Up To Your Eye

Old military equipment can sometimes be found in places like flea markets and eBay for pennies, often because people don’t always know what they have. While [tsbrownie] knew exactly what he was getting when he ordered this mystery device, we’re not sure we could say the same thing if we stumbled upon it ourselves. What looks like a vacuum tube of some sort turns out to be an infrared sensor from an old submarine periscope that was repurposed as a night vision device. (Video, embedded below.)

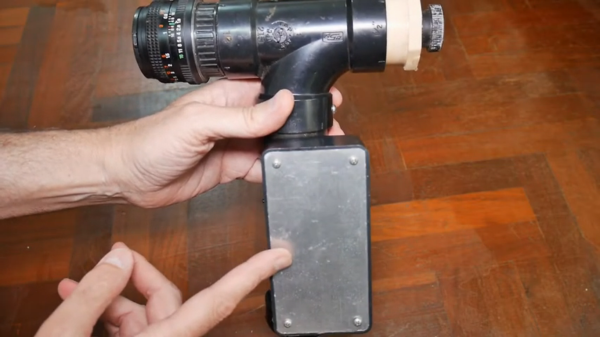
Of course, getting a tube like this to work requires high voltage. This one specifically needs 3500V in order to work properly, but this was taken care of with a small circuit housed in a PVC-like enclosure. The enclosure houses the tube in the center, with an eye piece at one end and a camera lens at the other, attached presumably by a 3D-printed mount. The electronics are housed in the “grip” and the whole thing looks like a small sightglass with a handle. Once powered up, the device is able to show a classic green night vision scene.

Old analog equipment like this is pretty rare, as are people with the expertise to find these devices and get them working again in some capacity. This is a great video for anyone with an interest in tubes, old military gear, or even if you already built a more modern night vision system a while back.

Thanks to [Zzp100] for the tip!

Continue reading “Hold 3500 Volts Up To Your Eye”

Motorized Lens Controller Techs Up Your Webcam

If you’re familiar with the DSLR camera market, you’d know that modern lenses are works of technological art. Crammed full of motors and delicate electronic assemblies, they’re bursting with features such as autofocus, optical stabilization and zoom. [Saulius Lukse] has been experimenting with motorized lenses for webcam applications, and has built a controller to make working with them a snap.

The controller is capable of controlling up to 3 stepper motors, as well as a voice coil, which should be enough for the vast majority of lenses out there. Microstepping is supported, which is key for optical systems in which tiny adjustments can make a big difference. The controller speaks USB and I2C, and is now based on an STM32 chip, having been upgraded from an earlier version which used the venerable ATmega328. The board is designed to be as compact as possible, to enable it to neatly fit inside camera and lens assemblies.

The board has been used to successfully control an 18x zoom lens, among others. Combining such a lens with a webcam and a good pan and tilt mechanism would create a highly capable surveillance package, or an excellent vision system for a robot.

It’s not the first time we’ve seen work from [Kurokesu] in these parts – they’ve done work on pedestrian detection before, too.

Flex PCB Saves Lens From The Junk Pile

There’s a piece of tech that many of us own, but very few of us have dissected. This is strange, given our community’s propensity for wielding the screwdriver, but how many of you have taken apart a camera lens. Even though many of us have a decent camera, almost none of us will have taken a lens to pieces because let’s face it, camera lenses are expensive!

[Anthony Kouttron] has taken that particular plunge though, because in cleaning his Olympus lens he tore its internal ribbon cableĀ  from the camera connector to the PCB. Modern lenses are not merely optics in a metal tube, their autofocus systems are masterpieces of miniaturised electronics that penetrate the entire assembly.

In normal circumstances this would turn the lens from a valued photographic accessory into so much junk, but his solution was to take the bold path of re-creating the torn cable in KiCad and have it made as a flexible PCB, and to carefully solderĀ  it back on to both connector and autofocus PCB. We applaud both the quality of his work, and thank him for the unusual glimpse into a modern lens system.

Lens repairs may be thin on the ground here, but we’ve had another in 2015 with this Nikon aperture fix.

Creating Lenses On Cheap CNC Machines

There are a lot of CNC machines sitting around in basements and garages, but we haven’t seen anything like this. It’s making lenses using a standard CNC machine and a lot of elbow grease.

The process of making a lens with a CNC machine begins by surfacing a waste board and taping an 8mm sheet of cast acrylic down with double-stick tape. The lens is then cut out with an 8mm endmill, removed from the stock material, and wet sanded to remove the tool marks. Wet sanding begins at 400 grit and progresses to 2000 grit, after which the lens is polished with a polishing compound meant for high-gloss car finishes. This was done by hand, but in this instance there’s no shame in using a real buffing wheel.

Several other lenses are demonstrated, including a cylindrical convex lens, but these are only planoconvex lenses, or lenses that are flat on one side. Biconvex lenses can be constructed by gluing two planoconvex lenses back to back, which is done with an acrylic glue, in this case Acrifix adhesive. The result is remarkable: with a lot — and we mean a lot — of sanding and polishing, you can make an acrylic lens on a cheap hobby CNC machine. The trick is just a very small stepover on your CNC path.

There are a few more videos planned in this series, including one on using Fusion 360 on defining the shape of the lens to have the right focal length. We can’t wait to see that.

Continue reading “Creating Lenses On Cheap CNC Machines”

Artistic Images Made With Water Lens

It’s said that beauty and art can be found anywhere, as long as you look for it. The latest art project from [dmitry] both looks in unassuming places for that beauty, and projects what it sees for everyone to view. Like most of his projects, it’s able to produce its artwork in a very unconventional way. This particular project uses water as a lens, and by heating and cooling the water it produces a changing image.

The art installation uses a Peltier cooler to periodically freeze the water that’s being used as a lens. When light is projected through the frozen water onto a screen, the heat from the light melts the water and changes the projected image. The machine uses an Arduino and a Raspberry Pi in order to control the Peliter cooler and move the lens on top of the cooler to be frozen. Once frozen, it’s moved again into the path of the light in order to show an image through the lens.

[dmitry] intended the project to be a take on the cyclical nature of a substance from one state to another, and this is a very creative and interesting way of going about it. Of course, [dmitry]’s work always exhibits the same high build quality and interesting perspective, like his recent project which created music from the core samples of the deepest hole ever drilled.

Continue reading “Artistic Images Made With Water Lens”