The Redox Keyboard

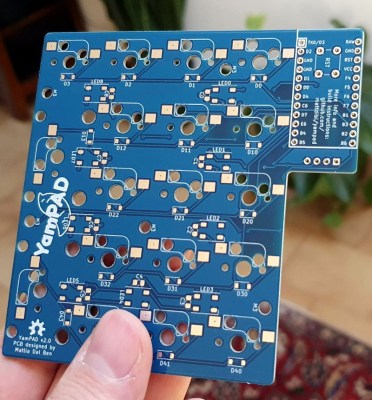
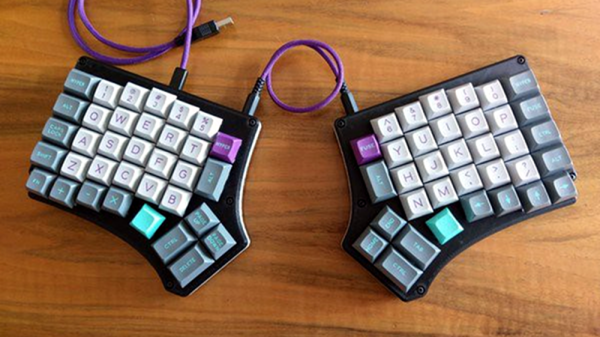
Alternative keyboard layouts like Colemak and Dvorak are nothing new; they allow easier access to more often used keys to reduce the strain placed on the hands during typing. Building on the popularity of the ergonomic Ergodox keyboard, [Mattia Dal Ben] has developed the Redox keyboard, the Reduced Ergodox, to make an even smaller, more ergonomic keyboard.

Like the Ergodox, the Redox uses a columnar layout, where the keys are laid out in columns, each column offset based on the corresponding finger. Where the Redox breaks away from the design of the Ergodox is the thumb keys. [Mattia] started having pain in his pinkies, so he wanted the thumb layouts to take away some of the extra work from the pinkies. The thumb cluster is smaller than its ancestor and includes an additional rotated thumb key.

The Redox has some great improvements over the Ergodox in order to help with the types of strain injuries most associated with typing, hopefully leading to a much nicer interaction with the peripheral that gets the most use.

The mechanical keyboard community is constantly coming up with great new designs and different DIY keyboards and we’ve featured many of them on the site. After you’ve checked out the pictures and schematics [Mattia] has created, take a look at this 3D printed mechanical keyboard, and details of a keyboard design and build were presented at the Hackaday Superconference in 2017.

Adding Analog Touch To (Nearly) Any Mechanical Keyboard

The new hotness for DIY electronics is mechanical keyboards, and over the past few years we’ve seen some amazing innovations. This one is something different. It adds an analog sensor to nearly any mechanical key switch, does it with a minimal number of parts, and doesn’t require any modification of the switch itself. It’s a reddit thread and imgur post, but the idea is just so good we can overlook the documentation on this one.

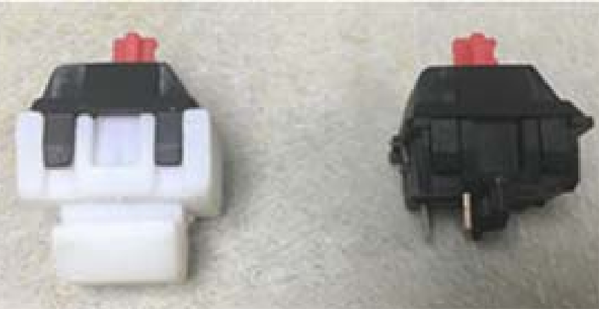
The key development behind this type of sensor is realizing that nearly every mechanical keyswitch (Cherry MX, Kalth, Gateron) has a spring in the bottom. A spring is just a coil of wire, and an inductor is just a coil of wire, too. By putting a spiral trace on the PCB of a mechanical keyboard underneath the keyswitch, you can sense the inductance of this spring. This does require a little bit of additional hardware, in this case an LDC1614 inductance to digital converter, but this is an I2C-readable part that can, theoretically, be integrated rather easily with any mechanical keyboard PCB and firmware.

The downside to using the LDC1614 is that sampling is somewhat time-limited, with four channels or individual keys being polled at 500 Hz. This isn’t a problem if the use-case is adding analog to your WASD keys, but it may become a problem for an entire keyboard. Additionally, the LDC1614 is a slightly expensive part, at about $2 USD in quantity 1000. A fully analog keyboard using this technique is going to be pricey.

Right now, the proof-of-concept for this analog mechanical keyswitch is just a 0.1 mm flexible PCB that is shoehorned inbetween a Cherry MX red and a (normal) mechanical keyboard PCB. The next step in the development will be a 2×4 keypad with analog sensors, and opening up the hardware and firmware examples up under a GPL license.

C64 Keyboard Helps Keep The Memory Alive

To say that the Commodore 64 was an important milestone in the history of personal computing is probably a bit of an understatement. For a decent chunk of the 1980s, it was the home computer, with some estimates putting the total number of them sold as high as 17 million. For hackers of a certain age, there’s a fairly good chance that the C64 holds a special spot in their childhood; perhaps even setting them on a trajectory they followed for the rest of their lives.

At the risk of showing his age, [Clicky Steve] writes in to tell us about the important role the C64 played in his childhood. He received it as a gift on his fifth birthday from his parents, and fondly remembers the hours he and his grandfather spent with a mail order book learning how to program it. He credits these memories with getting him interested in technology and electronic music. In an effort to keep himself connected to those early memories, he decided to build a modern keyboard with C64 keycaps.

As you might expect, the process started with [Steve] harvesting the caps from a real Commodore, in fact, the very same computer he received as a child. While the purists might shed a tear that the original machine was sacrificed to build this new keyboard, he does note that his C64 had seen better days.

Of course, you can’t just pull the caps off of C64 and stick them on a modern keyboard. [Steve] found the STLs for a 3D printable C64 to Cherry MX adapter on GitHub, and had 80 of them professionally printed as he doesn’t have access to an SLS printer. He reports the design works well, but that non-destructively removing the adapters from the caps once they are pressed into place probably isn’t going to happen; something to keep in mind for others who might be considering sacrificing their personal C64 for the project.

[Steve] installed the caps on a Preonic mechanical keyboard, which worked out fairly well, though he had to get creative with the layout as the C64 caps didn’t really lend themselves to the keyboard’s ortholinear layout. He does mention that switches a bit heavier than the Cherry MX Whites he selected would probably be ideal, but overall he’s extremely happy with his functional tribute to his grandfather.

If you’re more of a purist, you can always adapt the C64 keyboard directly to USB. Or go in the complete opposite direction and put a Raspberry Pi into a C64 carcass.

Custom Designed Keyboard Needs A Custom Made Metal Case

It’s hardly news that mechanical keyboard users love their keyboards.  When it comes to custom keyboards, though, [Cameron Sun] has taken things to the next level, by designing his own keyboard and then having the case custom milled from aluminum.  If a Macbook and an ErgoDox had a baby, it would look like this!

[Cameron] had been using a 60 percent keyboard (a keyboard with around 60% of the keys of a standard keyboard) but missed the dedicated arrow keys, as well as home/end and pgup/pgdown keys. Thus began the quest for the ultimate keyboard! Or, at least, the ultimate keyboard for [Cameron.]

Keyboards begin and end with a layout, so [Cameron] started with keyboard-layout-editor.com, a site where you can create your own keyboard layout with the number of keys you’d like. The layout was a bit challenging for [Cameron] using the online tool, so the editing was moved into Adobe Illustrator. Once the layout was designed, it was time to move on to the case. Wood was considered, but ultimately, aluminum was decided upon and the basic shape was milled and then the key holes were cut using a water jet.

An interesting addition to the keyboard were three toggle switches. These allow [Cameron] to choose a modified layout for use when gaming, and also to move some of the keys’ locations so that one side of the keyboard can be used for gaming.

Custom keyboard layouts are getting more and more popular and there are lots of DIY cases to hold those layouts. [Cameron] has upped the ante when it comes to cases, though. If you’re interested in building your own keyboard, we have you covered with articles like The A to Z of Building Your Own Keyboard. If you’re looking for more custom cases, perhaps a concrete one is what you want?

Via Reddit.

Turning Tact Switches Into Keyboards

One of the great unsolved problems in the world of DIY electronics is a small keyboard. Building your own QWERTY keyboard is a well-studied and completely solved problem; you need only look at the mechanical keyboard community for evidence of that. For a small keyboard, though, you’d probably be looking at an old Blackberry handset, one of those Bluetooth doohickies, or rolling your own like the fantastic Hackaday Belgrade badge. All of these have shortcomings. You’ll need to find a header for the Blackberry keyboard’s ribbon cable, the standard Bluetooth keyboard requires Bluetooth, and while the Belgrade badge’s keyboard works well, it’s a badge, not a keyboard you would throw in a bag for years of use.

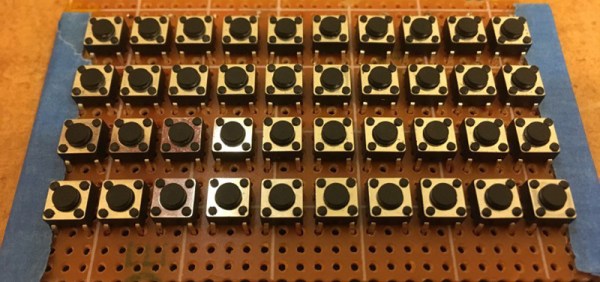
[bobricious] might have just cracked it. For his Hackaday Prize entry, he’s created a tiny USB keyboard out of tact switches. What’s the secret? An entire panel of PCBs. It looks great, and it might just hold up to the rigors of being tossed in a random bag of holding filled with electronics.

The electronics for the keyboard are simple enough; there are 56 standard through-hole tact switches, and an SAMD21 microcontroller. Connections to the outside world are through a micro USB port, serial, or I2C. it’s small, too, coming in at just under 5 cm by 10 cm.

The real trick here is using a stack of PCBs to label the buttons and provide a bit of mechanical support. The panel for this project consists of one base board holding all the electronics and a secondary board that gives the entire project a finished look while adding a bit of structural support.

If you’ve never looked at the options for small keyboards, there aren’t many. Blackberries are a thing of the past, and there’s no good way to add a QWERTY keyboard to small projects. This project does that in spades. Since the basic idea is, ‘put holes in a second PCB’, this idea is transferable to other keyboard layouts too.

On A Quest For The Perfect Numpad

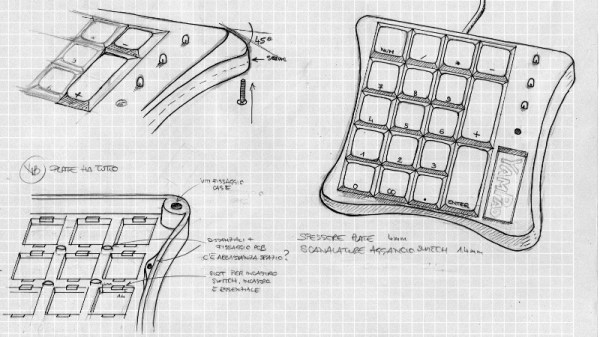
Often times, the only way to get exactly what you want in a device is to just build it yourself. Well, maybe not the only way, but we’ve all certainly told ourselves it was the only way enough that it might as well be true. We don’t know if the DIY imperative felt by [Olav Vatne] to construct his own Bluetooth mechanical number pad was genuine or self-imposed, but in either event, we’re glad he documented the process for our viewing pleasure.

Broken up into three separate posts on his blog, the construction of his custom numpad starts innocently enough with buying a kit from AliExpress. In a rather bizarre twist, the kit arrived assembled, which lead to an arduous period of desoldering to separate all the principle parts [Olav] wanted in the first place. So much for saving time.

Once he freed all the mechanical keys from the kit’s PCB, he went to town hand-wiring the matrix. After testing to make sure all the keys were wired correctly, the matrix got connected to an Adafruit Feather 32u4 Bluefruit. With the electronics sorted, [Olav] moved on to the software side. Here he was able to accomplish one of his primary goals, having a numpad that works over both USB and Bluetooth.

The last step of the process was creating the wooden enclosure. It basically goes together like a picture frame, with special care given to make sure there are appropriate openings in the case for the switches and USB port to pop through without ruining the overall look of the device.

Thanks to cheap USB-capable microcontrollers, hand-made artisan keyboards are now a thing. This project is a nice way to get started with custom input devices, and it only gets better from here.

Arduino Keyboard Is Gorgeous Inside And Out

While the vast majority of us are content to plod along with the squishy chiclet keyboards on our laptops, or the cheapest USB membrane keyboard we could find on Amazon, there’s a special breed out there who demand something more. To them, nothing beats a good old-fashioned mechanical keyboard, where each key-press sounds like a footfall of Zeus himself. They are truly the “Chad” of the input device world.

But what if even the most high end of mechanical keyboards doesn’t quench your thirst for spring-loaded perfection? In that case, the only thing left to do is design and build your own. [Matthew Cordier] recently unveiled the custom mechanical keyboard he’s been working on, and to say it’s an elegant piece of engineering is something of an understatement. It may even look better inside than it does on the outside.

The keyboard, which he is calling z.48, is based around the Arduino Pro Micro running a firmware generated on kbfirmware.com, and features some absolutely fantastic hand-wiring. No PCBs here, just a rainbow assortment of wire and the patience of a Buddhist monk. The particularly attentive reader may notice that [Matthew] used his soldering iron to melt away the insulation on his wires where they meet up with the keys, giving the final wiring job a very clean look.

Speaking of the keys, they are Gateron switches with DSA Hana caps. If none of those words mean anything to you, don’t worry. We’re through the Looking Glass and into the world of the keyboard aficionado now.

Finally, the case itself is printed on a CR-10 with a 0.3 mm nozzle and 0.2 mm layers giving it a very fine finish. At 70% infill, we imagine it’s got a good deal of heft as well. [Matthew] mentions that a production case and a PCB are in the cards for the future as he hopes to do a small commercial run of these boards. In the meantime we can all bask in the glory of what passes for a prototype in his world.

We’ve seen some exceptionally impressive mechanical keyboards over the years, including the occasional oddity like the fully 3D printed one and even one that inexplicably moves around. But this build by [Matthew] has to be one of the most elegant we’ve ever come across.