HHH: PCB Mill From Connecticut Hackerspace

hhh-pcb-mill-CT-hackerspace

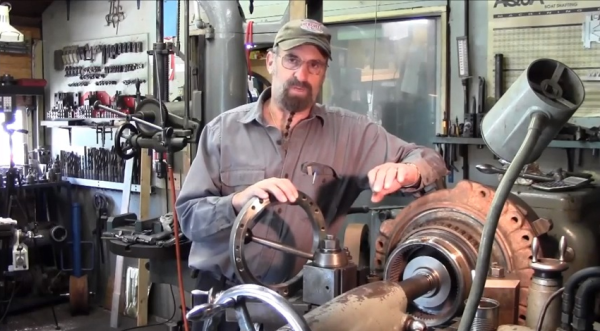
The latest Hackaday Hackerspace Henchmen entry comes from [Bremster] and the Connecticut Hackerspace. He mentions that he’s been meaning to write about the PCB/engraving mill used at the hackerspace for some time, but it was the HHH program which motivated him to do so. Yay! That’s exactly what we envisioned with this and we hope there are more submissions which will encourage us to continue and expand the program.

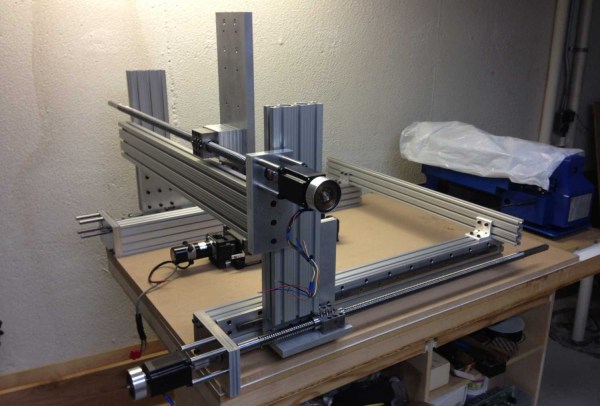
We think this is a perfect CNC project for any hackerspace whose members are into electronics. It’s compact, and we find milling PCBs to be more desirable than chemically etching them; the tool should get quite a bit of use. This particular build uses x, y, and z axis hardware which was pulled separately from unknown machinery. Like any good hacking project, the fabrication process was so addictive that [Bremster] stayed at the space all night, breaking at 5am to shower and eat before heading to work.

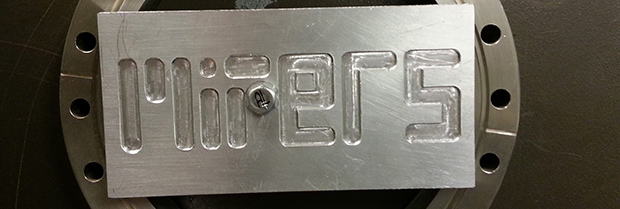
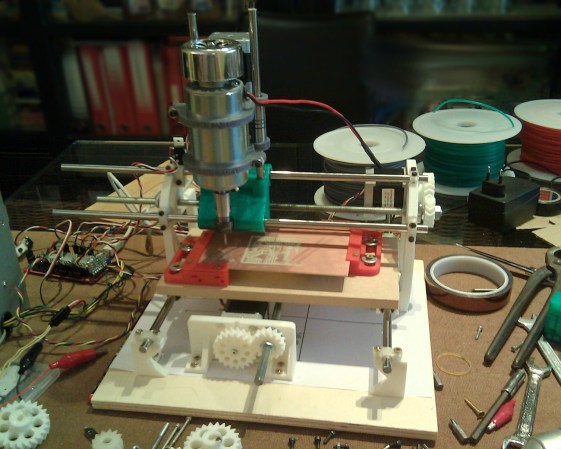
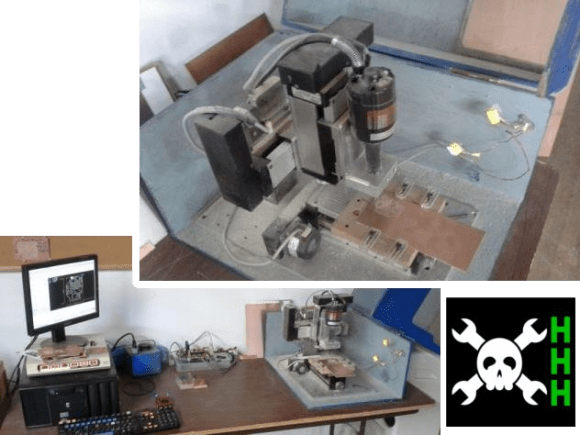
It originally used a Dremel rotary tool but had too much play in the mounting mechanism. When they replaced it with the motor shown above they also machined an aluminum bracket that dramatically stabilizes the cutting bit. This results in clean PCBs, and they’ve even used it to make stamps for their hackerspace passports. There is an enclosure attached, which has been hinged to the right for the two images above.

Check out the demo video below, and get your own CNC submission in for the HHH program before the October 31st deadline.

Continue reading “HHH: PCB Mill From Connecticut Hackerspace”

Learn Machining From An Old School Metal Master

In the depths of YouTube there are still some jewels to be found. [Keith Fenner] is one of them. [Keith] owns Turn Wright Machine Works in Cape Cod, MA. From his small shop, He works on everything from sailboats to heavy equipment.

[Keith] describes himself as “An artist, and a jobber, 36 years in the trade”. We think he could add teacher to that list, as we’ve learned quite a bit about machining from his Youtube channel.

One of the interesting things about [Keith] is his delivery on camera. He makes the viewer feel like an apprentice machinist working alongside him. Rather than carefully setup shots with graphics, [Keith] narrates as he works paying jobs. He also has no problem showing us his mistakes – and recovery from them, as well as his victories.

The main tools at Turn Wright are the lathe and mill, but [Keith] isn’t old fashioned by any means. He has a complete PlasmaCAM setup and isn’t afraid to do a little computer work.

Most of [Keith’s] projects are broken up into several videos. One of our favorites is “So you broke it off in your hole”. In this series [Keith] shows what it takes to get a broken screw extractor (or EZ Out) out of a large diesel turbo. Get a feeling for what [Keith] has to offer with his “Day in the LIfe” video after the break.

Continue reading “Learn Machining From An Old School Metal Master”

3D Printering: The Combo Machines Cometh

There’s only so many ways to squeeze hot plastic out of a nozzle, and eventually witnessing the explosion of 3D printer designs over the past few years gets just a little repetitive. What then, is someone who dreams of a technological utopia, Star Trek replicators, and making a few bucks off a Kickstarter to do?

The answer, of course, is a combo machine. Where the Repraps, Makerbots, and the very high-end Stereolithography machines can only do additive manufacturing by laying down plastic or resin layer by layer, these combo machines can also remove material, be it plastic, wood, or metals such as brass or aluminum.

Continue reading “3D Printering: The Combo Machines Cometh”

Rock Solid PCB Mill Built At Home

Let’s all slow clap for [Daniel Taylor] who, after a long journey, got his home built PCB mill up and running with remarkable precision. That’s 10 mil traces with 0.5mm pitch pads. We’re impressed! The board will be used for breaking out the connections of an LCD screen he has on hand.

After seeing a CNC project as yesterday’s Fail of the Week it’s nice to look in on one like this that does some amazing stuff. In fact, [Daniel’s] creation has been working for months already. The link above is the project log he kept while hacking, tweaking, and retrofitting his rig to get the level of precision he was after.

Improvements include swapping out drawer slides for proper linear bearings and completely reworking the Z-axis along with a motor upgrade. For those that aren’t fans of the reading (how did you make it this far into this feature?) you can take a quick look at his image gallery which includes captions.

Repairing A Mill That Cost As Much As A Car

miters

Years ago, someone at the bio-instrumentation lab at MIT needed to change a CMOS battery in the controller for a three axis mill. This reset the machine’s BIOS and was widely regarded as a bad move. The mill sat in the lab for a few years before  Prof. [Ian Hunter] donated it to MITERS – the student shop at MIT. And so the task of repairing a machine that cost as much as a car fell upon a plucky group of students.

The machine – a  Dyna-Myte 1007 has a 10″x7″x10″ work area, pneumatic tool changers and carousel, and the working for a fourth axis. It is. however, driven by an ancient Pentium computer running DOS with all the fun of ISA slots and IRQs that entails.

The MITERS began their repair by digging around in the software configuration, finding the axis drive is controlled via IRQ 3, which was currently occupied by COM 2. Changing that in the BIOS let the computer control the axes and, with a few solenoids and an air compressor, the tool carousel also worked.

With a bit of digging around, the MITERS also got the spindle working, giving them a very awesome and very expensive CNC milling machine for free. Even though the computer could be replaced with a $35 Raspberry Pi, we really have to admire the MITERS for fixing what they already had; it’s a cheaper and much, much faster way to get their new toy up and running.

Continue reading “Repairing A Mill That Cost As Much As A Car”

CNC Router Built With 80/20 Rail

There’s still quite a bit of machining that goes into a CNC mill build of this size. But using 80/20 brand extruded rail optimizes most of the build process into tasks manageable by the average basement hacker. That’s not to say that we think [Jim] is average. He took this mill from start to finish in just two weeks.

He picked up the set of three ball screws on eBay for $180. Two of them drive the X axis with the third moving the cutter assembly along the Y axis. The X axis travels along a set of precision rails instead of precision rods. He machined his own mounting plates to which those are attached. For now he’s not running the motors at full speed because the vibration starts to make the table shake. He may end up bolting the base to the floor once all is said and done.

We see this extruded rail used all over the place. We could highlight some other mill builds or 3d printers, but instead we think you’ll enjoy an extruded rail robotic bass guitar.

Oh, one last thing. We’re not against a bit of pandering. Below you can see the mill cutting out the Hackaday logo:

Continue reading “CNC Router Built With 80/20 Rail”

Cyclone PCB Factory: 3d Printable Circuit Board Mill

printable-cyclone-pcb-factory

If you can 3D print most of the parts for another 3D printer, why not also for a PCB mill? That’s the question answered by the Cyclone PCB Factory. It will help you kiss those toner transfer or photo resist days goodbye.

Homemade circuit boards tend to be rather small, which really helps keep the cost and scope of this project down. Most of the mounting parts, as well as the gears, are 3D printed. Of course there’s the usual machine tool items which you pretty much have to purchase: the ball screws, precision rod, stepper motors, and a motor to spin the routing tool.

Check out the video below to see where the project is right now. One of the crucial aspects of PCB milling is to have a level build table. The cutter head tends to be ‘V’ shaped so cutting just a bit too deep can blow out the traces you’re trying to isolate. The demo shows that this can automatically calibrate the software to account for any variances in the height of the copper clad.

We remember seeing a snap-together PCB mill. But we’re pretty sure that that one used parts milled from HDPE rather than 3D printed components.

Continue reading “Cyclone PCB Factory: 3d Printable Circuit Board Mill”