Warm Tube Clock

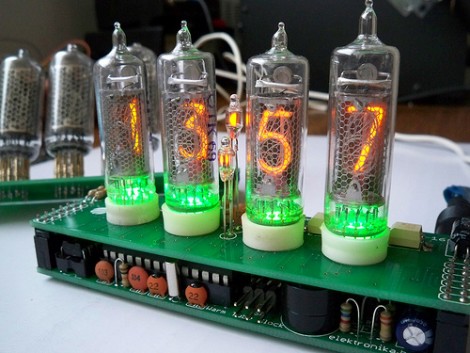
The Warm Tube Clock is the new kid on the block of Nixie Tube clocks. It takes inspiration from, and uses the same voltage driver circuit as the Ice Tube Clock. But this one uses four tubes instead of that hard-to-find single tube. It has a few other tricks up its sleeve. The shield that hosts the tubes has been designed for two different types. It also hosts an RGB LED for each tube, which adds the green glow seen above, and has a couple of small neon indicator bulbs which serve as the colon between hours and minutes.

The driver board centers around an ATmega328 running about three thousand lines of code. The firmware offers a lot of options including sound feedback, and a setting for every clock, calendar, alarm, and LED color toggle imaginable. See for yourself as the settings video, embedded after the break, walks you through each stage of the menu. We can’t help but think you need an instruction manual to set this thing up.
Continue reading “Warm Tube Clock”

Panaplex In A Jar

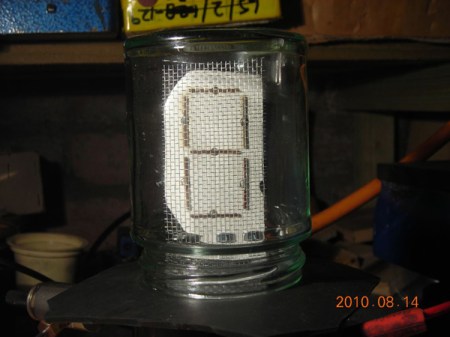
Check out this home made panaplex display. Panaplex displays are closely related to nixie tubes, but instead of layering individual numbers and lighting them separately, it uses pieces to build the numbers like a digital display. [Lindsay] managed to make one at home, using a jam jar as the vacuum tube.  Argon as the gas in the tube gives it a pleasant purple color. We really think the end result is fantastic, you can see some build pictures and a run through of the numbers on the site. Unfortunately there aren’t any videos of the display in action.

[via Makezine]

Use A Big Magnet To Set The Time

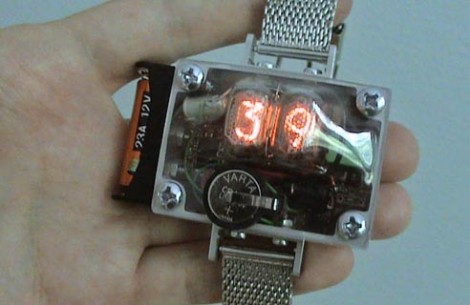
This bulky package is a Nixie tube wristwatch. We still like [Woz’s] watch better but this one has a few nice tricks of its own. Notably, there aren’t any buttons to set the time. Instead, a large magnet is used to actuate a magnetic switch inside the body. Speaking of enclosures, the case is aluminum and the face plate is polycarbonate but looks like it’s been vacuum formed. Check out the clip after the break.

Continue reading “Use A Big Magnet To Set The Time”

7-segment Sudoku

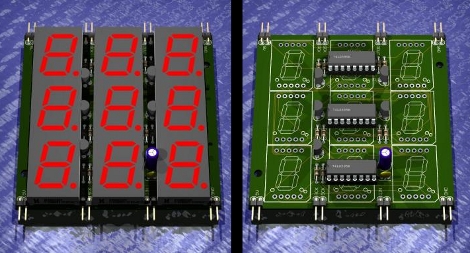
[John Sarik] keeps cranking out new ideas for his digital Sudoku project. This time he’s using 7-segment displays for each digit. The game play works the same as the Nixie Tube version, but this makes things quite a bit easier to build. The board above is one of the nine modules that make up the game. They each use three shift registers to drive the nine 7-segment displays. With the help of five resistors all of the multiplexing is addressed via the serial input on those chips.

Making Nixie Tubes At Home

[Aleksander Zawada] makes vacuum tubes in his home. One of the most challenging builds he has taken on is to produce a working Nixie tube. He describes the process in a PDF (Internet Archive, updated 2024), covering his success and failure. It seems the hardest part is to get the tube filled with the proper gas, at the proper pressure, and firmly seal it. In the end he managed to make a tube with three digits (0, 1, and 2) that worked for about 700 hours before burning out.

[Aleksander] joins [Jeri Ellsworth] on the short list of hackers who can pull off extreme industrial manufacturing at home. Kudos.

[Thanks Duncan]

Nixie Sudoku: A Look At The Hardware

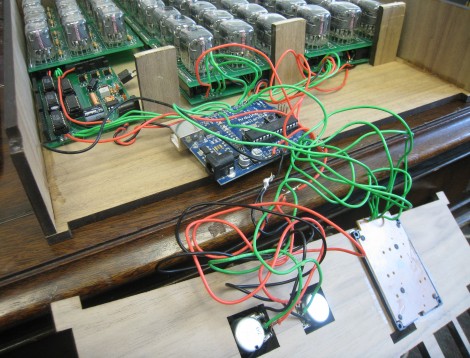
We’re always happy to receive a tour of the guts that make things work. [John Sarik] posted several pictures and descriptions of the hardware that makes up his Nixie Sudoku build. The modular design uses professionally made circuit boards which greatly improve the durability of a large set of circuits such as this.

The design draws on good ideas from similar hardware. The Nixie Duo kit from Ogi Lumen allows tubes to be mounted on top of driver boards with cascading shift registers for control of up to 8 tubes. The ArduiNIX shield makes the high voltages needed for Nixies easy to control with an Arduino. No, [John] didn’t just order these kits and plug them into each other. He designed his own boards to suit his needs. Each driver board can control 9 tubes in a 3×3 grid, all on one PCB. His high voltage board can supply enough juice for the whole system which is tied together with a single Arduino board.

His writeup is quite interesting so do take a look. He also filmed a walk through video which we’ve embedded after the break. It clears up some questions, such as showing the use of a blinking decimal point to indicate the current cursor position.

Continue reading “Nixie Sudoku: A Look At The Hardware”

Nixie Sudoku

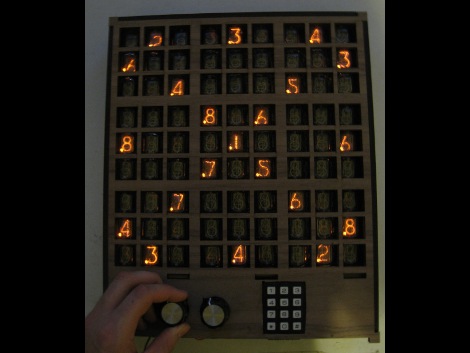
[John Sarik] asked himself why a project should only have a handful of Nixie tubes? Without a good answer to his query he went ahead and built this Sudoku game using 81 Nixie tubes. There’s not much of a description for his work but here’s how we think things go: The two knobs manipulate a cursor, one for rows and the other for columns, while the keypad is used to input your chosen number. The system is Arduino based and [John’s] linked to his code, schematic, and board layout files on Dropbox. He’s even written a recursive solver which can be seen in the video after the break. Would it be inappropriate to bring this to work and whip it out during some down time?

Continue reading “Nixie Sudoku”