“The Cow Jumped Over The Moon”

[Ash] built Moo-Bot, a robot cow scarecrow to enter the competition at a local scarecrow festival. We’re not sure if Moo-bot will win the competition, but it sure is a winning hack for us. [Ash]’s blog is peppered with delightful prose and tons of pictures, making this an easy to build project for anyone with access to basic carpentry and electronics tools. One of the festival’s theme was “Out of this World” for space and sci-fi scarecrows. When [Ash] heard his 3-year old son sing “hey diddle diddle, the cat and the fiddle…”, he immediately thought of building a cow jumping over the moon scarecrow. And since he had not seen any interactive scarecrows at earlier festivals, he decided to give his jumping cow a lively character.

Construction of the Moo-Bot is broken up in to three parts. The skeleton is built from lumber slabs and planks. The insides are then gutted with all of the electronics. Finally, the whole cow is skinned using sheet metal and finished off with greebles to add detailing such as ears, legs, spots and nostrils. And since it is installed in the open, its skin also doubles up to help Moo-bot stay dry on the insides when it rains. To make Moo-Bot easy to transport from barn to launchpad, it’s broken up in to three modules — the body, the head and the mounting post with the moon.

Moo-Bot has an Arduino brain which wakes up when the push button on its mouth is pressed. Its two OLED screen eyes open up, and the MP3 player sends bovine sounding audio clips to a large sound box. The Arduino also triggers some lights around the Moon. Juice for running the whole show comes from a bank of eight, large type “D” cells wired to provide 6 V — enough to keep Moo-Bot fed for at least a couple of months.

Check out the video after the break to hear Moo-bot tell some cow jokes – it’s pretty funny. We’re rooting for it to win the competition — Go Moo-bot.

Continue reading ““The Cow Jumped Over The Moon””

Homemade Smart Glasses Shows Why Smart Glasses Are Hard

[Harris Shallcross] decided to build a pair of smart glasses and recently completed a first prototype of his project ‘Ochi’ – an STM32 based, BLE-connected, OLED eyeglass display. There are of course several homebrew smart glasses projects out there; many are more polished-looking and nearly all of them also display information from a smartphone over Bluetooth. This one is interesting partly because it highlights many of the design challenges that smart glasses and other near-eye displays face. It also demonstrates the iterative development process: begin by getting something working to learn what does and doesn’t cut it at a basic level, and don’t optimize prematurely; let the process bring problems to the surface.

Ochi-1 Smart Glasses BBC feed Square
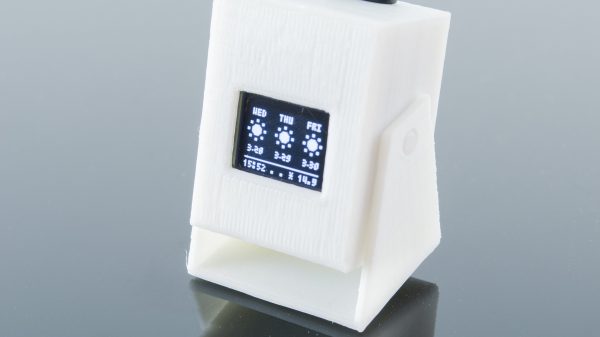
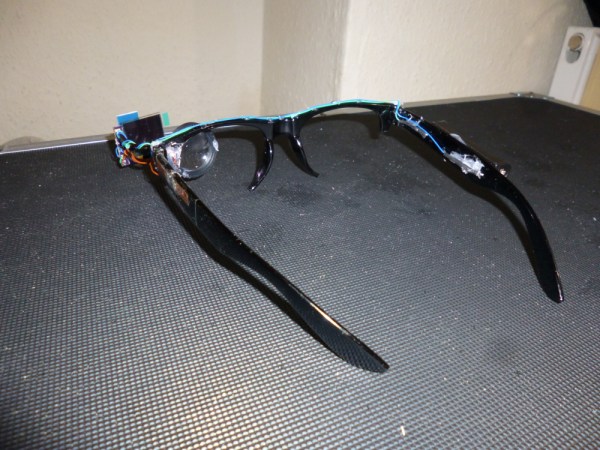
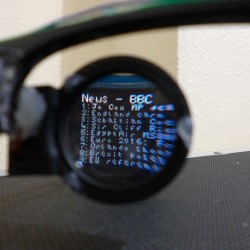
For his project, [Harris Shallcross] used a small 0.95″ diagonal 96×64 color OLED as the display. The lens is from a knockoff Google Cardboard headset, and is held in a 3D printed piece that slides along a wire rail to adjust focus. The display uses a custom font and is driven by an STM32 microcontroller on a small custom PCB, with an HM11 BLE module to receive data wirelessly. Power is provided by a rechargeable lithium-ion battery with a boost converter. An Android app handles sending small packets of data over Bluetooth for display. The prototype software handles display of time and date, calendar, BBC news feed, or weather information.

Devices like these have a lot to deal with. Weight and distribution of that weight is a concern, the size and comfort of the optics is important, and displaying data on a small OLED is only part of the battle – choosing what information to display and when are vital to the device being actually useful in any way, otherwise it’s just a tech demo.

This project set out to show whether it was possible to use the parts listed to make a glasses mounted smart display that was at least somewhat functional, and the software to support it. Clearly, [Harris Shallcross] succeeded at that, but what really showcases the development process is his list of improvements – what he decided needs to go into a second version, and why. One of those goals is to improve the optics; perhaps there’s something to learn from The $60 Bluetooth Head Mounted Display project, which used a similar OLED and a prism to locate the display off to the side instead of in front.

data logger

Data Logger Powered By Linkit One Board

[Jed Hodson] put together a nice little data logger with a Linkit One board at its heart. It’s capable of logging two analog channels and one digital channel which also has PWM capabilities. A GPS is used to get the correct time and a Freetronics OLED display coupled with a shield lets the user view the data in real time.

The data is logged on the Linkit One’s internal storage as a .CSV file, allowing for easy access via a spread sheet program. A LiPo rechargeable battery keeps the electrons flowing and the system will give a warning once the power drops below 20%. Speaking of system – the Linkit One board features an ARM-7 processor and has headers to fit Arduino shields. It’s targeted for wearable and IoT type devices.

Be sure to check out this project if you’re in need of a nice data logger. All code and details of the build are available on [Jed’s] Blog.

Adding An OLED To A LEGO Set

Sure, as a very powerful and influential LEGO dictator you’re more than able to make the trains run on time, but how do you make your LEGO citizens realize the benefits of living under your regime? With an OLED LEGO train schedule, of course! [Dan] over at Adafruit put together a great guide to interfacing a very small OLED display to a LEGO setup, perfect for displaying which trains are on schedule and not displaying which trains are heading to a ‘camp.’

The build uses a 96×64 RGB OLED display that is just under an inch in size. After connecting the display to an Arduino, [Dan] crafted a bezel and mounted it inside a LEGO brick wall. Seems like just the thing for the Adafruit LEGO set.

Of course, the tiny Adafruit OLED display can be used for much more than showing the train schedule at a LEGO train station. We imagine this could be put to use in an awesome model train layout or even a small plastic security checkpoint.