Multi-Volume Knob Gives All Your Programs A Turn

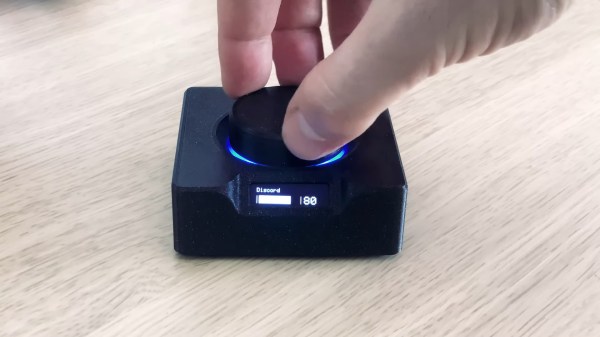
We’ve all been there. You’re manning the battle station, deep in the sim-racing or some other n00b-pwning zone and suddenly some loudmouth blows out your eardrums over Discord. It’s insulting to have to stop what you’re doing to find the right Windows volume slider. So why do that? Build [T3knomanzer]’s simple yet elegant multi-volume knob and stay zen in the zone.

It’s easy, just turn the knob to cycle through your programs until Discord comes up on the little screen, and then push down to change it into a volume knob. If you need to change another volume, just click it again. Since there’s no Alt+Tabbing out to the desktop, no checkered flags should ever slip through your fingers.

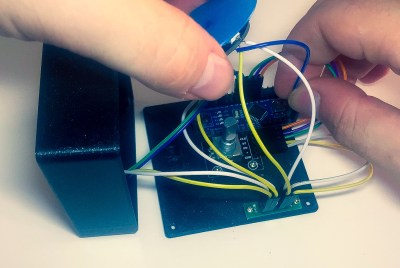
Inside the well-designed case you’ll find the usual suspects — Arduino Nano, rotary encoder, an OLED display, and an LED ring, each with their own place carved out.

This completely open-source knob looks great, and we love that it’s been made incredibly easy to replicate by standing up a site with foolproof, well-depicted, step-by-step instructions. Watch them take it for a spin after the break.

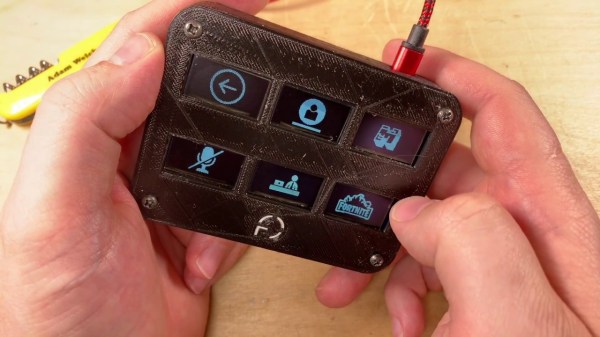
Want more than volume at your fingertips? Here’s a DIY USB knob that does shortcuts, too.

Continue reading “Multi-Volume Knob Gives All Your Programs A Turn”

Laser Tachometer Knows How Fast You Were Spinning Back There

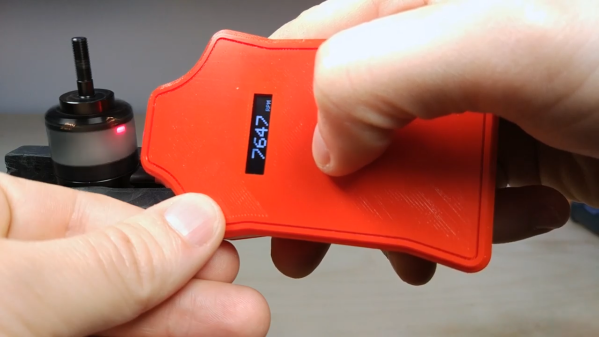
Does your drill go as fast as the manufacturer says it will? Well, you’d need a tachometer to figure that out. They’re not that expensive to buy, but as [Elite Worm] shows, they’re not that expensive to make, either — about $10 total if you get your parts from the right places. Lucky for you, he has links to everything.

Really, the links are just the tip of the iceberg here as far as the gifts that [Elite Worm] bestows upon those who choose to undertake this project. The build video (after the break, as usual; our favor to you) is fantastic, and would be perfect for a beginner because of the entrancing speed at which he builds it. The video is straight up relaxing to watch, whether you want to build one or not.

It’s a fairly simple circuit — just push the momentary switch, and the laser diode and sensor pair count the revolutions over one second. The Arduino Nano multiplies this number by 60 and displays the RPM on the OLED screen. What we absolutely love about this build is the care that taken in designing the case. There’s a designated spot for each component, and the ones without their own special holder are kept in place with printed crossbar pieces. [Elite Worm] says this has a higher refresh rate than his store-bought tacho, and we say it looks way cooler, too.

Still don’t want to make one yourself? Well, okay. Before you buy one, try using your phone to calculate RPM.

Continue reading “Laser Tachometer Knows How Fast You Were Spinning Back There”

ESP32 Boards With Displays: An Overview

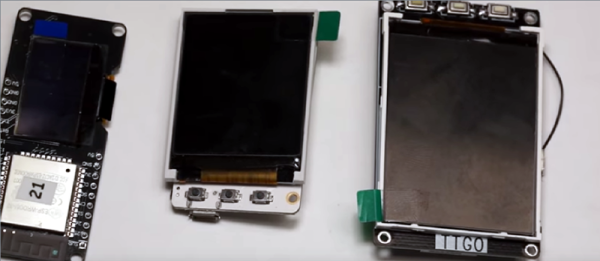
The ESP8266 has become practically the 555 chip of WiFi connected microcontrollers. Traditionally, you’d buy one on a little breakout board with some pins and a few connectors, and then wire up anything else you need. The ESP8266’s big brother, the ESP32, hasn’t quite taken over from the ESP8266, but it has a lot more power and many more options. [Andreas] has a new video that shows seven new ESP32 boards that have integral displays. These boards can simplify a lot of applications where you need both WiFi and a user interface.

Of the boards examined, six of them have OLED displays, but one has an E-paper display. To summarize results, [Andreas] summarized his findings on these seven along with others in an online spreadsheet.

Continue reading “ESP32 Boards With Displays: An Overview”

Accessing Blockchain On ESP8266 Using The NodeMCU Board

Blockchains claim to be public, distributed, effectively immutable ledgers. Unfortunately, they also tend to get a little bit huge – presently the Bitcoin blockchain is 194GB and Ethereum weighs in at 444GB. That poses quite an inconvenience for me, as I was looking at making some fun ‘Ethereum blockchain aware’ gadgets and that’s several orders of magnitude too much data to deal with on a microcontroller, not to mention the bandwidth cost if using 3G.

Having imagined a thin device that I could integrate into my mobile phone cover (or perhaps… a wallet?) dealing with the whole blockchain was clearly not a possibility. I could use a VPS or router to efficiently download the necessary data and respond to queries, but even that seemed like a lot of overhead, so I investigated available APIs.

As it turns out, several blockchain explorers offer APIs that do what I want. My efforts get an ESP8266 involved with the blockchain began with two of the available APIs: Ethplorer and Etherscan.

Continue reading “Accessing Blockchain On ESP8266 Using The NodeMCU Board”

Checking The Weather Without A Window

Making a weather display is great because it’s a simple project that shows off some skills and has an obvious daily use. So [ACROBOTIC Industries] decided to make an easy kit for the Hackaday Prize to make weather displays even more accessible.

Calling it the ESPecter, [ACROBOTIC Industries] wanted to make this a simple project for anyone, regardless of skill with a soldering iron or Arduino toolkit. So they decided to base the guts on common components that can be put together easily, specifically a Wemos Mini D1 with an OLED shield as a bright display. They also designed a cool tiltable 3D-printed enclosure for this small device so that you can orient it to your eye level.

ESPecter breadboarded prototype.

While they already have a breadboarded prototype, and a 3D printed case, some software work remains to make the project really shine. They plan to add nice features like a web interface to configure location and network information, alerts, additional locations, and historical weather data. They also want to create a weather library to display well on a low-resolution screen and add battery operation.

We look forward to seeing the final version later in the Hackaday Prize!

This isn’t the first weather project we’ve seen around here. Other variants include mirror weather displays, an ESP8266-based weather monitoring station, a very low-power weather station, and this roundup of weather displays which might give you some inspiration.

A Bar Graph For Beer Fridge Vitals

[ChrisN219] has an antique Coke machine that used to hold glass bottles. Now it holds around 30 tall boy cans of his favorite post-work suds. The only problem is that [Chris] has no idea how many cans are in it without opening up the door or keeping tally on a nearby slate board. Enter the Arduino.

He wanted to make something completely non-invasive to the machine (phew!) while using as many parts he already had as possible. The result is a simple circuit that uses an ultrasonic sensor mounted inside the machine to ping the depths, and a Nano in a nifty 3D printed box up top to do some math and display the number of cans remaining as a simple bar graph. The sensor reads one bay, and the code multiplies by two to get the total. It was touch and go there for a minute as he wasn’t sure that the HC-SR04s would get a good response from the cylindrical cans. Not only did they give a good reading, the first test was quite accurate.

[Chris] recently finished Mk. II, which replaces the momentary (and the Coke logo) with a second HC-SR04. The first version required the push of a button to do inventory, but now he simply walks up to the machine and knows at a glance if it’s time to make a beer run.

Okay, so maybe you don’t have cool old Coke machine problems. But surely you can find something that needs pinging, like an inconvenient rain barrel.

SID Organ Pulls Out All The Stops

Someone left this organ out in the rain, but [Tinkartank] rescued it and has given it a new life as a SID controller. What’s a SID, you ask? That’s the sound chip Commodore used in the C64, a remarkable chip revered among retro gamers that was way ahead of its time.

He threw out everything but the keyboard assembly for the build. Each key press now drives a momentary button, and those are all wired up to an Arduino Mega through some I/O expansion boards left over from another project. The Mega drives the MOS6581 SID chip which generates those sweet chiptunes. There are four CV outs for expanding the organ’s horizons with Eurorack modules.

Our favorite part is the re-use of the stop knobs — particularly that they are actuated the same way as before. The knobs still technically control the sound, but in a new way — now they turn pots that change the arpeggio, frequency, or whatever he wants ’em to do.

The plans for the future revolve around switching to a Teensy to help out with memory issues. Although it’s a work in progress, this organ already has a ton of features. Be sure to check them out after the break.

Once you dive down the chiptunes rabbit hole, you might want to take them everywhere.  When you get to that point, here’s a portable SID player. A SIDman, if you will.

Continue reading “SID Organ Pulls Out All The Stops”