Hackaday Prize Semifinalist: A Better Smart Plug

Walk into any home improvement store, and you’ll find dozens of smart accessories, home automation equipment, and WiFi-connected ephemera. The Belkin WeMo Insight is one of these devices, giving anyone with $60 and a WiFi network the ability to switch lights and appliances on and off over a network. [John] picked up one of these WiFi plugs, but it didn’t work exactly as he would like. Instead of building a smart plug from scratch, [John] replaced the controller board for a WeMo Insight for his Hackaday Prize entry, making it far more useful and a replacement for devices like the Kill-a-Watt.

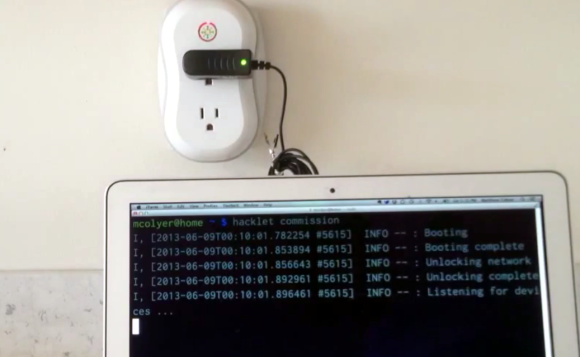
In its stock form, the WeMo can only be used though the smartphone app provided by Belkin or through a few third-party services like IFFT. All of these solutions have a limited API, and don’t provide advanced power metrics. To solve this problem, [John] replaced the smart controller board inside the Belkin WeMo with one of their own design.

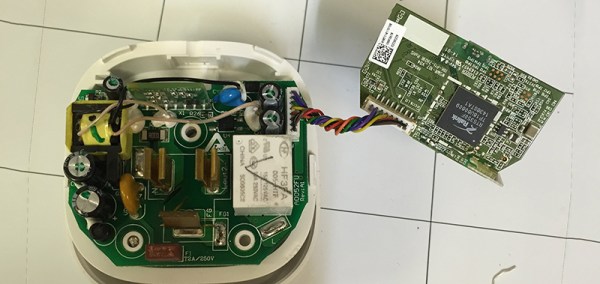
By volume, most of the electronics inside the WeMo are a transformer, caps, and a relay; the smarts of this smart plug are just a daughterboard. By re-engineering this daughterboard with a new microcontroller, an ESP8266, and a microSD card connector, [John] can replicate the functionality of the WeMo while adding some new features. SD card datalogging for up to four years is now possible, a RTC now provides precise time stamps on all data collected, and a few simple calculations on the microcontroller enable power factor, line frequency, and total energy metering. With the ESP, all this data can be sent up to the cloud with a vastly improved API.

It’s a great project, and something that Belkin should seriously consider for their next revision of the WeMo. For anyone stuck with a stock WeMo, [John] has made all his design files and code available, allowing anyone to replicate this build

You can check out [John]’s Hackaday Prize entry video below.

The 2015 Hackaday Prize is sponsored by:

Continue reading “Hackaday Prize Semifinalist: A Better Smart Plug”

Hacking A Wireless AC Power Outlet

It’s always nice to see hackers pick up stuff headed for the landfill and put it back in action with a quick repair and upgrade. [Septillion] found a wireless remote controlled AC outlet in the junk bin and decided to do just that. A nice spin-off of such hacks is that we end up learning a lot about how things work.

His initial tests showed that the AC outlet and its remote could be revived, so he set about exploring its guts. These remote AC outlets consist of an encoder chip on the remote and a corresponding decoder chip on the outlet, working at 433MHz.  Since the various brands in use have a slightly different logic, it needed some rework to make them compatible. The transmit remote was a quick fix – changing the DIP switch selected address bits from being pulled low to high and swapping the On and Off buttons to make it compatible with the other outlets.

Working on the AC outlet requires far more care and safety. The 230V AC is dropped down using a series capacitor, so the circuit is “hot” to touch. Working on it when it is powered up requires extreme caution. A quick fix would have been to make the changes to the address bits and the On/Off buttons to reflect the changes already made in the remote transmitter. Instead, he breadboarded a small circuit around the PIC12F629 microcontroller to take care of the data and address control. Besides, he wanted to be able to manually switch the AC outlet. The relay control from the decoder was routed via the microcontroller. This allowed either the decoder or the local manual switch from controlling the relay. Adding the PIC also allowed him to program in a few additional modes of operation, including one which doubled the number of outlets he could switch with one remote.

Fixing Faulty But Genuine Apple Power Adapters

apple 
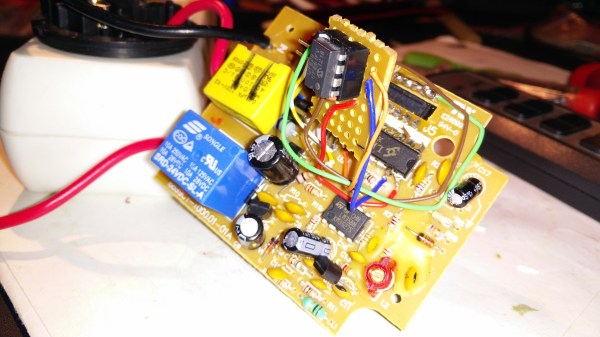
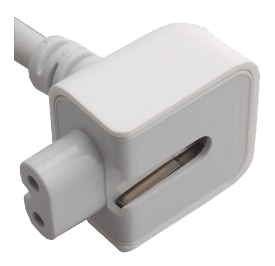
The standard power adapter for Apple laptops is a work of art. The Magsafe connector has saved more than one laptop owned by the Hackaday crew, and the power brick with interchangeable plugs for different countries is a work of genius. Being a miracle of modern manufacturing doesn’t mean Apple gets it right all the time; the UK adapter doesn’t use the ground plug, leading to the power supplies singing at 50 Hz when plugged in. [Gareth] had had enough of the poor design of his charger and decided to fix it.

The Apple power adapter has two obvious connections, and another shiny metal disk meant for a connection to Earth. In most of the Apple charger ‘extension cords’, this earth connection is provided by the cord. In the smaller plug adapters – even ones where space is not an issue, like the UK plug – this connection is absent.

To fix this glaring oversight, [Gareth] shoved some aluminum foil where the earth terminal on the plug should go. A hole was drilled through the plug to connect this foil to the Earth socket terminal, and everything was covered up with kneadable epoxy.

No, aluminum foil probably won’t do its actual job of preventing horribleness in the event of an insulation failure or short. It will, however, silence the 50 cycle hum emanating from the power adapter, and that’s good enough for [Gareth].

Hacklet Adds Linux Control For The Modlet Smart Outlet

modlet-for-linux-hacklet

Linux users now have a simple option for controlling the Modlet smart outlet. Hacklet is a Ruby script that can switch and read status information from Modlet.

This is the first we remember hearing about Modlet. It’s another take on controlling your appliances remotely. Unlike WeMo, which puts control of one outlet on WiFi, the Modlet uses a USB dongle to control two outlets wirelessly. It has the additional benefit of reading how much current is being used by each plug. This does mean that you need a running computer with the USB dongle to control it. But cheap embedded systems like the Raspberry Pi make this less of an issue both in up-front cost, and the price to keep it running all the time.

[Matt Colyer’s] demo video includes an unboxing of the $60 starter kit. The screen seen above shows his script pairing with the outlet. It goes on to demonstrate commands to switch it, and to pull the data from the device. He even provides an example of how to use IFTTT with the script.

Continue reading “Hacklet Adds Linux Control For The Modlet Smart Outlet”

Proximity Switch For Your Mains Devices

[Ivan’s] friend built a proximity sensor to switch his LED bench lighting off every time he walked away. The idea is pretty neat, so [Ivan] decided to implement it for mains devices by making this proximity switched outlet box.

A Sharp GP2D12 infrared distance sensor is the key to the system. It has an emitter and receiver that combine to give distance feedback base on how much of the light is reflected back to the detector. This is presented as a voltage curve which is monitored by an ATtiny85 (running the Arduino bootloader). It is small enough to fit inside the outlet box along with a tiny transformer and linear regulator to power to logic circuitry. The mains are switched with a relay using an NPN transistor to protect the chip’s I/O pins.

Check out the video after the break to see this in action. It should be a snap to add a count-down timer that gives you a bit more freedom to move around the workshop. With that in place this is a fantastic alternative to some other auto-shutoff techniques for your bench outlets.

Continue reading “Proximity Switch For Your Mains Devices”

Under-bench Timed Outlets Won’t Let You Leave The Iron On

When we used to use firesticks (the pen style plug-in soldering irons) it was always a worry that we might leave them on. But now we use a base unit which has an indicator light to serve as a reminder. Still, [FoxxTexx] isn’t taking any chances and instead built this timer-based outlet which kills the power automatically.

The parts are all pretty common. The timer itself is the same form factor as a light switch and is commonly used for heat lamps or hot tub jets. It feeds the outlet next to it by way of the indicator switches to the right. We like the use of the switches but since mains voltage is still running through them we would suggest using a three-gang box and mounting them on the cover plate so that all the wiring is contained. If done this way you could just have the electrical box siting on your bench, but it is a nice touch to have it mounted this way.

We’ve long been proponents of a timer system. Back when we put together our Hacker’s Soldering Station we just used a plug-in timer unit.

Home Automation With RC Wall Plugs And Raspberry Pi

[Jake] took some cheap hardware and figured out a way to use it as a huge home automation network. He’s chose a Raspberry Pi board to connect the radio controlled power outlets to his network. He wrote about his project in two parts, the first is hacking the RC outlet controller and the second is using the Raspberry Pi to manipulate it.

These RC outlets are a pass-through for appliances that connect to mains (lamps, consumer electronics, christmas trees, etc). Often the protocol used by the cheap-as-dirt remote is difficult to work with, but [Jake] really hit it out of the part on this one. In addition to simulating button presses for up to fifteen devices on the remote, he replaced the DIP switch package. This lets him change the encoding, essentially allowing the one device to control up to 32 sets of outlets. Theoretically this lets him command 480 devices from the Raspberry Pi. Since that board is a web server it’s just a matter of coding an interface.

Some of the inspiration for this hack came from the whistle-controlled appliance hack.