3D Printing Paper — Sort Of

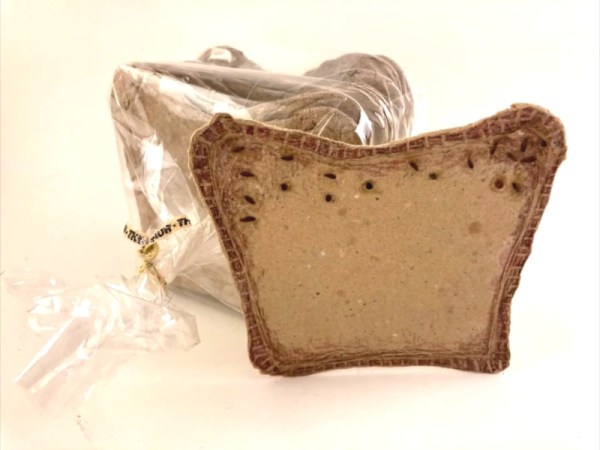
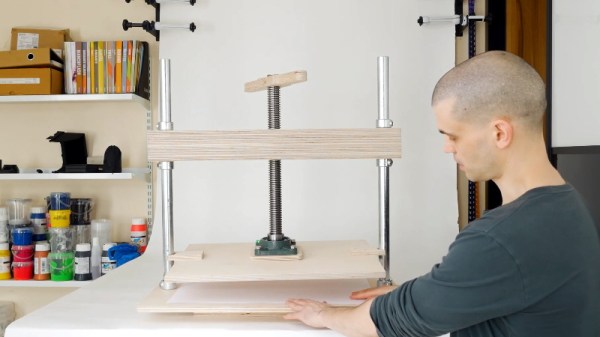
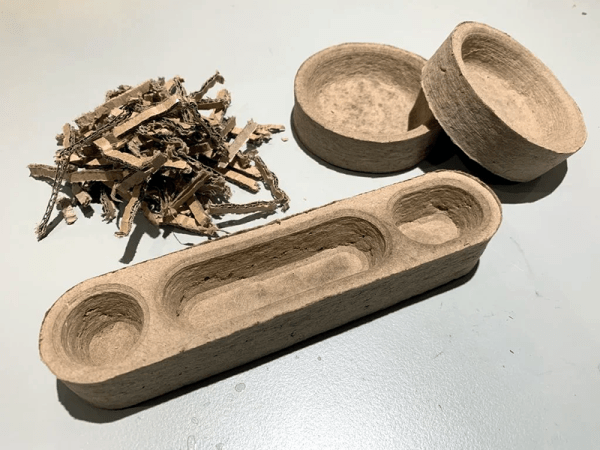
There are only a few truly ancient engineered materials, and among the oldest is paper. Traditionally, paper is flat and can be bent into shapes. However, paper can be molded into for example packing material or egg cartons. [XYZAidan]  has a process that can recycle paper into 3D cardboard-like objects. You need a 3D printer, but it doesn’t actually print the paper. Instead, you use the printer to create a mold that can form paper pulp you make out of recycled paper and a blender.

[Aidan] provides seven different molds ranging from a desk tray and a dish to simple cubes and coasters. The molds are made in three parts to assist in removing the finished product.

Continue reading “3D Printing Paper — Sort Of”

Rock, Paper, Neural Net

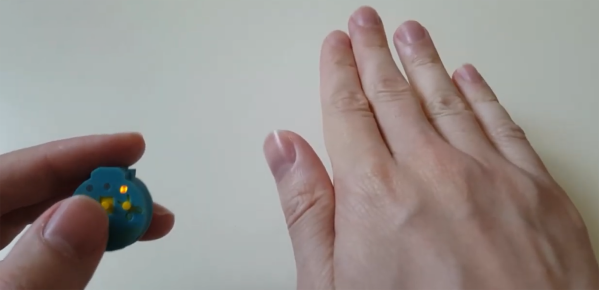
You might think the game of Rock Paper Scissors is just the random chance, but that’s not true. There is a strategy for Rock Paper Scissors, multiple ones in fact, and the best human players can consistently beat any Joe Schmoe off the street. But what about computers? [Paul] answered that question with a tiny little keychain dongle that can beat you at Rock Paper Scissors.

This is a neural network, and you need to train a neural network, so where did [Paul] get all that data? roshambo.me offers thousands of paper rock scissor games, and trained the network on more than 85,000 human games, along with about 10,000 simulated games. Rock Paper Scissors isn’t a complicated game at all, and the entire neural network is stored on an ATtiny1614 microcontroller. The calculations are done as floats, even. That’s how non-computationally intensive this project is.

Building a neural network is one thing, but putting it in a handy keychain enclosure is something else. This handsome device fits on a PCB just larger than a 2032 coin cell battery and is enclosed in a 3D printed case. The buttons are 3D printed as well, with some clever application of fiber optic as light pipes for the LEDs. The end result is something that is slightly better than random chance at Rock Paper Scissors and shows off some matrix programming skills. Check out the video below.

Continue reading “Rock, Paper, Neural Net”

Simple Automata Extravaganza

[Federico Tobon] from [Wolfcat Workshop] spent Makevember in 2017 building a series of fascinating automata using the most basic of craft supplies and simple tools in his workshop. Using a combination of rigid materials such as wooden cubes, popsicle sticks, and paper clips and pliable ones like paper and rubber bands, his creations are way more delightful to play with compared to fidget spinners.

There are no assembly guides, instructions or building plans, but for a hacker, one look at these designs ought to be enough to glean how to build one, with some trial and error to get it right. And that is exactly what [Tobon] found to his delight. After sharing animated GIFs of his creations on social media, numerous other hackers built and shared their own versions of his designs as well as building some new ones.

He posts several other useful resources, some of which were the inspiration that got him started making these automata. All of them are pretty interesting, so do take a look at them too. There is a lot that young kids can learn from building these little machines, given some guidance and help from the elders. But the way we see it, it’s likely the old folks will enjoy them more.

The video after the break compiles all of the little machines for six minutes of viewing pleasure.

Continue reading “Simple Automata Extravaganza”

See How Paper Maché Sculptor Uses Cloth For Tricky Spots

When is paper maché not paper maché? When it is cloth, of course. [Dan Reeder] has been putting his own spin on paper maché art since the 70s and demonstrates the technique of using cloth for tricky spots in his outstanding sculpture of an Ice Dragon. Thin strips of cloth are used just as paper would be, but give a much different structure and grant natural-looking folds to spots like eyelids, nostrils, and lips.

[Dan] feels that paper maché is an under-utilized and under-rated medium, and he puts out some stunning work on his blog as well as his YouTube channel. What’s great to see are his frank descriptions and explanations of what does and doesn’t work, and he’s not afraid to try new things and explore different ways to approach problems.

Enterprising hackers may not pick paper maché as their first choice to create creating custom enclosures, but it can be done and the accessibility and ease of use of the medium are certainly undeniable. One never knows when a tool or technique may come in handy.

Sniffing RFID Readers With A Piece Of Paper

We feature plenty of printed projects here on Hackaday, though they tend to be of the three dimensional type thanks to the proliferation of affordable 3D printers. But in this case, [Milosch Meriac] has managed to put together a printable design that’s not only a very cool hack, but is made up of a scant two dimensions. His creation, which could perhaps be considered something of an interactive circuit diagram, allows anyone with a paper printer and a few passive components to make a functional low-frequency RFID sniffer.

[Milosch] tells us the goal of the project is to lower the barrier for experimenting with the RFID technology that’s increasingly part of our everyday lives. Rather than having to use something expensive and complicated such as an oscilloscope, experimenters can simply plug their DIY RFID sniffer into their computer’s line-in jack and explore the produced waveform with open source tools.

To create a paper RFID sniffer, you start by printing the image out on a thick piece of paper, like card stock. You then apply foil tape where indicated to serve as traces in this makeshift PCB, and start soldering on the components as described in the text. [Milosch] says the assembly procedure is so simple even a kid can do it, and the total cost of each assembled sniffer is literally pennies; making this an excellent project for schools or really any large group.

If you want to play it safe the sniffer can be connected to a USB sound card rather than your machine’s primary sound hardware, and still come in dirt cheap. [Milosch] stops short of explaining the software side of things in this particular project, but any tool which can use input from the sound card as a makeshift oscilloscope should be a good start.

In the past we’ve seen [Milosch] perform low frequency RFID sniffing through the sound card with the powerful baudline tool, but if you want a little more capable hardware, we can point you in the right direction.

3D-Printer Extrudes Paper Pulp Instead Of Plastic

We’ve seen all sorts of 3D-printers on these pages before. From the small to the large, Cartesians and deltas, and printers that can squeeze out plastic, metal, and even concrete. But this appears to be the first time we’ve ever featured a paper-pulp extruding 3D-printer.

It’s fair to ask why the world would need such a thing, and its creator, [Beer Holthuis], has an obvious answer: the world has a lot of waste paper. Like 80 kg per person per year. Thankfully at least some of that is recycled, but that still leaves a lot of raw material that [Beer] wanted to put to work. Build details on the printer are sparse, but from the photos and the video below it seems clear how it all went together. A simple X-Y-Z gantry moves a nozzle over the build platform. The nozzle, an order of magnitude or two larger than the nozzles most of us are used to, is connected to an extruder by a plastic hose. The extruder appears to be tube with a stepper-driven screw that lowers a ram down onto the pulp, squeezing it into the hose. [Beer] notes that the pulp is mixed with a bit of “natural binder” to allow the extruded pulp to keep its shape. We found the extrusion process to be just a wee bit repulsive to watch, but fascinating nonetheless, and the items he’s creating are certainly striking in appearance.

This may be the first pulp printer to grace our pages, but it’s not the first pulp hack we’ve featured. Pulp turns out to be a great material to keep your neighbors happy and even makes a dandy fuel.

Continue reading “3D-Printer Extrudes Paper Pulp Instead Of Plastic”

Custom LED Signage From Household Items

We’ll admit it: sometimes we overthink things. We imagine some of you are the same way; there seems to be something in the hacker mentality that drives us to occasionally over-engineer ideas to the point of unrecognizability. There’s nothing inherently wrong with this, but sometimes it does keep us from seeing easier solutions.

For example, the very slick looking personalized LED sign (Google Translate) that [Clovis Fritzen] recently wrote in to share with us. If we were tasked with creating something like this there would certainly have been a 3D printer and likely a CNC involved before all was said and done, and a few days later we’d still be working out the bugs in our OpenSCAD code. But his approach is very different. Fantastically simple and constructed largely from household items, this is a good project to keep the Junior Hackers entertained on a rainy weekend.

The first step of the process is to draw out the characters you want onto a piece of cardboard, and then carefully cut it out. If you’re worried that you’re not particularly artistic, this step will go a bit better if you print out the design and tape the paper over the cardboard to serve as a template. Once you’ve got your design cut out, you glue or tape a piece of standard printer paper over it. This is the face of the display; it just needs to be lit from behind.

If you wanted to make a sign that was just a single color and didn’t have individually addressable elements, then it would be enough to illuminate the whole cutout with a single light source. But where’s the appeal in that? As [Clovis] shows, you can get much better results by constructing a segmented box, with one LED in each cell. By wiring each LED to a pin on an Arduino or other microcontroller, you’ll have control over the color and brightness of each section of the sign.

Of course, if you’re not big on the whole cardboard aesthetic, you could even recreate this design with the aforementioned CNC and 3D printer. [Clovis] shows how the basic concept works, and that it can be scaled pretty easily depending on the kind of materials you have access to.