Heavy Raspberry Pi User? Keep An HDMI-to-USB Capture Device Around

Here’s a simple tip from [Andy], whose Raspberry Pi projects often travel with him outside the workshop: he suggests adding a small HDMI-to-USB video capture device to one’s Raspberry Pi utility belt. As long as there is a computer around, it provides a simple and configuration-free way to view a Raspberry Pi’s display that doesn’t involve the local network, nor does it require carrying around a spare HDMI display and power supply.
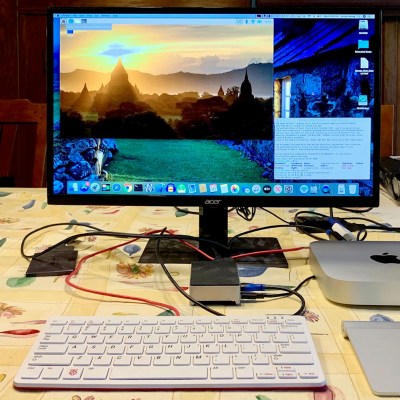
Raspberry Pi’s display, viewed on a Mac as if it were a USB webcam. No configuration required.

The usual way to see a Pi’s screen is to either plug in an HDMI display or to connect remotely, but [Andy] found that he didn’t always have details about the network where he was working (assuming a network was even available) and configuring the Pi with a location’s network details was a hassle in any case. Carrying around an HMDI display and power supply was also something he felt he could do without. Throwing a small HDMI-to-USB adapter into his toolkit, on the other hand, has paid off for him big time.

The way it works is simple: the device turns an HDMI video source into something that acts just like a USB webcam’s video stream, which is trivial to view on just about any desktop or laptop. As long as [Andy] has access to some kind of computer, he can be viewing the Pi’s display in no time.

Many of his projects (like this automated cloud camera timelapse) use the Pi camera modules, so a quick way to see the screen is useful to check focus, preview video, and so on. Doing it this way hit a real sweet spot for him. We can’t help but think that one of these little boards could be a tempting thing to embed into a custom cyberdeck build.

C++ Compiler Targets The Web

It is a common problem these days. You have a piece of code in C or C++. Maybe it is older code. Or maybe you prefer prototyping your ideas using C. But, inevitably, someone now wants your code to run in a Web browser. The options for making this happen have expanded quite a bit lately and one possibility is Cheerp, an open-source compiler that handles up to C++ 17 and can output to WebAssembly, JavaScript, or asm.js.

The compiler is free to use for GPLv2 projects. If you aren’t open yourself, it looks like you have to cut a deal to use Cheerp with its maker, Learning Technologies.

Continue reading “C++ Compiler Targets The Web”

Coil On Plug Ignition For Tiny Engines

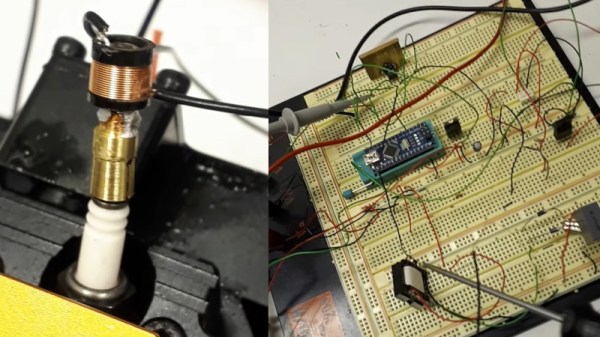
The spark plug was a key invention in the history of the internal combustion engine, allowing combustion to be easily controlled and engines to rev faster than messy earlier designs. Mid-century cars tended to rely on points ignition with a distributor and coil, however more modern designs place a coil on top of each individual spark plug. [Roger Moore] decided to build a similar setup for a small model engine on his workbench.

The rig is built with an Arduino, a flyback transformer, a smattering of MOSFETs and passives, an IGBT and a capacitor. The Arduino outputs PWM through a MOSFET which is stepped up through the transformer, and then charges the capacitor. The capacitor is then discharged into a coil mounted on top of the sparkplug of the single-cylinder engine, which fires the spark. The timing of the spark is determined by a Hall effect sensor reading a magnet placed on the flywheel.

Later development aims to shrink the system further to fit on a V10 design [Roger] is planning to make. It’s been done on a small scale before, and we’d love to see another tiny engine with way too many cylinders. Video after the break.

Continue reading “Coil On Plug Ignition For Tiny Engines”

Watch Life Tick Away, One LED Segment At A Time

In the grand scheme of things, a single human lifetime is a drop in the bucket. Even if we don’t like to acknowledge it, we all know the meter is running so to speak. Yet you’re still squandering your precious time on this Earth by reading Hackaday instead of doing something constructive. Of course nobody is burning up more time on this site than those of us who are writing it all, so don’t feel too bad.

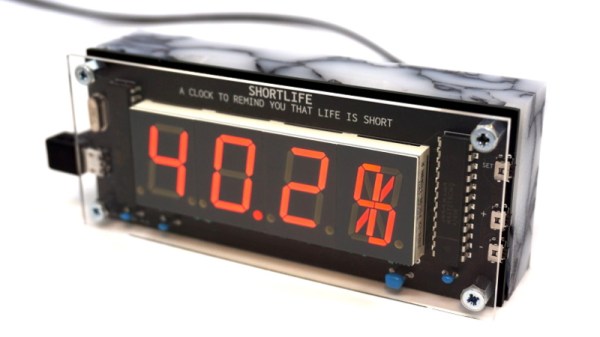
To remind us that life is fleeting, [Dries Depoorter] has designed the Shortlife: a device that counts down until your expected departure date. Before you get too excited, it can’t predict the future. The gadget is programmed with the vital statistics for the individual user, and data provided by the World Health Organization is used to calculate how much of your estimated life expectancy has already elapsed. Some would find this information depressing, while others will no doubt look at it as a source of inspiration. Us? We just think its a slick piece of gear.

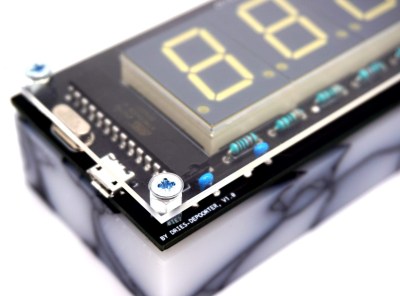
The Shortlife is made up of a custom PCB mounted to a marbled block of recycled plastic. On the board there’s an ATmega328 microcontroller, a MAX7219 LED driver, and of course the red LED segment displays. Three of them are the classic seven count, while the rightmost display sports fourteen segments for a bit of added accuracy. All the user has to do if they want to watch their remaining time slip away is plug the device into a USB power source and set the current time.

We’ve seen similar mortal countdown clocks in the past, but the Shortlife certainly brings a certain level of elegance to the idea. Plus we also like the fact that you’re just a line of code or two away from having the display tick down to some other date in the future when that whole existential crisis kicks in

Remoticon Video: Making Glowy Origami With Charlyn Gonda

Hacking is about pushing the envelope to discover new and clever ways to use things in ways their original designers never envisioned. [Charlyn Gonda]’s Hackaday Remoticon workshop “Making Glowly Origami” was exactly that; a combination of the art of origami with the one of LEDs. Check out the full course embedded below, and read on for a summary of what you’ll find. Continue reading “Remoticon Video: Making Glowy Origami With Charlyn Gonda”

World Solar Challenge: How Far In A Solar Car?

Solar power is a great source of renewable energy, but has always had its limitations. At best, there’s only 1,000 Watts/m2 available at the Earth’s surface on a sunny day, and the limited efficiency of solar panels cuts this down further. It’s such a low amount that solar panels on passenger cars have been limited to menial tasks such as battery tending and running low-power ventilation fans.

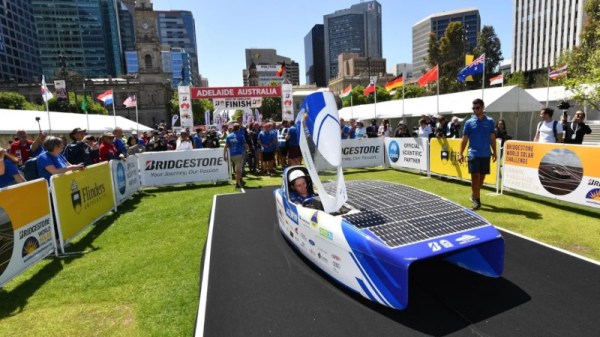
However, where some might see an impossibility, others see opportunity. The World Solar Challenge is a competition that has aimed to show the true potential of solar powered transport. Now 30 years since its inception, what used to be impossible is in fact achieved by multiple teams in under one tenth of the original time. To keep competitors on their toes, the rules have been evolving over time, always pushing the boundaries of what’s possible simply with sunlight. This isn’t mainstream transportation; this is an engineering challenge. How far can you go in a solar car?

Continue reading “World Solar Challenge: How Far In A Solar Car?”

Solar Pi Zero E-Paper Photo Frame Waits For The Right Moment

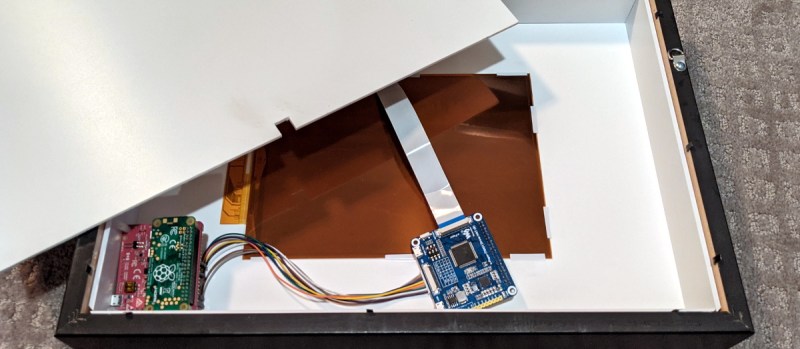
One of the biggest advantages of electronic paper is that it doesn’t require a constant power source to display a static image. Depending on the application, this can lead to a massive energy savings compared to more traditional display technologies. Of course, the electronics that actually drive the display are another story entirely. You need to reduce the energy requirements of the whole system if you really want to stretch your battery life.

So when [Giacomo Miceli] wanted to put together this solar powered e-paper photo frame, he had to come up with some creative ways to curb the energy consumption of the Raspberry Pi Zero that runs the show. While the 10.3 inch 1872 × 1404 panel would only require the occasional burst of power to flick over to a new image, the Pi would be a constant drain on the internal battery pack. Considering he wanted the frame to recharge from ambient light with an array of small solar panels, that simply wouldn’t do.

The solution came in the form of a PiJuice HAT and some scripts that decide how often the Pi is to be powered on based on the current battery level. If there’s enough power, it might be every hour or so. But the lower the charge, the longer the delay. When the energy situation is particularly dire, the Pi might only be turned on every couple of days. With the Pi off and the e-paper not drawing any power, all of the energy produced by the solar panels can be devoted to recharging the frame’s 1,000 mAh battery.

When the Pi does get booted up, it quickly connects to a server to download a new image and update the display. After that, it ascertains the current battery level and determines how long the PiJuice should wait before turning it back on. After these tasks are complete, it will turn itself off until the next scheduled event. All told, [Giacomo] says the Pi is only up and running for about a minute each time the image is refreshed on the e-paper. He says the system has been running for six weeks now, with the battery level occasionally dipping down to 40% or so before it climbs back up.

Admittedly the energy consumption of the frame could be cut drastically by replacing the Raspberry Pi with a simple microcontroller, but we appreciate the creativity. Besides, the power and flexibility afforded by the Pi means this frame could be taught quite a few new tricks with some updated software.