Make DIY Conductive, Biodegradable String Right In Your Kitchen

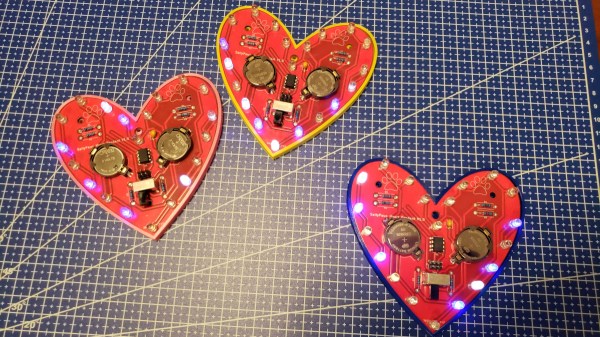
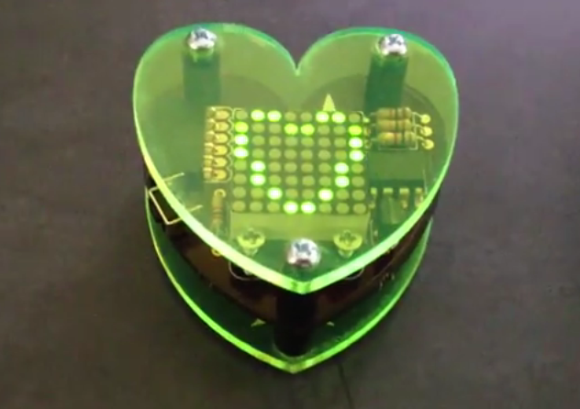
[ombates] shares a step-by-step method for making a conductive bio-string from scratch, no fancy equipment required. She demonstrates using it to create a decorative top with touch-sensitive parts, controlling animations on an RGB LED pendant. To top it off, it’s even biodegradable!

The string is an alginate-based bioplastic that can be made at home and is shaped in a way that it can be woven or knitted. Alginate comes primarily from seaweed, and it gels in the presence of calcium ions. [ombates] relies on this to make a goopy mixture that, once extruded into a calcium chloride bath, forms a thin rubbery length that can be dried into the strings you see here. By adding carbon to the mixture, the resulting string is darkened in color and also conductive.

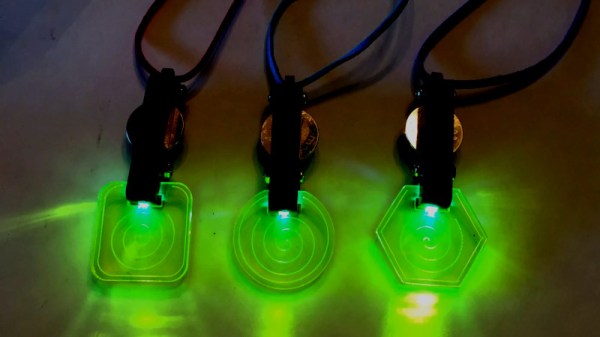
There’s no details on what the actual resistance of a segment of this string can be expected to measure, but while it might not be suitable to use as wiring it is certainly conductive enough to act as a touch sensor in a manner similar to the banana synthesizer. It would similarly be compatible with a Makey Makey (the original and incredibly popular hardware board for turning household objects into touch sensors.)

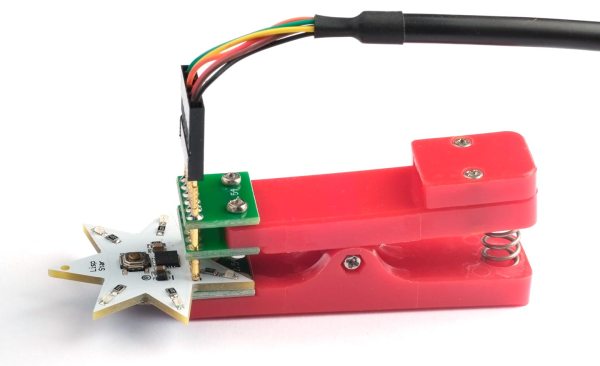
What you see here is [ombates]’ wearable demonstration, using the white (non-conductive) string interwoven with dark (conductive) portions connected to an Adafruit Circuit Playground board mounted as an LED pendant, with the conductive parts used as touch sensors.

Alginate is sometimes used to make dental molds and while alginate molds lose their dimensional accuracy as they dry out, for this string that’s not really a concern. If you give it a try, visit our tip line to let us know how it turned out!

Lisp Runs This Microcontroller Pendant

As a programming language, Lisp has been around longer than any other active language except for Fortran. To anyone who regularly uses it, it’s easy to see why: the language allows for new syntax and macros to be created fluidly, which makes it easy to adapt it to new situations, like running it on a modern Atmel microcontroller to control the LEDs on this star pendant.

The pendant has simple enough hardware — six LEDs arranged around the points of the star, all being driven by a small ATtiny3227 operating from a coin cell battery. This isn’t especially spectacular on it’s own, but this particular microcontroller is running an integer version of a custom-built Lisp interpreter called uLisp. The project’s creator did this simply because of the whimsy involved in running a high-level programming language on one of the smallest microcontrollers around that would actually support the limited functionality of this version of Lisp. This implementation does stretch the memory and processing capabilities of the microcontroller quite a bit, but with some concessions, it’s able to run everything without issue.

As far as this project goes, it’s impressive if for nothing other than the ‘I climbed the mountain because it was there’ attitude. We appreciate all kinds of projects in that same vein, like this Arduino competitor which supports a programming language with only eight commands, or this drone which can carry a human.

Three pendants that the article is describing, on a drafting mat.They're heart-shaped red PCBs with LEDs all around its perimeter, two CR2032-like batteries in its center.

Heart-Shaped Heartwarming Valentine’s Day Pendant

This is no ordinary heart-shaped PCB pendant project! To us, it’s also symbol representing the striking amount of love that [SaltyPaws] has put into its design and documentation. He tells us that he designed it for the two daughters he is raising, as an electronics and general STEAM introduction – with outstanding educational and aesthetic qualities, giving insights into a wide range of topics while looking . The PCB is mostly through-hole, making for easy soldering and quick return on the effort investment. The project is thought-out beyond the PCB, however – this pendant is designed to be wearable day-to-day, which is why it’s accompanied by a 3D-printed frame, protecting its wearer from sharp PCB edges and through-hole lead ends!

Open-sourcing things is a gift, and today, we are also the recipients. [SaltyPaws] has open-sourced everything involved – PCB files, 3D cover files, firmware, BOM, everything you would need to build your own version. All of this is in a GitHub repository, with detailed sourcing and assembly instructions in the README.md – we couldn’t ask for more! If you have loved ones that would take delight in putting such a pretty pendant together, you have about a week to order the PCBs – after that, Chinese New Year will likely thwart your plans!

Looking for more accessories that double as electronics projects? We’ve covered a wide variety, even when it comes to pendants alone – check out this edge-lit fluorescent acrylic educational Maker Faire accessory, or this circuit sculpture BEAM-inspired bird-imitating one, or this tiny SAMD21-powered pendant with an IPS LCD!

Edge Lit Pendant, Is, Well… Lit

Acrylic is a great material. It’s not cheap, but it comes in a wide variety of colours and styles and can be used to make some very attractive projects. [Geek Mom Projects] is a big fan, and whipped up some fun pendants for a high school Maker Faire.

[Geek Mom] has long been a fan of edge-lighting, as it’s a great way to make beautiful glowy projects out of acrylic. In this case a fluorescent acrylic is used with white LEDs to generate an eerie green glow, though it’s also noted that the project can be done with clear acrylic and color-shifting LEDs instead for an equally cool look. If you’re filming a low-budget sci-fi film, this could be just what you need.

The pendants made a great project for young makers to learn about LEDs, electronics, and technologies such as lasercutting that were used to produce the parts. With copper tape used instead of soldering and a CR2032 battery used to eliminate the need for a current limiting resistor, it’s a very accessible project that most teens were able to complete without assistance.

It’s not the first time we’ve seen edge-lit pendants, either. Alternatively, if you need your acrylic bent, there’s a tool for that, too.

Edge-lit Pendants Show Two Layers Are Better Than One

Engraved acrylic lights up nicely with LED lighting. Simply engrave clear acrylic with a laser engraver, then edge-light the acrylic and watch the engraving light up. This badge made by [Solarbotics] shows how they used this principle when creating some pendants for an event that performed particularly well in the dark.

The pendants they created have two engraved acrylic panels each, and that’s about it. Two LEDs and a CR2032 battery nestle into pre-cut holes, and the engraved sides are placed face-to-face, so the outer surfaces of the pendant are smooth. By using some color-cycling RGB LEDs on one panel and blue LEDs on the other panel, the effect is that of an edge-lit outer design with a central element that slowly changes color separately from the rest of the pendant.

The design stacks the LED leads and coin cells in such a way that a simple wrap of tape not only secures things physically, but also takes care of making a good electrical connection. No soldering or connectors of any kind required. [Solarbotics] found that CR2032 cells would last anywhere between a couple of days to a week, depending on the supplier.

This design is great for using a minimum of materials, but if that’s not a priority it’s possible to go much further with the concept. Multiple layers of edge-lit acrylic were used to make numeric 0-9 display modules as well as a full-color image.


Heart-shaped Project Takes No Shortcuts

heart-shaped-project

If all [Blake] wanted to do is scroll “Blake loves Kim” on some LEDs he could have stopped with the breadboard version of the project. Or hastily craft a cardboard heart around the marquee. But he really just used this heart-shaped electronics project as an excuse to get his feet wet with several different types of manufacturing.

The project started as a simple scrolling message pendant. Something along these lines. His very small LED module was being driven by an ATtiny85. He planned to run it from battery which is a perfect excuse to learn how to use the sleep functions built into the chip.

The initial design worked so well he decided to lay out his own circuit board. This made it quite simple to add in a side-positioned button to wake from sleep, and a coin cell battery holder on the back. He used OSH Park for board manufacturing — good thing they allow creative board outlines. To protect the circuitry he also ordered laser-cut acrylic plates that work in conjunction with stand offs to form a case.

He mentions he missed his Valentine’s Day delivery date by a long shot. But that’s how these sort of things go, right?

Continue reading “Heart-shaped Project Takes No Shortcuts”

Super-cap Powered Blinky Jewelry Charged By The Sun Or USB

blinky-jewelry-solar-supercap

We don’t see ourselves wearing these pendants around, but we still enjoyed taking a look at the design. These are just two from a wide range of offerings meant to be worn around and recharged by the sun. But a cloudy day won’t ruing the fun; they can be topped off via USB as well. Parts lists and schematics are included in the assembly Instructables for both the Owl and the Heart.

[Marty] and [Robin], a brother and sister developement/design team, were showing them off at the Sector67 hackerspace in Madison, WI. The single integrated circuit used in both is an OpAmp responsible for managing the blinking. The heart board has a calculator-style solar cell which charges that 0.5F supercap. The Owl has just a 0.022F coin-type capacitor and features a different style of solar harvester. The six components around the cap are each individual solar cells. [Marty] told us that they pump out a ton of juice in direct sunlight, outperforming the calculator-style cell. The opposite is true indoors. But as we’ve seen before, indoor solar harvesting is a tough game.

Need even more bling around your neck? Check out these LED matrix pendants.