A Look Inside A DIY Rocket Motor

[Joe Barnard] made a solid propellant rocket motor, and as one does in such situations, he put it through its paces on the test stand. The video below is not about the test, nor is it about the motor’s construction. Rather, it’s a deconstruction of the remains of the motor in order to better understand its design, and it’s pretty interesting stuff.

Somewhere along the way, [Joe], aka “BPS.Space” on YouTube, transitioned from enthusiastic model rocketeer to full-fledged missile-man, and in the process stepped up his motor game considerably. The motor that goes under the knife — or rather, the bandsaw — in this video is his “Simplex V2,” a completely DIY build of [Joe]’s design. For scale, the casing is made from a 6″ (15 cm) diameter piece of aluminum tubing over a meter in length, with a machined aluminum forward closure and a composite nozzle assembly. This is a pretty serious piece of engineering.

The closure and the nozzle are the focus of the video, which makes sense since that’s where most of the action takes place. To understand what happened during the test, [Joe] lopped them off and cut them roughly in half longitudinally. The nozzle throat, which was machined from a slug of graphite, fared remarkably well during the test, accumulating only a little slag from the propellant, a combination of powdered aluminum, ammonium perchlorate, and HTBP resin. The lower part of the nozzle, made from phenolic-impregnated linen, did pretty well too, building up a pyrolyzed layer that acted much like a space capsule’s ablative heat shield would. The forward closure, whose sole job is to contain the inferno and direct the exhaust anywhere but up, took more of a beating but stood up to the challenge. Especially interesting was the state of the O-rings and the way that the igniter interfaced with the closure.

Post mortems like these are valuable teaching tools, and while it must be heartbreaking to destroy something you put so much work into, you can’t improve what you can’t measure. Hats off to [Joe] for the peek inside his world. Continue reading “A Look Inside A DIY Rocket Motor”

Retrotechtacular: Circuit Potting, And PCBs The Hard Way

There was a time when the very idea of building a complex circuit with the intention of destroying it would have been anathema to any electrical engineer. The work put into designing a circuit, procuring the components, and assembling it, generally with point-to-point wiring and an extravagant amount of manual labor, only to blow it up? Heresy!

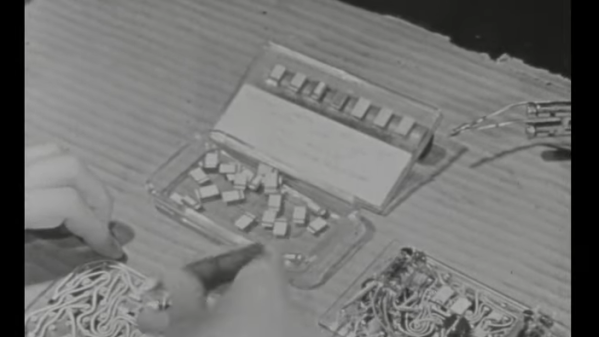
But, such are the demands of national defense, and as weapons morphed into “weapon systems” after World War II, the need arose for electronics that were not only cheap enough to blow up but also tough enough to survive the often rough ride before the final bang. The short film below, simply titled Potted and Printed Circuits, details the state of the art in miniaturization and modularization of electronics, circa 1952. It was produced by the Telecommunications Research Establishment (TRE), the main electronics R&D entity in the UK during the war which was responsible for inventions such as radar, radio navigation, and jamming technology.

Continue reading “Retrotechtacular: Circuit Potting, And PCBs The Hard Way”

Turning Old Toggle Switches Into Retro-Tech Showpieces

While those of us in the hacking community usually focus on making new things, there’s plenty to be said for restoring old stuff. Finding a piece of hardware and making it look and work like new can be immensely satisfying, and dozens of YouTube channels and blogs exist merely to feed the need for more restoration content.

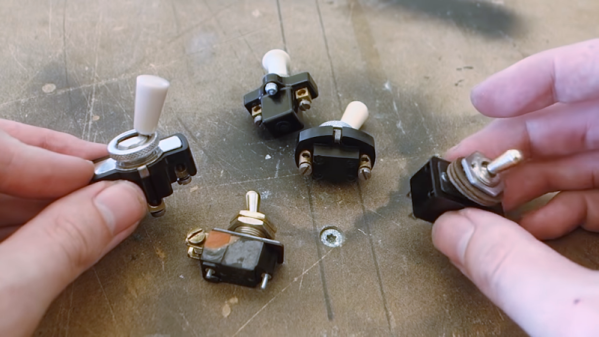
The aptly named [Switch and Lever] has been riding the retro wave for a while, and his video on restoring and repairing vintage toggle switches shows that he has picked up a trick or two worth sharing. The switches are all flea market finds, chunky beasts that have all seen better days. But old parts were built to last, and they proved sturdy enough to withstand the first step in any restoration: disassembly. Most of the switches were easily pried open, but a couple needed rivets drilled out first. The ensuing cleaning and polishing steps were pretty basic, although we liked the tips about the micromesh abrasives and the polishing compound. Another great tip was using phenolic resin PCBs as repair material for broken Bakelite bodies; they’re chemically similar, and while they may not match the original exactly, they make for a great repair when teamed up with CA glue and baking soda as a filler.

3D-printed repairs would work too, but there’s something satisfying about keeping things historically consistent. Celebrating engineering history is really what restorations like these are all about, after all. And even if you’re building something new, you can make it look retro cool with these acid-etched brass plaques that [Switch and Lever] also makes.

Continue reading “Turning Old Toggle Switches Into Retro-Tech Showpieces”