Light Transport And Constructing Images From A Projector’s Point Of View

Imagine you have a projector pointing at a scene, which you’re photographing with a camera aimed from a different point. Using the techniques of modelling light transport, [okooptics] has shown us how you can capture an image from the projector’s point of view, instead of the camera—and even synthetically light the scene however you might like.

The test scene used for the explanation of the work.

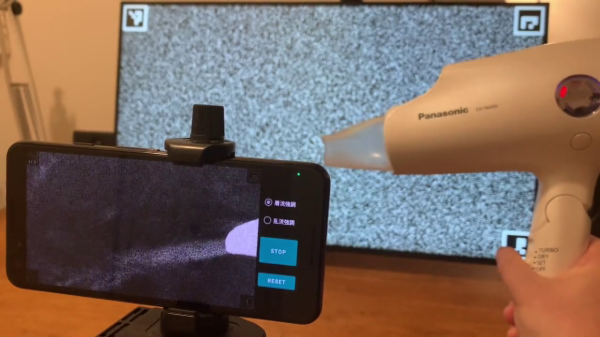
The concept involves capturing data regarding how light is transported from the projector to the scene. This could be achieved by lighting one pixel of the projector at a time while capturing an image with the camera. However, even for a low-resolution projector, of say 256×256 pixels, this would require capturing 65536 individual images, and take a very long time. Instead, [okooptics] explains how the same task can be achieved by using binary coded images with the projector, which allow the same data to be captured using just seventeen exposures.

Once armed with this light transport data, it’s possible to do wild tricks. You can synthetically light the scene, as if the projector were displaying any novel lighting pattern of your choice. You can also construct a simulated photo taken from the projector’s perspective, and even do some rudimentary depth reconstruction. [okooptics] explains this tricky subject well, using visual demonstrations to indicate how it all works.

The work was inspired by the “Dual Photography” paper published at SIGGRAPH some time ago, a conference that continues to produce outrageously interesting work to this day.

Continue reading “Light Transport And Constructing Images From A Projector’s Point Of View”

On the left side, there's a smartphone. On the right side, there's a hairdryer turned on. On the smartphone screen, you can see the working end of the hairdryer shown, as well as a jet of air coming out of that end. In the background, there's an LCD screen showing a noise pattern.

Observe Airflow Using Smartphone And Background-Oriented Schlieren

Multiple people have recently shared this exciting demonstration (nitter) with us – visualizing airflow using a smartphone, called ‘background-oriented schlieren’. On a hot summer day, you might see waves in the air – caused by air changing density as it warms up, and therefore refracting the light differently. Schlieren photography is an general set of techniques for visualizing fluid flow, but of course, it can also be applied to airflow. In this case, using some clever optical recognition tricks, this schlieren method lets you visualize flow of air using only your Android smartphone’s high resolution camera and a known-pattern printed background! Continue reading “Observe Airflow Using Smartphone And Background-Oriented Schlieren”

Schlieren On A Stick

Schlieren imaging is a technique for viewing the density of transparent fluids using a camera and some clever optical setups. Density of a fluid like air might change based on the composition of the air itself with various gasses, or it may vary as a result of a sound or pressure wave. It might sound like you would need a complicated and/or expensive setup in order to view such things, but with a few common things you can have your own Schlieren setup as [elad] demonstrates.

His setup relies on a cell phone, attached to a selfie stick, with a spherical mirror at the other end. The selfie stick makes adjusting the distance from the camera to the mirror easy, as a specific distance from the camera is required as a function of focal length. For cell phone cameras, it’s best to find this distance through experimentation using a small LED as the point source. Once it’s calibrated and working, a circular field of view is displayed on the phone which allows the viewer to see any change in density in front of the mirror.

The only downside of this build that [elad] notes is that the selfie stick isn’t stiff enough to prevent the image from shaking around a little bit, but all things considered this is an excellent project that shows a neat and useful trick in the photography/instrumentation world that could be useful for a lot of other projects. We’ve only seen Schlieren imaging once before and it used a slightly different method of viewing the changing densities.

Continue reading “Schlieren On A Stick”

Stunning Fake Polaroid Camera Performs Magic

It’s high time us Muggles got our hands on the hardware used to take Magical Photographs as seen in The Daily Prophet. The first pioneering step in that direction has been taken by [Abhishek] who built this moving picture taking polaroid-ish camera, which he’s calling the “Instagif NextStep”. It’s a camera that records a short, three second video, converts it to GIF and ejects a little cartridge which displays the animated photo.

This amazing piece of hardware has been painstakingly built, and the finished product looks great. The nice thing about building such projects, in [Abhishek]’s own words, is that “it involves a bunch of different skill sets and disciplines – hardware, software, 3D modeling, 3D printing, circuit design, mechanical/electrical engineering, design, fabrication etc that need to be integrated for it to work seamlessly.”
Continue reading “Stunning Fake Polaroid Camera Performs Magic”

3D Popup Cards From 3D Photos

The world of 3D printing is growing rapidly. Some might say it’s growing layer by layer. But there was one aspect that [Ken] wanted to improve upon, and that was in the area of 3D photos. Specifically, printing a 3D pop-up-style photograph that collapses to save space so you can easily carry it around.

It’s been possible to take 3D scans of objects and render a 3D print for a while now, but [Ken] wanted something a little more portable. His 3D pop-up photographs are similar to pop-up books for children, in that when the page is unfolded a three-dimensional shape distances itself from the background.

The process works by taking a normal 3D photo. With the help of some software, sets of points that are equidistant from the camera are grouped into layers. From there, they can be printed in the old 2-dimensional fashion and then connected to achieve the 3D effect. Using a Kinect or similar device would allow for any number of layers and ways of using this method. So we’re throwing down the gauntlet — we want to see an arms-race of pop-up photographs. Who will be the one to have the most layers, and who will find a photograph subject that makes the most sense in this medium? Remember how cool those vector-cut topographical maps were? There must be a similarly impressive application for this!

[Ken] isn’t a stranger around these parts. He was previously featured for his unique weather display and his semi-real-life Mario Kart, so be sure to check those out as well.

Mix Your Own Photo Developing Emulsions

If you’re into developing your own photographs you might try mixing your own emulsion. [Jimmy Hartnett] worked out the chemical reaction necessary to make a photosensitive medium using Silver Chloride. His process lets him manufacture canvas that can be use like photo paper. The gist of it involves coating the back of a canvas with Gesso to prevent the emulsion from passing all the way through. He then floats the canvas face-down to apply the emulsion and skims it with a straight edge before it has time to set. You can see the results of some contact print testing in the image above. If anything, this makes a great piece of art to hang on the wall as it’s visually interesting and [Jimmy] has a personal connection because he not only made it himself, but came up with the process.

Beer Can Pinhole Camera

When [Justin Quinnell] sent in his beer can pinhole camera, we were just floored. The parts are easy to obtain, and the process for building and ‘shooting’ with the camera are near effortless.

The really impressive part of this hack is letting your camera sit for 6 months facing the sun. Yes, you read that correct, a 6 month exposure. Check out after the break for one of his astonishing shots, and trust us, its well worth the click. Continue reading “Beer Can Pinhole Camera”