MeatBagPnP Makes You The Automatic Pick And Place

It’s amazing how hackers are nowadays building increasingly complex hardware with SMD parts as small as grains of sand. Getting multilayer PCB’s and soldering stencils in small quantities for prototyping is easier than ever before. But Pick-and-Place — the process of taking parts and stuffing them on the PCB in preparation for soldering — is elusive, for several reasons. For one, it makes sense only if you plan to do volume production as the cost and time for just setting up the PnP machine for a small run is prohibitive. And a desktop PnP machine isn’t yet as ubiquitous as a 3D printer. Placing parts on the board is one process that still needs to be done manually. Just make sure you don’t sneeze when you’re doing it.

Of course the human is the slow part of this process. [Colin O’Flynn] wrote a python script that he calls MeatBagPnP to ease this bottleneck. It’s designed to look at a row in a parts position file generated from your EDA program and highlight on a render of the board where that part needs to be placed. The human then does what a robotic PnP would have done.

A bar code scanner is not necessary, but using one does make the process a bit quicker. When you scan a code on the part bag, the script highlights the row on the spreadsheet and puts a marker on the first instance of it on the board. After you’ve placed the part, pressing the space bar puts a marker on the next instance of the same value. The script shows it’s done after all parts of the same value are populated and you can then move on to the next part. If you don’t have a bar code scanner handy, you can highlight a row manually and it’ll tell you where to put that part. Check it out in the video below.

Of course, before you use this tool you need some prior preparation. You need a good PNG image of the board (both sides if it is double-sided) scaled so that it is the same dimensions as the target board. The parts position file generated from your EDA tool must use the lower left corner of the board as the origin. You then tell the tool the board dimensions and it scales up everything so that it can put the red markers at the designated XY positions. The script works for single and double-sided boards. For a board with just a few parts, it may not be worth the trouble of doing this, but if you are trying to manually populate a complex board with a lot of parts, using a script like this could make the process a lot less painful.

The project is still fresh and rough around the edges, so if you have comments or feedback to offer, [Colin] is listening.

[Colin]’s name ought to ring a bell — he’s the hacker who built ChipWhisperer which took 2nd Prize at The Hackaday Prize in 2014. The MeatBagPnP project is a result of having worked at building increasingly complex boards manually and trying to make the process easier. In addition to the walk-through of how the script works after the break we’ve embedded his other video from three years back when he was stuffing parts — including BGA’s — the hard way and then reflowing them in a Chinese oven with hacked firmware.

Continue reading “MeatBagPnP Makes You The Automatic Pick And Place”

Hackaday Prize Entry: A Manual, CNC Pick And Place Machine

Everyone who wants a 3D printer probably already has one, and even laser cutters and CNC machines are making their way into garages and basements ’round the world. Pick and place machines are the next great frontier of personal manufacturing, and even though that’s a long way off, [Tegwyn]’s project for this year’s Hackaday Prize is bringing us that much closer to popping down 0201 LEDs reliably.

This project is a manual pick and place machine — otherwise known as ‘tweezers’. It’s a bit more complicated than that, because the entire idea behind [Tegwyn]’s build is to decouple a human’s fine motor skills from the ability to place components on a board. To do that, this project is using an off-the-shelf, blue light special CNC machine. There’s not much to it, just a bit of aluminum extrusion and some threaded rods. However, with the addition of a vacuum pump, a hollow needle, and a few manual controls to move the axes around, the operator has very fine control over where a resistor, cap, or LED goes.

There are a few neat additions to the, ‘put a vacuum pump on a CNC machine’ idea. This is a 4 axis machine, giving the user the ability to rotate the part around a pad. There’s also a microscope hooked up to a small monitor mounted to the machine. If you’re assembling hundreds of boards, this is not the machine you want. If, however, you only need a handful, don’t mind spending a few hours placing parts, and don’t want to go insane with tiny QFN packages, this is a great build and a great entry for the Hackaday Prize.

Continue reading “Hackaday Prize Entry: A Manual, CNC Pick And Place Machine”

An Hour To Surface Mount

Most of us have made the transition from through hole parts to surface mount. There are lots of scattered tutorials, but if you want to learn some techniques or compare your technique to someone else’s, you might enjoy [Moto Geek’s] hour-long video on how he does surface mount with reflow soldering. You can see the video below.

What makes the video interesting is that it is an hour long and covers the gamut from where to get cheap PCBs, to a homebrew pick and place pencil. [Moto Geek] uses a stencil with solder paste, and he provides links to the materials he uses. Continue reading “An Hour To Surface Mount”

BrdMaker, A DIY Pick And Place Machine

A small, desktop pick and place machine has obvious applications for hackerspaces, small companies, and even home labs. However, despite multiple efforts, no one has come up with a solution that’s both better and cheaper than buying a used, obsolete pick and place machine. [Mika]’s brdMaker is yet another attempt at a desktop chipshooter, and while the prototype isn’t done yet, it’s a fantastic build that might soon be found in your local electronics lab.

The easy part of any pick and place machine is a Cartesian frame. This has been done over and over again by the 3D printing and CNC communities, and the brdMaker is no exception. [Mika]’s robot is a 600 by 600 mm CNC frame powered by NEMA 23 motors. So far, so good.

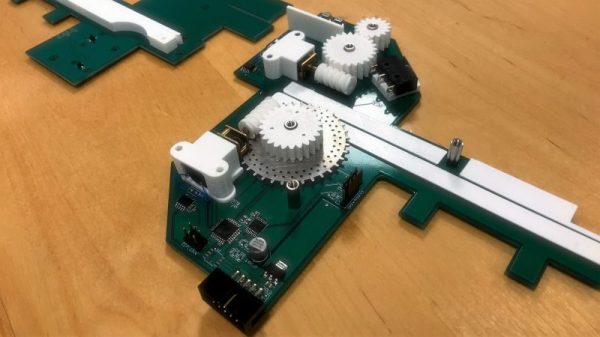
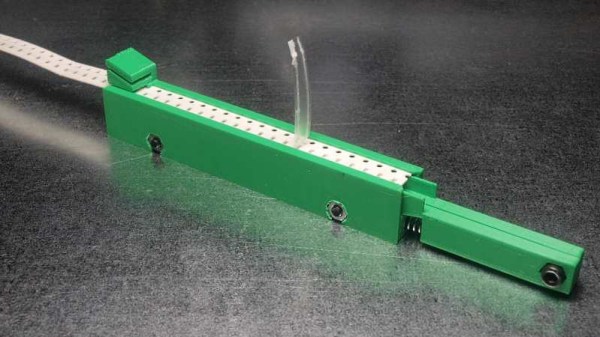
The tricky part of a pick and place machine is working with the fiddly bits. This means feeders and machine vision. There are several different options for feeders including a ‘drag’ feeder that uses the vacuum nozzle tip to move a reel of parts along, and a slightly more complicated but vastly more professional feeder. A machine needs to see the parts it’s putting down, so [Mika] is using two cameras. One of these cameras is mounted on the toolhead and looks surprisingly similar to a USB microscope. The other camera is mounted in the frame of the machine to look at the bottom of a part. This camera uses 96 LEDs to illuminate the component and find its orientation.

[Mika]’s brdMaker still has a long way to go, but there are indications the market is ready for a cheap, easy to use desktop pick and place machine. The Chipsetter, an exquisitely designed pick and place machine revealed at last year’s NY Maker Faire had an unsuccessful Kickstarter, but they’re still chugging along.

[Dave’s] Not Just A Member Of The Air Club For Tweezers

We are always surprised how much useful hacking gear is in the typical craft store. You just have to think outside the box. Need a hot air gun? Think embossing tool. A soldering iron? Check the stained glass section. Magnification gear? Sewing department.

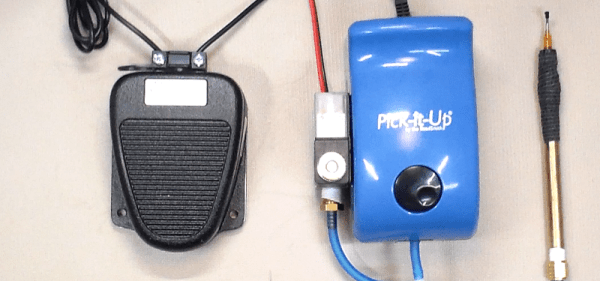
We’ve figured out that people who deal with beads use lots of fine tools and have great storage boxes. But [Dave] found out they also use vacuum pickup tweezers. He had been shopping for a set and found that one with all the features he wanted (foot pedal, adjustable air flow, and standard tips) would run about $1000.

By picking up a pump used for bead makers and adding some components, he put together a good-looking system for about $200. You can see a video of the device, below, and there are several other videos detailing the construction.

Continue reading “[Dave’s] Not Just A Member Of The Air Club For Tweezers”

A DIY Vacuum Pickup Tool For $75

If you’re assembling prototypes of SMD boards on your own, placing the parts accurately can be a pain. Of course, it’d be nice to have a full pick and place machine, but those are rather expensive and time consuming to set up, especially for a small run of boards. Instead, a vacuum pickup tool can help you place the parts quickly and accurately by hand.

The folks over at Ohmnilabs have put together their own DIY pickup tool for about $75, and it’s become part of their in-house prototyping process. They grew tired of placing components with tweezers, which require you to remove parts from the tape before lifting them, and have a tendency to flip parts over at the worst time.

The build consists of a couple parts that can be bought from Amazon. An electric vacuum pump does the sucking, and the vacuum level is regulated with an adjustable buck converter. A solid foot switch keeps your hands free, and syringe tips are used to pick the parts up.

This looks like a simple afternoon build, but if you’re prototyping, it could save you tons of time. To see it in action, check out the video after the break.

Continue reading “A DIY Vacuum Pickup Tool For $75”

Ottawa Maker Faire - Droids and Pick and Place Machines

Ottawa Maker Faire: Droids And Pick And Place Machines

Three things that I love about participating in Maker Faires are seeing all the awesome stuff people have done over the past year, spending time with all my maker friends in one big room over two days and the reactions to what I made. The 2016 Ottawa Maker Faire had all this in spades.

BB-8 – Droid With Magnetic Personality

There’s just something about BB-8 that touches people. I once heard of a study that showed that when buying kid’s toys, adults were attracted to circles, that that’s the reason teddy bears often have round heads with big round eyes. Similar reactions seem to happen with BB-8, the droid from last year’s Star Wars movie. Adults and kids alike pet him, talk baby-talk to him, and call to him with delight in their voice. I got those reactions all throughout the Maker Faire.

But my favorite reaction happened every time I removed the head and lifted the top hemisphere of the ball to expose the electronics inside. Without fail the reaction of adults was one of surprise. I don’t know if it was because of the complexity of the mechanism that was revealed or because it was just more than they expected. To those whom I thought would understand, I gave the same speech:

“This is the remote control receiver taken from a toy truck, which puts out negative and positive voltages for the different directions. That goes to this ugly hack of a board I came up with that converts it all to positive voltages for the Arduino. The Arduino then does pulse width modulation to these H-bridge driver boards, for speed control, which then talk to these two drill motors.”

Bowie and BB-8
Bowie and BB-8

Those I wasn’t sure would understand were given a simpler overview. Mine’s a hamster drive (we previously covered all the possible ways to drive a BB-8) and so I showed how it sits on two Rollerblade wheels inside the ball. I then flipped it over to show the heavy drill batteries underneath, and then explained how the magnets at the top of the drive mechanism attracted the magnets under the head, which got another look of revelation. All went away satisfied.

But BB-8 sometimes needs a break from human interaction and seeks out its own kind, like Bowie which you can read about below along with more awesome Maker Faire exhibits.

Continue reading “Ottawa Maker Faire: Droids And Pick And Place Machines”