Programmable Air Makes Robotics A Breeze

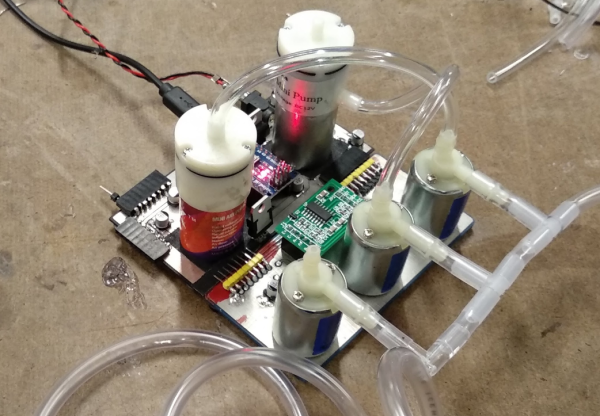
[Amitabh] was frustrated by the lack of options for controlling air pressure in soft robotics. The most promising initiative, Pneuduino, seemed to be this close to a Shenzhen production run, but the creators have gone radio silent. Faced with only expensive alternatives, he decided to take one for Team Hacker and created Programmable Air, a modular system for inflatable and vacuum-based robotics.

The idea is to build the cheapest, most hacker-friendly system he can by evaluating and experimenting with all sorts of off-the-shelf pumps, sensors, and valves. From the looks of it, he’s pretty much got it dialed in. Programmable Air is based around $9 medical-grade booster pumps that are as good at making vacuums as they are at providing pressurization. The main board has two pumps, and it looks like one is set to vacuum and the other to spew air. There’s an Arduino Nano to drive them, and a momentary to control the air flow.

Programmable Air can support up to 12 valves through daughter boards that connect via right-angle header. In the future, [Amitabh] may swap these out for magnetic connections or something else that can withstand repeated use.

Blow past the break to watch Programmable Air do pick and place, control a soft gripper, and inflate a balloon. The balloon’s pressurization behavior has made [Amitabh] reconsider adding a flow meter, but so far he hasn’t found a reasonable cost per unit. Can you recommend a small flow meter that won’t break the bank? Let us know in the comments.

Continue reading “Programmable Air Makes Robotics A Breeze”

Pick And Place Machine Is Mirror Image Of 3D Printer

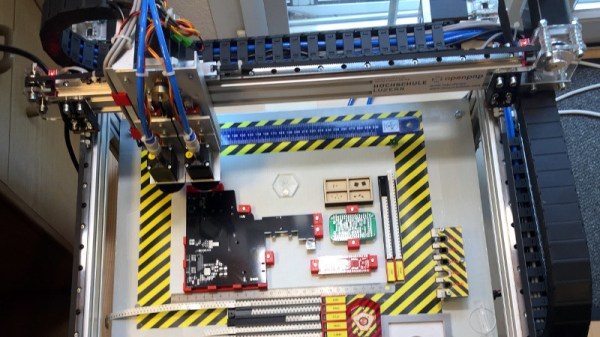
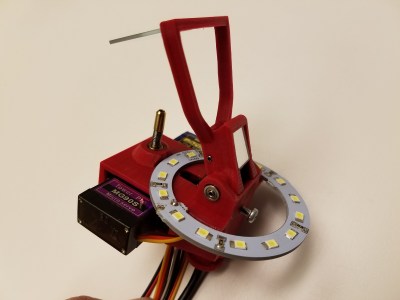
For his Hackaday prize entry, [Daren Schwenke] is creating an open-source pick-and-place head for a 3D printer which, is itself, mostly 3D printable. Some serious elbow grease has gone into the design of this, and it shows.

The really neat part of this project comes in the imaging of the part being placed. The aim is to image the part whilst it’s being moved, using a series of mirrors which swing out beneath the head. A Raspberry Pi camera is used to grab the photos, an LED halo provides consistent lighting, and whilst it looks like OpenPnP may have to be modified slightly to make this work, it will certainly be impressive to see.

Two 9g hobby servos are used: one to swing out the mirrors (taking 0.19 seconds) and one to rotate the part to the correct orientation (geared 2:1 to allow 360 degrees part rotation). Altogether the head weighs 59 grams – lighter than an E3D v6.

In order to bring this project to its current state, [Daren] has had to perform some auxiliary hacks.  The first was an aquarium to vacuum pump conversion – by switching around the valves and performing some other minor mods, [Daren] was able to produce a vacuum of 231mbar. The second was hacking a two-way solenoid valve from a coffee machine into a three-way unit. As [Daren] says, three-way valves are not expensive, but “a part in hand is worth two on Alibaba.”

Hybrid 3D-Printer Creates Complete Circuits, Case And All

The cool kids these days all seem to think we’re on the verge of an AI apocalypse, at least judging by all the virtual ink expended on various theories. But our putative AI overlords will have a hard time taking over the world without being able to build robotic legions to impose their will. That’s why this advance in 3D printing that can incorporate electronic circuits may be a little terrifying, at least to some.

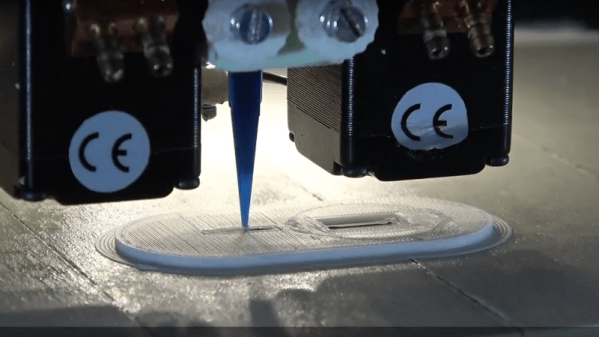
The basic idea that [Florens Wasserfall] and colleagues at the University of Hamburg have come up with is a 3D-printer with a few special modifications. One is a separate extruder than squirts a conductive silver-polymer ink, the other is a simple vacuum tip on the printer extruder for pick and place operations. The bed of the printer also has a tray for storing SMD parts and cameras for the pick-and-place to locate parts and orient them before placing them into the uncured conductive ink traces.

The key to making the hardware work together though is a toolchain that allows circuits to be integrated into the print. It starts with a schematic in Eagle, which joins with the CAD model of the part to be printed in a modified version of Slic3r, the open-source slicing package. Locations for SMD components are defined, traces are routed, and the hybrid printer builds the whole assembly at once. The video below shows it in action, and we’ve got to say it’s pretty slick.

Sure, it’s all academic for now, with simple blinky light circuits and the like. But team this up with something like these PCB motors, and you’ve got the makings of a robotic nightmare. Or not.

Continue reading “Hybrid 3D-Printer Creates Complete Circuits, Case And All”

Simple Mechanism Gives Support For SMT Assembly

With the fine work needed for surface-mount technology, most of the job entails overcoming the limits of the human body. Eyes more than a couple of decades old need help to see what’s going on, and fingers that are fine for manipulating relatively large objects need mechanical assistance to grasp tiny SMT components. But where it can really fall apart is when you get the shakes, those involuntary tiny muscle movements that we rarely notice in the real world, but wreak havoc as we try to place components on a PCB.

To fight the shakes, you can do one of two things: remove the human, or improve the human. Unable to justify a pick and place robot for the former, [Tom] opted to build a quick hand support for surface-mount work, and the results are impressive considering it’s built entirely of scrap. It’s just a three-piece arm with standard butt hinges for joints; mounted so the hinge pins are perpendicular to the work surface and fitted with a horizontal hand rest, it constrains movement to a plane above the PCB. A hole in the hand rest for a small vacuum tip allows [Tom] to pick up a part and place it on the board — he reports that the tackiness of the solder paste is enough to remove the SMD from the tip. The video below shows it in action with decent results, but we wonder if an acrylic hand rest might provide better visibility.

Not ready for your own pick and place? That’s understandable; not every shop needs that scale of production. But we think this is a great idea for making SMT approachable to a wider audience.

Continue reading “Simple Mechanism Gives Support For SMT Assembly”

Custom Parts Feeder Aims To Keep Pace With Pick And Place

When your widgets have proven so successful that building them gets to be a grind, it might be time to consider a little mechanical help in the form of a pick and place machine (PnP). If you’re going to roll your own though, there’s a lot to think about, not the least of which is how to feed your beast with parts.

Managing the appetite of a PnP is the idea behind this custom modular parts feeder, but the interesting part of [Hans Jørgen Grimstad]’s work-in-progress project has more to do with the design process. The feeders are to support a custom PnP being built in parallel, and so the needs of one dictate the specs of the other. Chief among the specs are the usual big three: cheap, fast, and reliable. But size is an issue too insofar that the PnP could be working with dozens of component reels at once. Flexibility was another design criteria, so that reels of varied width can be accommodated.

With all that in mind, [Hans] and company came up with a pretty slick design. The frame of the feeder is made out of the PCBs that house the motors for handling the tape, and the ATmega168 that controls everything. Tapes are driven by a laser-cut sprocket driven by 3D-printed worm gears. The boards have fingers that mate up to the aluminum extrusion that the PnP will be built from, and at only a few millimeters wider than the tape, lots of feeders can be nestled together. The video below shows the feeder undergoing some tests.

Alas, this build isn’t quite done, so you’ll have to check back for the final schematics and PCB files if you want to build one for yourself. While you’re waiting, you might want to build your own pick and place.

Continue reading “Custom Parts Feeder Aims To Keep Pace With Pick And Place”

Make A Better, Spring-Loaded SMT Tape Strip Holder

Every so often, a project is worth some extra work to see if the idea can go any further. [JohnSL] has been busy doing exactly that with his spring-loaded SMT tape holder project. Having done the original with 3D printing, he has been working on designing for injection molding. This isn’t a motorized feeder, it’s still a manual tool but it is an improvement over the usual workshop expedient method of just sticking segments of tape down to the desktop. Tape is fed into the holders from one end and spring tension holds the tape firm while a small slot allows the cover tape to be guided backward after peeling. As anyone who has used cut segments of tape to manually deal with SMT parts knows, small vibrations — like those that come from peeling off the clear cover — can cause the smaller components to jump around and out of their pockets, and any length of peeled cover gets awkward quickly.

The design allows for multiple holders to mount side-by-side.

In [JohnSL]’s design, all SMT tapes sit at an even height regardless of size or tape thickness. A central support pushes up from the bottom with tension coming from a spring pulling sideways; the central support is forced upward by cams and presses against the bottom surface of the tape. As a result, the SMT tape gets supported from below with even tension and the whole assembly maintains a narrow profile suitable for stacking multiple holders side by side. The CAD files are available online along with a McMaster-Carr part number for the specific spring he used.

After working out the kinks on 3D printed prototypes, [JohnSL] decided to see if it would be feasible to design an injection molded version and made a video outlining the process, embedded below.

Continue reading “Make A Better, Spring-Loaded SMT Tape Strip Holder”

MeatBagPnP Makes You The Automatic Pick And Place

It’s amazing how hackers are nowadays building increasingly complex hardware with SMD parts as small as grains of sand. Getting multilayer PCB’s and soldering stencils in small quantities for prototyping is easier than ever before. But Pick-and-Place — the process of taking parts and stuffing them on the PCB in preparation for soldering — is elusive, for several reasons. For one, it makes sense only if you plan to do volume production as the cost and time for just setting up the PnP machine for a small run is prohibitive. And a desktop PnP machine isn’t yet as ubiquitous as a 3D printer. Placing parts on the board is one process that still needs to be done manually. Just make sure you don’t sneeze when you’re doing it.

Of course the human is the slow part of this process. [Colin O’Flynn] wrote a python script that he calls MeatBagPnP to ease this bottleneck. It’s designed to look at a row in a parts position file generated from your EDA program and highlight on a render of the board where that part needs to be placed. The human then does what a robotic PnP would have done.

A bar code scanner is not necessary, but using one does make the process a bit quicker. When you scan a code on the part bag, the script highlights the row on the spreadsheet and puts a marker on the first instance of it on the board. After you’ve placed the part, pressing the space bar puts a marker on the next instance of the same value. The script shows it’s done after all parts of the same value are populated and you can then move on to the next part. If you don’t have a bar code scanner handy, you can highlight a row manually and it’ll tell you where to put that part. Check it out in the video below.

Of course, before you use this tool you need some prior preparation. You need a good PNG image of the board (both sides if it is double-sided) scaled so that it is the same dimensions as the target board. The parts position file generated from your EDA tool must use the lower left corner of the board as the origin. You then tell the tool the board dimensions and it scales up everything so that it can put the red markers at the designated XY positions. The script works for single and double-sided boards. For a board with just a few parts, it may not be worth the trouble of doing this, but if you are trying to manually populate a complex board with a lot of parts, using a script like this could make the process a lot less painful.

The project is still fresh and rough around the edges, so if you have comments or feedback to offer, [Colin] is listening.

[Colin]’s name ought to ring a bell — he’s the hacker who built ChipWhisperer which took 2nd Prize at The Hackaday Prize in 2014. The MeatBagPnP project is a result of having worked at building increasingly complex boards manually and trying to make the process easier. In addition to the walk-through of how the script works after the break we’ve embedded his other video from three years back when he was stuffing parts — including BGA’s — the hard way and then reflowing them in a Chinese oven with hacked firmware.

Continue reading “MeatBagPnP Makes You The Automatic Pick And Place”