Computer-aided Paint Brush

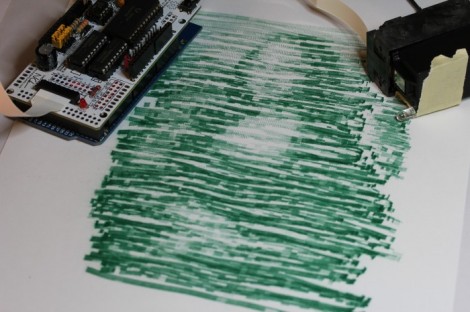
[Nirav] painted this masterpiece by hand… with a little help from a computer. He calls it the semi-automatic paintbrush because you do need to move it over the canvas by hand, but a computer decides when to dispense the ink.

He’s using a piece of hardware we looked at back in September called the InkShield that got a boost from Kickstarter. It’s an Arduino shield that drives an inkjet printer cartridge. The trick is how to know when the cartridge is in position for printing.

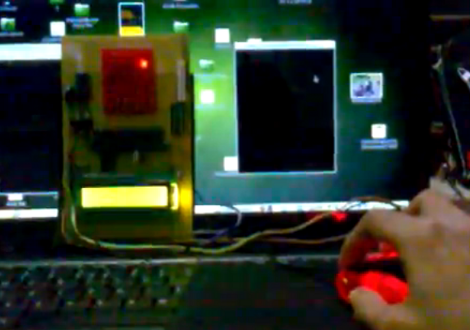
The system uses visual processing for that. [Nirav] added an IR led to the cartridge, and uses a camera to extrapolate its position. He actually reused a Python homography module which he had written for use with a projector. That setup was developed as a digital white board, but works just as well for this purpose.

He mentions that results like this won’t be featured in an art museum. But the look is unique, and we’d love to make a set of geeky thank-you notes using the technique.

An Exercise In Servo Voice Control With Android

voice-controlled-android-lock

[Shazin] had some free time on his hands, so he settled in to do something he had been meaning to for a while – learn Android programming. He went an indirect route, and ended up using the Scripting Layer for Android (SL4A), which gave him a head start on the process. Sitting in between the Android API and scripting languages such as Python, SL4A allowed him the ability to apply something he was already familiar with to the Android environment.

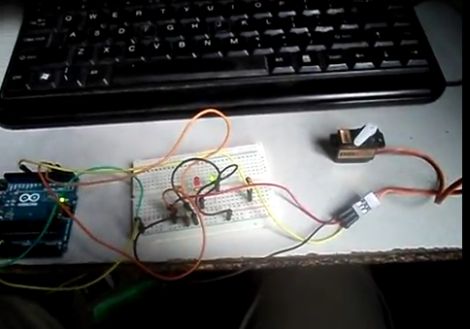
He thought it would be cool to try building a door entry system which relied on voice commands to lock and unlock. Using the Google Voice API for Android and an Arduino, he built a small Python application that allows him to toggle a servo simply by talking into his phone.

The application on his phone communicates with an Arduino over WiFi, once Google Voice has decoded the command [Shazin] is giving. The Arduino controls a servo, which in theory could control the locking mechanism on a door.

After a bit of tweaking and some added security, his proof of concept could definitely come in handy.

Check out the short video below to see [Shazin’s] voice-controlled servo in action.

Continue reading “An Exercise In Servo Voice Control With Android”

Python Powered Sprinkler System Wastes No Water

rain-gauge

One thing that annoyed [Jashua] to no end was hearing his automated sprinkler system kick on in the middle of the night, when it had rained earlier in the day. He wished that his sprinklers were a bit smarter, so he decided to give the system an upgrade.

Rather than pay hundreds of dollars for a more sophisticated automation system, he spent about $45 on supplies and scrounged together some items he had sitting around the house to make a rain-sensing module of his own.

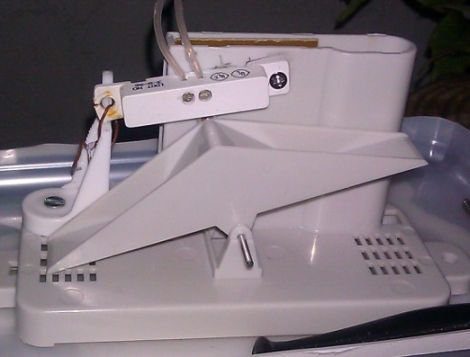
The resulting project, Pysprinklers, uses Python along with a handful of components to better manage his water usage. He got his hands on a cheap rain gauge, and modified it with a game controller and a set of magnetic surface contacts. If there has been a significant amount of rain in the last 24 hours, his system will prevent the sprinklers from turning on. Additionally, if there is rain in the forecast, the sprinklers will be delayed a bit to see if rain makes its way into the area.

We’re all for saving money (and water), so we think [Jashua’s] system looks great, especially because he ended up using a handful of things he already had on hand.

FT-2232 Bridges Python And I2C/SPI

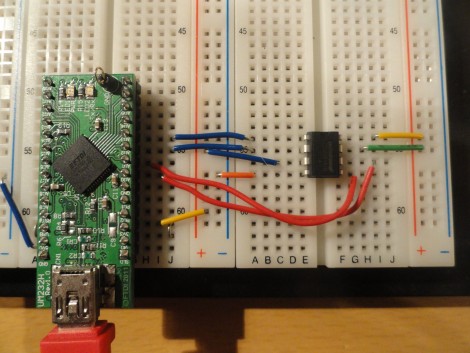
You might already have the hardware on hand to easily interface I2C and SPI devices with Python scripts on your computer. The board seen above is an FT-2232 breakout board. These chips are often used to facilitate JTAG programming via USB, but they have other features that might be useful to you as well. The chip has a Multi-Protocol Synchronous Serial Engine (MPSSE) which can speak the I2C and SPI protocols, you just need to know how to active them in your code.

[Craig] makes this easy with his MPSSE Python wrapper. Simply install his module, and you’ll be able to import all the commands you need. He demonstrates reading the data out of a 1 MB SPI flash memory chip. This could be used for a lot more, including debugging peripherals à la the Bus Pirate, or reprogramming chips to add to your projects (we’re thinking font arrays and sprites for displays, or look-up tables).

If you’re not aware, these FTDI chips were the go-to for USB support for a long time. We’ve got a guide for bit-banging using this hardware. Lately more chips have become available with USB hardware built-in. They’re quite useful and cost-effective, especially with the availability of open-source stacks like the LUFA project.

Using WebSocket With PIC Microcontrollers

[Blaise Jarrett] has been grinding away to get the WebSocket protocol to play nicely with PIC microcontrollers. Here he’s using the PIC 18F4620 along with a Roving Networks RN-XV WiFi module to get the device on the network. He had started with a smaller processor but ran into some RAM restrictions so keep that in mind when choosing your hardware.

This project was spawned after seeing the mBed feature a few days back which combined that board along with a WebSocket library and HTML5 to pull off some pretty amazing stuff. [Blaise] doesn’t have quite as much polish on the web client yet, but he has recreated the data transfer method and improved on that project by moving to the newer version 13 of WebSockets. The protocol is kind of a moving target as it is still in the process of standardization.

The backend is a server called AutoBahn which is written in python. It comes along with client-side web server examples which gave him a chance to get up and running quickly. From there he got down to work with the WebSocket communications. They’re a set of strings that look very much like HTML headers. He outlines each command and some of the hangups one might run into with implementation. After reading what it takes to get this going it seems less complicated than we thought, but it’s obvious why you’ll need a healthy chunk of RAM to pull it off.

RF Sniffing On-the-go

It’s been a while since we checked in on [Travis Goodspeed]. His latest post makes RF sniffing with the Next HOPE badge more portable by ditching the need to display data on a computer. He’s built on the work he did at the beginning of the year, replacing the FTDI chip on the badge with a Bluetooth module. Now he can use his Nokia N900 as a GoodFET terminal to not only display the packets pulled from the air, but the control the badge as well.

Previously, the client running on the computer was communicating with the badge via a serial connection. To get it working on the N900 [Travis] transitioned from using py-serial over to using py-bluez. All of the code changes are available from the GoodFET repository.

He’s got a few other tricks planned for this concept. He put in a parts order to add Bluetooth to the Girltech IM-ME. The pretty pink pager has the same radio chip on board, so adding Bluetooth connectivity will allow it to be used in the same way. There are also plans in the works to add a couple other packet sniffing protocols to the bag of tricks, including ZigBee.

Which Resistor Values Should You Order For All Circumstances?

A hard drive crash, and some other happenings that aren’t entirely clear to us, led [Devbisme] to put in a parts order. As he wanted to make the most of his shipping costs, he decided to fill out the order with parts that he’ll use eventually. He’s been working with surface mount designs and wanted to move from using resistors with 0805 packages to the 0603. Having nothing on hand, he devised a way to account for almost all standard values with the fewest number of different resistors.

That’s a mouthful, but what he actually did was figure out what combinations of resistors can best be wired in parallel to achieve a different standard resistance value. This way, if he doesn’t have a specific value he can solder one 0603 surface mount resistor on top of another one to get there. He ended up writing a Python program to best calculate this set of values. It came up with a set that lets him synthesize 159 of the 168 standard resistor values within +/- 4% using just 19 actual resistor values. His method requires anywhere from one to three resistors to get to each value. Soldering three 0603 packages on top of each other might not be the most fun, but it makes for easy parts inventory management.