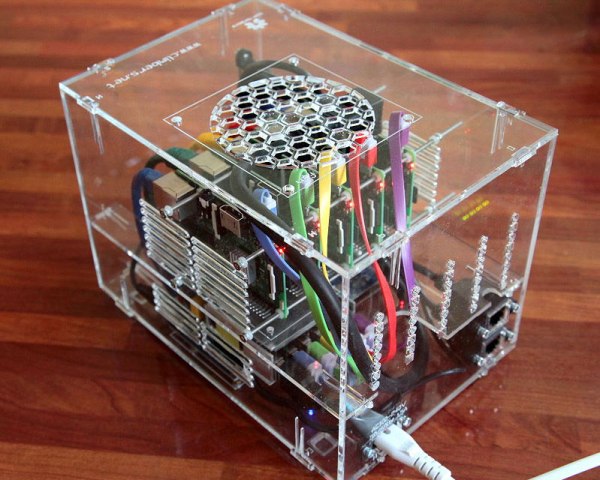
Raspberry Pi clusters are a dime a dozen these days. Well, maybe more like £250 for a five-Pi cluster. Anyway, this project is a bit different. It’s exquisitely documented.
[Nick Smith] built a 5-node Pi 3 cluster from scratch, laser-cutting his own acrylic case and tearing down a small network switch to include in the design. It is, he happily admits, a solution looking for a problem. [Smith] did an excellent job of documenting how he designed the case in CAD, prototyped it in wood, and how he put the final cluster together with eye-catching clear acrylic.
Of interest is that he even built his own clips to hold the sides of the case together and offers all of the files for anyone who wants to build their own. Head over to his page for the complete bill of materials (we didn’t know Pis were something you could order in 5-packs). And please, next time you work on a project follow [Nick’s] example of how to document it well, and how to show what did (and didn’t) work.
We were delighted at a seeing 96 MacBook Pros in a rack a couple of days ago which served as testing hardware. It’s pretty cool so see a similar exquisitely executed hack that is actually in use as a production server. imgix is a startup that provides image resizing for major web platforms. This means they need some real image processing horsepower and recently finalized a design that installs 44 Mac Pro computers in each rack. This hardware was chosen because it’s more than capable of doing the heavy lifting when it comes to image processing. And it turns out to be a much better use of rack space than the 64 Mac Minis it replaces.
Racking Mac Pro for Production
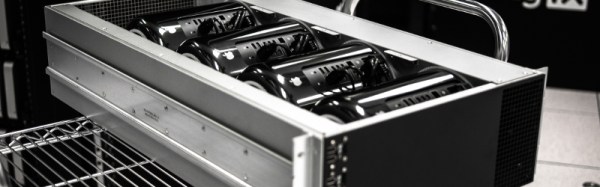
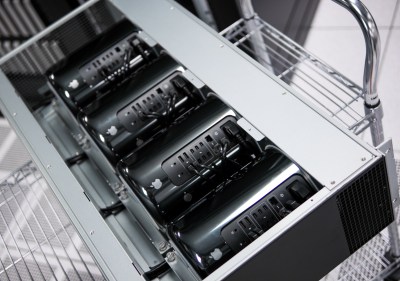
Each of the 11 R2 panels like the one shown here holds 4 Mac Pro. Cooling was the first order of business, so each panel has a grate on the right side of it for cold-air intake. This is a sealed duct through which one side of each Pro is mounted. That allows the built-in exhaust fan of the computers to cool themselves, pulling in cold air and exhausting out the opposite side.
Port access to each is provided on the front of the panel as well. Connectors are mounted on the right side of the front plate which is out of frame in this image. Power and Ethernet run out the back of the rack.
The only downside of this method is that if one computer dies you need to pull the entire rack to replace it. This represents 9% of the total rack and so imgix designed the 44-node system to deal with that kind of processing loss without taking the entire rack down for service.
Why This Bests the Mac Mini
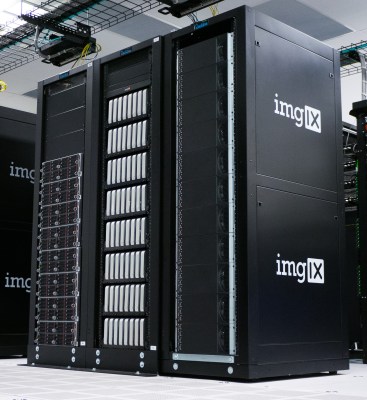
3 racks – Linux. Mac Min, Mac Pro
Here you can see the three different racks that the company is using. On the left is common server equipment running Linux. In the middle is the R1 design which uses 64 Mac Minis for graphic-intensive tasks. To the right is the new R2 rack which replace the R1 design.
Obviously each Mac Pro is more powerful than a Mac Mini, but I reached out to imgix to ask about what prompt them to move away from the R1 design that hosts eight rack panes each with eight Mac Minis. [Simon Kuhn], the Director of Production, makes the point that the original rack design is a good one, but in the end there’s just too little computing power in the space of one rack to make sense.
Although physically there is room for at least twice as many Mac Mini units — by mounting them two-deep in each space — this would have caused several problems. First up is heat. Keeping the second position of computers within safe operating temperatures would have been challenging, if not impossible. The second is automated power control. The R1 racks used two sets of 48 controllable outlets to power computers and cooling fans. This is important as the outlets allow them to power cycle mis-behaving units remotely. And finally, more units means more Ethernet connections to deal with.
We having a great time looking that custom server rack setups. If you have one of your own, or a favorite which someone else built, please let us know!
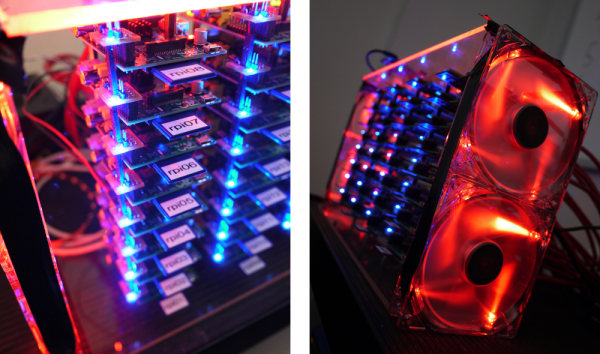
Not only did [Josh Kiepert] build a 33 Node Beowulf Cluster, but he made sure it looks impressive even if you don’t know what it is. That’s thanks to the power distribution PCBs he designed and etched. In addition to injecting power through each of the RPi GPIO headers they host an RGB LED which is illuminated in blue in the images above.
Quite some time ago we saw a 64-node RPi cluster. That one used LEGO pieces as a rack system to hold all of the boards. But [Josh] used stand-offs to create the columns of hardware which are suspended between top and bottom plates made out of acrylic. The only thing that’s unique about each board is the SD card and that’s why each has a label on it that identifies the node. These have been flashed with almost identical images; the host name and IP address are the only thing that changes from one to the next. They’ve been put in order physically so that you can quickly find your way through the rack. But functionally this doesn’t matter… put the card in any RPi and it will automatically identify itself on the network no matter where it’s located in the rack.
Don’t miss the demo video where [Josh] explains the entire setup.
[LuckyNumbrKevin] wanted an epic monitor array of his own but didn’t really have the desk real estate to pull it off. His solution was to build a three computer monitor mounting rack with a relatively small footprint.
The design started with some virtual test builds using SketchUp. Once he had it dialed in he began transferring measurements for the base onto some plywood. The rest of the parts are built using dimensional lumber. As the project shaped up he wrapped the edges of the plywood with some trim, and gave the piece a good sanding. After a few passes with a dark stain he was ready to mount the monitors he bought from Newegg.
[Kevin] left a comment in the Reddit thread about the parts cost for his design. Including the monitors, this came in under $300. That does not include the Nvidia graphics card which is capable of driving the trio.
So let’s say that you’re a developer on the Xbee team. You need to test the extremes of what the RF radio modules can do when in a large network. But in addition to numerous nodes, you also need to test the effects of distance on the radios. Since it’s not reasonable to distribute hundreds of the devices (each with their own power source) throughout town, you build a test setup like the 1 kilonode Xbee rig which the project manager, [Jared Hofhiens] is showing off.
He’s holding one blade from the rack-mounted system. Each of those squares is an Xbee module, there’s 32 etched onto the board. On the edge furthest from him there are a set of connectors which mate with the rack connectors, hooking the blade up to a set of terminal servers. These servers allow developers to ssh into individual modules. On the near side of the blade there’s a set of attenuation adjustment circuits. They allow adjustments of 0-40 dB of attenuation in 10 dB increments to adjust how strong the RF signals are, simulating distance between modules.
[Dirk] let us know about this fantastic music synthesis experimentation setup (translated). Turn your computer speakers off (to avoid the auto-playing music when every page loads) and dig into the wealth of information in this repository. Literally dozens of modules have been built and superbly mounted on a rack system. Each can be connected with other modules into an incredible number of different setups using patch wires that terminate with banana plugs.
The module enclosures themselves are made to fit in a standard 19″ rack. The front bezels were designed in CAD, with the rest of the housing made mostly of aluminum. Since each module tends to be quite small several are ganged into one rack skeleton to save space. You can see in the images above that there are as many as eight modules per rack slice.
You’ll enjoy reading about the many different sound chips that are in use here. But it doesn’t have to end there. If this has whet your appetite for your own rack-mounted system you’re in luck. The download area has schematics, board artwork, and build information for most of the modules.
[DocDawning] had a nice home network up and running, but the messy pit housing the hardware made him avoid that part of the house. In an effort to cut down on noise, and clean up the clutter, he built himself a very nice data center inside a small closet.
One of the biggest changes in the setup provides adequate cooling. He cut a vent hole into a wall shared between the closet and a hallway. This was just the right size for a few large cooling fans which suck air into the enclosed space. But cool-air intake must be accompanied by hot-air outflow so he added an exhaust vent in the ceiling. This also received a trio of big fans, and as you can see above, the integrated LEDs act as a light source for the server farm.
The final part of the plan involved machine-specific brackets mounted to the walls of the enclosure. These racks were built out of 1×1 white wood. They hold the hardware in place leaving plenty of room to run cables. The new setup even opened up enough wall space to mount power and networking hardware. Now everything has its place, and [DocDawning] can finally close the door on his noisy servers.