The latest news from the world of cheap electronics is a single board computer running Linux. It costs six dollars, and you can buy it right now. You might even be able to compile code for it, too.
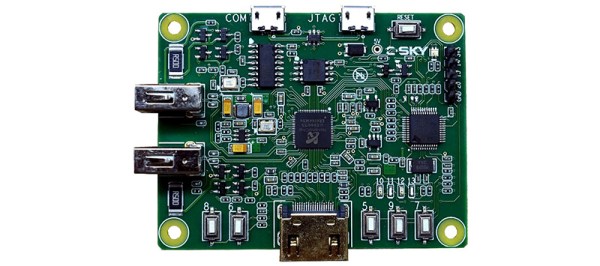
The C-Sky Linux development board is listed on Taobao as an ‘OrangePi NanoPi Raspberry Pi Linux Development Board” and despite some flagrant misappropriation of trademarks, this is indeed a computer running Linux, available for seven American dollars.
This board is based on a NationalChip GX6605S SoC, a unique chip with an ISA that isn’t ARM, x86, RISC-V, MIPS, or anything else that would be considered normal. The chip itself was designed for set-top boxes, but there are a surprising number of build tools that include buildroot, GCC and support for qemu. The company behind this chip is maintaining a kernel, and support for this chip has been added to the mainline kernel. Yes, unlike many other single board computers out there, you might actually be able to compile something for this chip.
The features for this board include 64 MB of DDR2 RAM, HDMI out (with a 1280 x 720 framebuffer, upscaled to 1080p, most likely), and a CPU running at just about 600 MHz. There are a few buttons connected to the GPIO pins, two USB host ports, a USB-TTL port for a serial console, and a few more pins for additional GPIOs. There does not appear to be any networking, and we have no idea what the onboard storage is.
If you want a challenge to get something compiled, this is the chip for you.