2023 Halloween Hackfest: Spooky Noise Maker Is Self-Contained

We just love it when y’all build off of each other’s projects. This spooky Halloween noise maker from [C.M. Herron] is no exception. But while the projects we’ve seen lately rely on external computers and/or guitar pedals to create the effects part of the build, this one has everything running on a Raspberry Pi that sits inside the box.

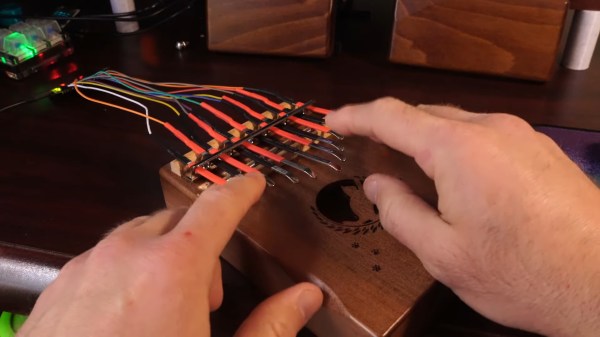
Readers of a certain vintage will recognize this as an 8-track storage box, on top of which are several noise-making objects that creak and ting and reverberate nicely. A USB microphone picks up the sounds, and by using a regular microphone instead of a piezo, [C.M.] can introduce varying levels of feedback to make the sounds even spookier.

So, how did [C.M.] make this work on a Pi 4? To put it simply, they’ve got the Reaper DAW and Windows Valhalla plugins running on top of WINE, which running on top of Box64, which is running on top of the Bullseye Pi OS. [C.M.] sure learned a lot from this build, and hopes to inspire others to build their own spooky noise boxen. Plus, they’ve already thought of ways to improve it for next year. Be sure to check it out in action after the break.

Continue reading “2023 Halloween Hackfest: Spooky Noise Maker Is Self-Contained”

Booting The Raspberry Pi 5 With An NVMe SSD

The Raspberry Pi has come a long way since its humble origins, adding faster processors and better interfaces with each new generation. Now, the Raspberry Pi 5 has a lovely new PCIe port right on board, and [Jeff Geerling] has gone right ahead and slammed in an NVMe SSD as a boot drive.

[Jeff] explains that to use an NVMe to boot, you first have to modify /boot/config.txt to enable PCIe and modify the Raspberry Pi’s boot order. Once the bootloader is appropriately configured, you can boot straight off an SSD with Raspberry Pi OS installed. To get the operating system on to an NVMe drive, he recommends cloning an existing boot volume from a microSD install.

One of the primary reasons you might want to do this is speed. NVMe drives are generally a significant cut above even the best microSD cards, both in speed and reliability. [Jeff] also notes that you can use an NVMe SSD through a PCIe switch on the Pi 5 if you so desire, but you can’t currently boot with this configuration.

It’s a great feature to have on the Pi 5, and it follows on from the earlier implementation on the Raspberry Pi Compute Module 4. Video after the break.

Continue reading “Booting The Raspberry Pi 5 With An NVMe SSD”

Driving An OLED Screen With A 6502 Single-Board Computer

Twenty years ago, if you wanted an LCD for a project, you’d probably end up with something salvaged from a mobile phone or an HD44780 character display. These days, little OLEDs can be had for a few bucks and they’ve taken the maker world by storm. [Anders Nielsen] has recently been experimenting with driving these displays from the vintage 6502 CPU, and he’s even got scrolling operation down pat.

The best part is that [Nielsen] is doing all this on a single-board computer running his own assembly code. That’s right – there’s no compilers here. It’s bare metal coding at it’s best. The build uses a 6507 chip running at 1 MHz, paired with a 6532 RIOT and just 128 bytes of RAM—a similar setup to the Atari 2600.

The video explains how the code stacks up and drives the display, achieving the scrolling effect. It makes a huge difference to usability, especially compared to chunking pages at a time to the postage stamp-sized screen. He demonstrates a legitimate usage case too, using the setup as a serial terminal for a Raspberry Pi.

The 6502 architecture still looms large in the collective consciousness; we’ve been talking about programming it in assembly for years. Video after the break.

Continue reading “Driving An OLED Screen With A 6502 Single-Board Computer”

2023 Halloween Hackfest: Haunted Keyboard Is Free From Ghosting

This may look like another DIY mechanical keyboard, but it’s hiding a secret. [Mx. Jack Nelson] has combined Halloween and keyboards in glorious, haunted fashion. Type a line, any line into this bad boy and you get a spooky, sort of cryptic response generated by AI.

Essentially, a Raspberry Pi Pico W does all the work, it handles the keyboard matrix, connects to Wi-Fi, sends the input to ChatGPT, and spits the response out on the screen wherever the cursor happens to be. Incidentally, it turns out [Mx. Jack Nelson] used ChatGPT to generate much of the CircuitPython code.

The layout is a custom 40% that is heavily influenced by the Akko 40%, with the Ctrl, Alt, and Win keys replaced by Ctrl, Cmd, and Opt. This was [Mx. Jack Nelson]’s first PCB, and you never forget your first. You don’t want to miss the demo video after the break.

Are keyboards just not spooky enough for you? Here’s a creepy baby doll that does basically the same thing.

Continue reading “2023 Halloween Hackfest: Haunted Keyboard Is Free From Ghosting”

Why The RP1 Is The Most Important Product Raspberry Pi Have Ever Made

We’ve had about a week to digest the pending arrival of the Raspberry Pi 5, and it’s safe to say that the new board from Cambridge has produced quite some excitement with its enhanced specifications and a few new capabilities not seen in its predecessors. When it goes on general sale we expect that it will power a slew of impressive projects in these pages, and we look forward with keen anticipation to its companion Compute Module 5, and we sincerely hope eventually a Raspberry Pi 500 all-in-one. It’s the latest in a line of incrementally-upgraded single board computers from the company, but we think it conceals something of much greater importance than the improvements that marked previous generations. Where do we think the secret sauce lies in the Pi 5? In the RP1 all-in-one PCIe peripheral chip of course, the chip which provides most of the interfacing on the new board. Continue reading “Why The RP1 Is The Most Important Product Raspberry Pi Have Ever Made”

2023 Halloween Hackfest: Candy Basket Sees You Coming

On Halloween, some people can’t or don’t want to open the door for various reasons. Maybe they have a cat that likes to escape every chance it gets, or maybe their favorite TV show is on during prime trick-or-treating time. Whatever the case, we think it’s perfectly acceptable to leave a bowl of candy outside the door, especially if there are electronics involved.

In this case, the bowl detects trick-or-treaters and candy eaters using an LD2410 60 GHz radar sensor and an RP2040. A light pipe shows orange when a person is detected, and switches over to green as they come closer, as if to say you may have candy now.

Nothing happens after that, but now that we think about it, it would be cool to add an MP3 decoder and a speaker to play a little witch cackle or something once they’ve had a chance to stick their hand in the bucket.

[Mike Kushnerik] actually designed the PCB a few months ago for non-Halloween purposes: some home automation projects. But then they were trying to think of something for Halloween, and this delightful light-up bucket came to mind. In addition to the RP2040 chip, there’s a 128 MB flash chip, a WS2812 LED, and a header for communicating with the radar sensor over UART. Be sure to check out the brief demo video after the break.

If you’d like to stand outside and give out candy, at least send it down a light-up slide or something.

Continue reading “2023 Halloween Hackfest: Candy Basket Sees You Coming”

Dial Up A Tune On The Jukephone

What do you do when you find a nice corded phone with giant buttons out in the wild? You could pay $80/month for a landline, use a VOIP or Bluetooth solution instead, or do something a million times cooler and turn it into a jukebox.

Now when the receiver is lifted, [Turi] hears music instead of a dial tone or a voice on the other end. But playback isn’t limited to the handset — there’s a headphone jack around back.

To listen to a track, he can either dial one in directly, or call up a random track using one of the smaller buttons below. A handy directory organizes the tunes by the hundreds, putting children’s tracks between 1-99 and the intriguing category “hits” between 900-999.

The phone’s new guts are commanded by a Raspberry Pi Pico, which is a great choice for handling the key matrix plus the rest of the buttons. As you may have guessed, there’s an DF Player Mini mp3 player that reads the tracks from an SD card. Everything is powered by a rechargeable 18650 battery.

Jukephone is open source, and you’ll find more pictures on [Turi]’s blog post. Be sure to check out the very brief build and demo video after the break.

Continue reading “Dial Up A Tune On The Jukephone”