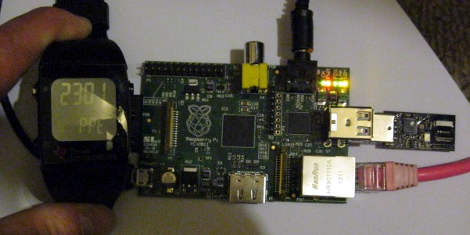
For those of us who haven’t received their Raspberry Pis yet, it may come as a bit of a shock to realize the RasPi doesn’t have an on board WiFi adapter. While the Model B RasPi has an RJ45 Ethernet plug, but the Model A must rely on USB-bound networking dongles. [Mike] over at Mitch Tech put up a great guide to using a Realtek WiFi dongle with his Raspberry Pi.
Stock, the standard Debian install recommended by the folks at Raspberry Pi has the drivers for the Realtek WiFi adapter, but no firmware. [Mike] goes over how to get the firmware for this series of WiFi adapters to keep the kernel from complaining. Interestingly, [Mike]’s instructions also work for a slew of Realtek-based wireless dongles, so the installation instructions should work for a bunch of adapters available from DealExtreme or eBay.
[Mike] also has a guide for installing Quake 3 on a RasPi. Combine these two builds and you’ve got the perfect setup for a Raspberry Pi LAN party. Anyone want to host?
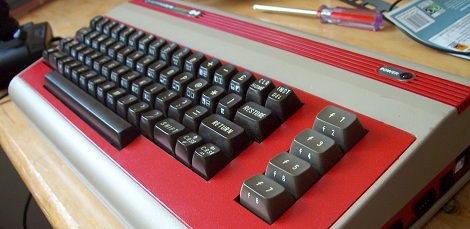
This TRS-80 Model 100 is a lot more powerful than you might think. That’s because [Karl Lunt] is using it as an enclosure for his Raspberry Pi board. Since the ARM-powered device comes sans-enclosure it’s fun to see a retro choice like this one. And having had to go out and buy a USB keyboard to use our own RPi, we appreciate [Karl’s] solution for using the original keyboard as an input device.
Above you can see that he’s using an LCD tv as the display. For now that connection is made using the composite video output, which explains the fuzzy image. To the right of the TRS-80 a standard wall wart connects to the barrel jack to provide power. [Karl] scrapped a USB cellphone charger in order to connect from the barrel jack to the micro-USB jack on the Pi board. The ribbon cable to the left lets him get at the I/O header without opening the case.
In order to use the keyboard he patched into it with a Teensy board. That connects to the USB port on the RPi, sending HID keyboard commands based on what it received from the user. We like this option as it give you the ability to pre-process keystrokes (ie: you can code your own custom macros that the Teensy will listen for). Right now the Model 100’s LCD screen isn’t hooked up but he may add that in the future.
Have you heard of the Raspberry Pi? Surprisingly enough, they’re starting to trickle into the hands of thousands of hackers, and we were fortunate to get our hands on one (second-hand since we didn’t jump in time for the initial preorder). We’ve longed for a tiny embedded option for running XBMC and this is one of the best opportunities we’ve seen yet. The Raspbmc project, created by [Sam Nazarko], is tailored to getting XBMC on the Raspberry Pi just a few minutes after it arrives in the mail. And that’s exactly what we did.
If you’re familiar with writing an image to an SD card (or any device for that matter) this is a simple process. Raspbmc is distributed as a single image file which starts up the RPi hardware, then copies itself to RAM while it downloads and installs the filesystem for the distribution. Once the card is flashed just pop it in, power up, and wait about 20 minutes until XBMC shows up on the screen. After that it’s a quick boot each time.
The good news is that its works. XBMC runs pretty fast, with just a hint of lag when loading some menus. We felt at home using the confluence skin we’re familiar with, and had no trouble setting up our samba shares to the video library. The one problem is that it won’t play any of the video files we have on hand. None of them. So we downloaded the Big Buck Bunny trailer. It wouldn’t play that either. This is all a codec issue. Although the chip used on the RPi is capable of hardware decoding MPEG2 video, the foundation didn’t license that ability. So it can’t play that format, period. With the movie trailer we tried the OGG format and that’s not currently supported, but the MOV version did play, in full 1080p without trouble.
So the verdict is, if you’re looking to get an RPi just to run XBMC you should wait. So far the package is promising. But we record ATSC video, all of which is MPEG2. If you use MakeMKV to store your DVDs on a server, that also uses MPEG2. Of course there is the option of transcoding everything. But you’ll want to be careful if you have other XBMC frontends which may not be able to play alternative encodings.
[Jake] took some cheap hardware and figured out a way to use it as a huge home automation network. He’s chose a Raspberry Pi board to connect the radio controlled power outlets to his network. He wrote about his project in two parts, the first is hacking the RC outlet controller and the second is using the Raspberry Pi to manipulate it.
These RC outlets are a pass-through for appliances that connect to mains (lamps, consumer electronics, christmas trees, etc). Often the protocol used by the cheap-as-dirt remote is difficult to work with, but [Jake] really hit it out of the part on this one. In addition to simulating button presses for up to fifteen devices on the remote, he replaced the DIP switch package. This lets him change the encoding, essentially allowing the one device to control up to 32 sets of outlets. Theoretically this lets him command 480 devices from the Raspberry Pi. Since that board is a web server it’s just a matter of coding an interface.
[Celso] bought himself a Ultimaker kit and put together a time-lapse video of him putting it together. There’s a lot of work that goes into these machines, but being able to print a nearly perfect cube on the first run is nearly magical.
How about a CNC mill, too?
The folks over at Inventables have put together a tiny CNC mill kit designed from the fruitful mind of [Edward Ford]. The Shapeoko mill is designed around the Makerslide linear bearing system, so you’re getting a lot of precision very easily. Here’s some more info on the Shapeoko
Update the firmware on your RasPi
[Hexxeh] has been playing around with the Linux images for his Raspberry Pi, so he needs to reinstall the firmware on an image quite a lot. He wrote a tool to automate this task, but it should be useful for RasPi users that want to keep kernel and firmware up to date. You can get the rpi-updater at [Hexxeh]’s GitHub.
Your robotic barista is still always on the phone
Zipwhip is a company that provides a bridge from your phone to your computer so text messages can be displayed on your desktop. To show off their tech, they created a text enabled espresso machine. Everything on this robotic barista is automatic: the cups are grabbed from a warming tray with a servo arm, coffee is automatically brewed, and the last three digits of your cell phone number are printed on the foam to identify each cuppa. Check out the video; action starts at 1:30.
Awesome reading material
If you’re looking for something to read on that fancy tablet computer of yours, here’s every issue of New Scientist from 1956 to 1985. The early 60s issues say fusion power plants are about 50 years away, so we should be just fine in a couple of years.
Since the Arduino was launched years ago, many ‘shields’ or add-on boards providing additional functionality have been released. There are hundreds of different shields, from video capture shields to touch screen shields. Now that the Raspberry Pi is out in the wild, it was only a matter of time before a RasPi to Arduino shield bridge was created.
[Omer] calls his bridge ‘Ponte’ and it allows Arduino shields to be used with the incredible horsepower of an embedded Linux system. While [Omer] originally expected to write the RasPi to Arduino software converter himself, but found WiringPi halfway through the build. Of course this build comes just a day after we saw a tutorial on controlling the GPIO pins on the RasPi, and we expect to see similar GPIO-hacking builds in the future.
Right now, the Ponte only supports Arduino Uno-sized shield, so the possibility of an all-in-one RepRap controller using the RAMPS motor driver is impossible for now. We expect that to change very quickly as more people get their RasPis delivered.
For the lucky few who have a Raspberry Pi board in their hands, you can now use the GPIO pins as a web interface (German, google translation). [Chris] is turning this magical board is turning a small device that can play 1080p video into something that can blink LEDs via the web.
The build started with an example of driving GPIO pins under Linux. [Chris] cobbled together a bit of PHP and Javascript on the Raspberry pi. Whenever he goes to the website hosted on the Pi, he’s greeted with the status and direction of a couple of expansion IO pins.
On a semi-related note, [Tony] is building a GPIO MIDI interface for his Pi. Yes, he could just get a USB to MIDI adapter and call it a day, but this is a far more professional looking solution to all the MIDI goodness the RasPi will deliver. If you’ve got any info on other RasPi breakout boards you’ve seen, send them in on the tip line.