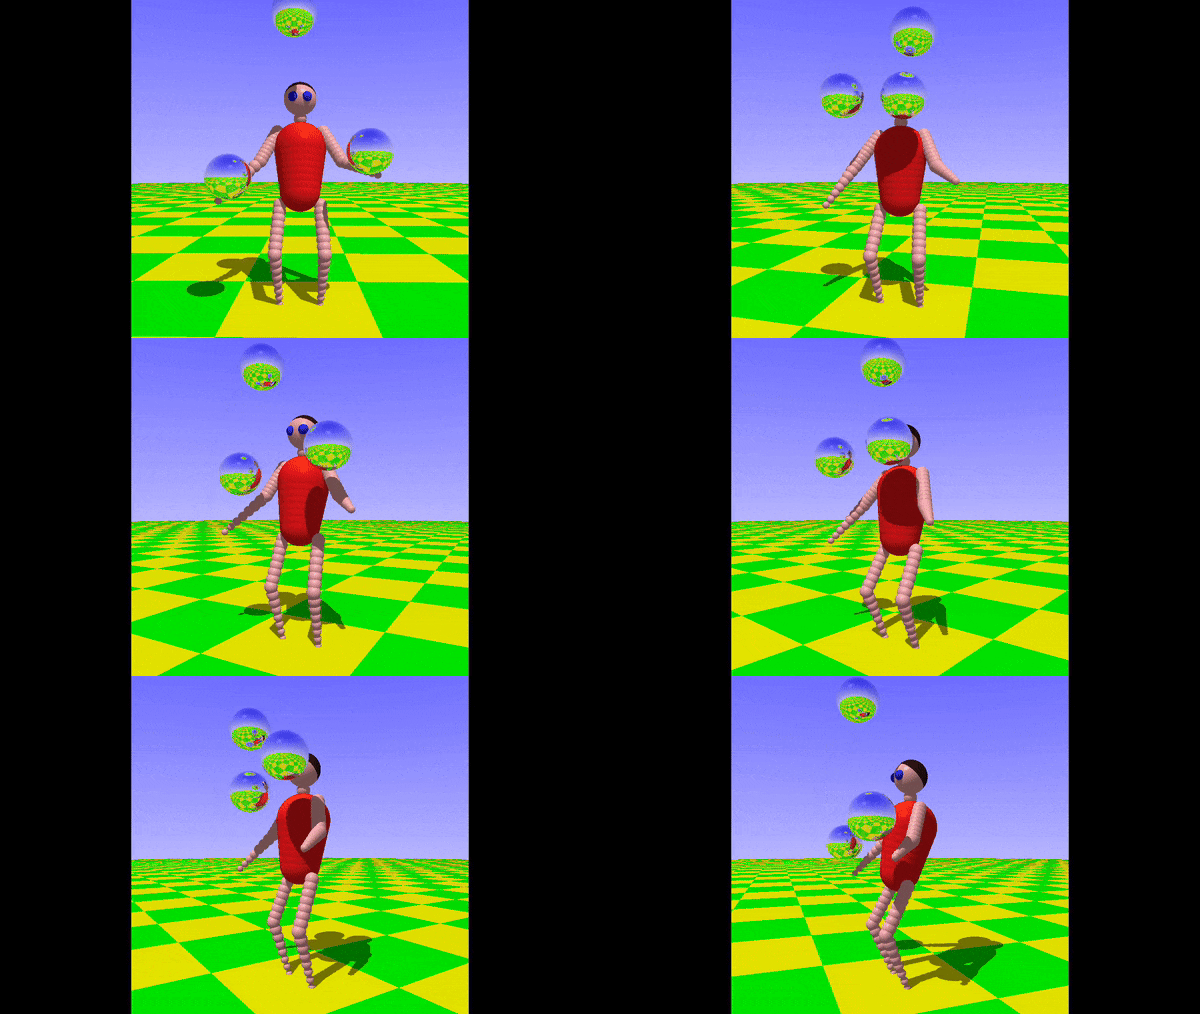
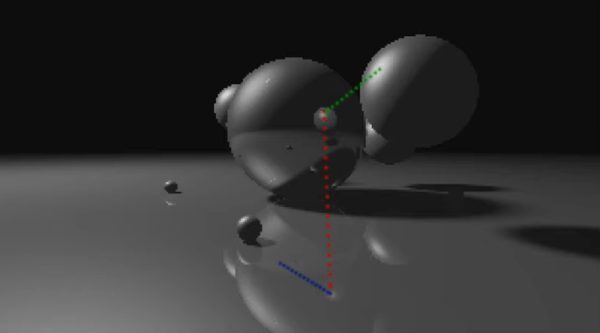
render of the Amiga juggler demo

The Juggler: In Rust

Back on the theme of learning to program by taking on a meaningful project — we have another raytracing demo — this time using Rust on the Raspberry Pi. [Unfastener] saw our previous article about writing a simple raytracer in spectrum BASIC and got inspired to try something similar. The plan was to recreate the famous juggler 3D demo, from the early days of 3D rendering on the Amiga.

The juggler story starts with an Amiga programmer called [Eric Graham] who created ssg, the first ray tracer application on a personal computer. A demo was shown to Commodore, who didn’t believe it was done on their platform, but a quick follow-up with the actual software used soon quelled their doubts. Once convinced, they purchased the rights to the demo for a couple of thousand dollars (in 1986 money, mind you) to use in promotional materials. [Eric] developed ssg into the popular Sculpt 3D, which became available also on Mac and Windows platforms, and kick-started a whole industry of personal 3D modelling and ray tracing.

Anyway, back to the point. [Unfastener] needed to get up the considerable Rust learning curve, and the best way to do that is to let someone else take care of some of the awkward details of dealing with GUI, and just concentrate on the application. To that end, they use the softbuffer and winit Rust crates that deal with the (important, yet frankly uninteresting) details of building frame buffers and pushing the pixels out to the window manager in a cross-platform way. Vecmath takes care of — you guessed it — the vector math. There’s no point reinventing that wheel either. Whilst [Unfastener] mentions the original Amiga demo took about an hour per frame to render, this implementation runs in real-time. To that end, the code performs a timed pre-render to determine the most acceptable resolution to get an acceptable frame rate, achieving a respectable 30 or so frames per second on a Pi 5, with the older Pis needing to drop the resolution a little. This goes to show how efficient Rust code can be and, how capable the new Pi is. How far we have come.

We saw another interesting rust-based raytracer a while back, which is kinda fun. We’ve also covered rust in other applications a few times, like inside the Linux kernel. Finally here’s our guide to getting started with rust, in case you need any more motivation to have a crack at this upcoming language.

A ZX Spectrum Raytracer, In BASIC

[Gabriel Gambetta] knows a few things about ray tracers, being the author of Tiny Raytracer, a raytracer written in just 912 bytes of JavaScript. As a long-time fellow sufferer of the UK-designed ZX Spectrum, could these two love affairs be merged? Could the Tiny Raytracer fit on the ZX Spectrum? In BASIC? The answer is an affirmative, albeit with our beloved speccy’s many limitations.

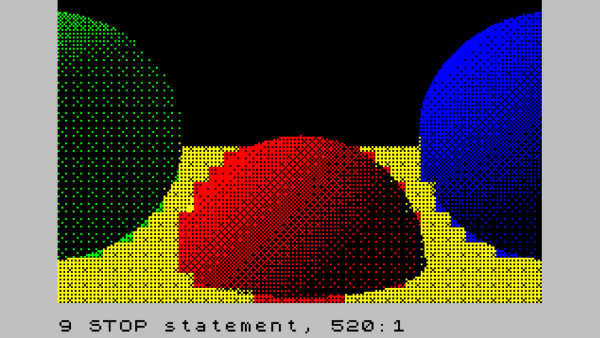
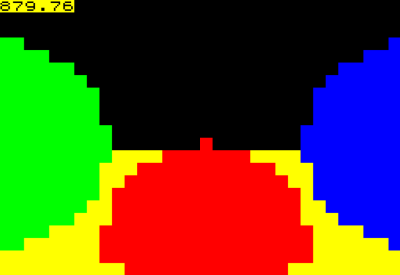
Ray tracing with only 15 primary colours

The story starts with [Gabriel]’s Computer Graphics From Scratch (CGFS) raytracer algorithms and an existing code base that was ported to the ZX Spectrum’s very limited BASIC dialect, using VSCode for editing, BAS2TAP to generate a tape image file (essentially an audio track) and executed with FUSE. With the toolchain sorted, [Gabriel] adds just enough code to deal with the ray intersection equations of a sphere, and renders a three-sphere scene to a 32×22 pixel colour image, taking a mere 15 minutes of runtime. Fellow sufferers will remember the spectrum had a 32×22 block attribute array (or colour array) with two colour values for foreground and background pixels. Each attribute block contains 8×8 pixels, each of which could be foreground (on) or background (off.) The next stage was then to expand the code to handle pixels as well as blocks, by simply expanding the raytracing to the full 256×176 resolution, and for each block simply determine the two most common colours, and run with those for the whole block. It sort of works, in a very spectrum-esq ‘attribute clash’ kind of fashion.

Continue reading “A ZX Spectrum Raytracer, In BASIC

Ray-Traced Doom Really Shines!

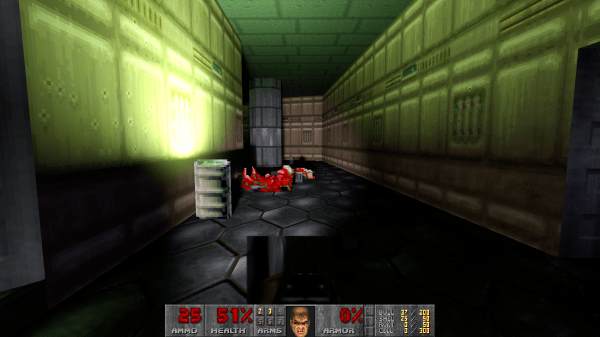
We’re huge fans of taking retro games and adding new graphics features to them, so you had to know that when [Sultim Tsyrendashiev] released his ray-traced Doom engine, we would have to cover it. Now this does break with tradition — instead of running Doom on every conceivable platform, this version requires an AMD or Nvidia ray tracing capable card. On the other hand, the spirit of Doom is certainly alive, as ray-traced Doom has already been demonstrated on the Steam Deck. Check out the video below for a demo, and come back after the break for more info.

The most exciting part of this graphical feat may be the RayTracedGL1 library that “simplifies the process of porting applications with fixed-function pipeline to real-time path tracing.” Besides Doom, there’s also been demos made of Serious Sam and Half-Life 1. There’s even experimental Linux support! We managed to compile and test it on our system, running a 6700 XT and Fedora 35 with bleeding edge Mesa. There are a few visual glitches to work out, but it’s an outstanding project so far. The only complaint we have is that it’s based on prboom, not the still-maintained GZDoom, though with enough attention who knows where the project will go. If this leaves you hungry for more, check out more retro-upgrades, or Doom on more devices.

Continue reading “Ray-Traced Doom Really Shines!”

Excel Ray Tracing With Help From C

It isn’t news that [s0lly] likes to do ray tracing using Microsoft Excel. However, he recently updated his set up to use functions in a C XLL — a DLL, really — to accelerate the Excel rendering. Even if ray tracing isn’t your thing, the technique of creating custom high-performance Excel functions might do you some good somewhere else.

We’ve seen [s0lly’s] efforts before, and you can certainly see that the new technique speeds things up and produces a better result, which isn’t especially surprising. In addition to being faster, the new routines produce more detail.

Continue reading “Excel Ray Tracing With Help From C”

Ray Casting 101 Makes Things Simple

[SSZCZEP] had a tough time understanding ray tracing to create 3D-like objects on a 2D map. So once he figured it out, he wrote a tutorial he hopes will be more accessible for those who may be struggling themselves.

If you’ve ever played Wolfenstein 3D you’ll have seen the technique, although it crops up all over the place. The tutorial borrows an animated graphic from [Lucas Vieira] that really shows off how it works in a simplified way. The explanation is pretty simple. From a point of view — that is a camera or the eyeball of a player — you draw rays out until they strike something. The distance and angle tell you how to render the scene. Instead of a camera, you can also figure out how a ray of light will fall from a light source.

There is a bit of math, but also some cool interactive demos to drive home the points. We wondered if Demos 3 and 4 reminded anyone else of an obscure vector graphics video game from the 1970s? Most of the tutorial is pretty brute force, calculating points that you can know ahead of time won’t be useful. But if you stick with it, there are some concessions to optimization and pointers to more information.

Overall, a lot of good info and cool demos if this is your sort of thing. While it might not be the speediest, you can do ray tracing on our old friend the Arduino. Or, if you prefer, Excel.

A SNES, Ray Tracing

A trick famously used by Nintendo to keep its slowly aging SNES console fresh against newer competition was to produce new games with extra support chips in the cartridge to push out hitherto-unthinkable performance. Chips such as the famous SuperFX gave us 3D polygonal graphics, but it would have been a few more years before even much faster platforms could achieve real-time ray-tracing. Nintendo may not have managed it, but here in 2020 [Ben Carter] has a SNES on his bench rendering a complex 3D ray-traced world.

Ray tracing refers to the practice of rendering a scene with accurate lighting by tracing the rays of light that go towards making each pixel. It can achieve results that even approach photorealism, but it remains an extremely computationally intensive job for any computer. To do this with a SNES he hasn’t resorted to a modern computer like the excellent Raspberry-Pi-based NES DOOM cartridge, instead he’s tried to create something that might have graced a Nintendo custom chip back in the 1990s. The tool may be a thoroughly modern DE10-Nano FPGA dev board, but what it implements could conceivably have been made as a 1990s-spec ASIC. In it are three ray tracing cores that do the work, but the final rendering is handled by the SNES itself. At 200 x 160 pixels and 256 colours it’s no graphical powerhouse, but the maximum frame rate of 30 fps makes it no slouch for the day. The video below the break supplies extra detail.

Perhaps an unexpected takeaway of the rendered scene lies in how of its era it seems. It comes from an age in which checker-board floors, mirrored balls, and azure blue skies looked so futuristic, and just before the likes of Toy Story redefined what the general public might expect from 3D rendering. If Nintendo had produced a ray-traced SNES game using a chip like this one, it would have certainly been a defining moment for gaming in that decade.

Continue reading “A SNES, Ray Tracing”

Experiments In 3D Graphics Via Excel

3D graphics were once the domain of university research groups and large, specialized computing systems. Eventually, they were tamed and became mainstream. Your phone, tablet, and home computer are all perfectly capable of generating moving 3D graphics. Incidentally, so is Microsoft Excel.

This is the work of of [s0lly], who has been experimenting wtih Excel in this way for quite some time. Starting with pseudo-3D graphics, the project then progressed to the development of a real 3D engine. Naturally, things couldn’t stop there. The next logical step was to advance to raytracing, which was pulled off with aplomb. Shiny spheres on featureless planes are par for the course here.

The graphics are necessarily basic, with resolutions on the order of 256×144. Output is by changing the individual color of the various cells of the spreadsheet. The relevant files are available on Github, for those eager to tinker with experiments of their own. We’ve seen others attempt similar work before, with [C Bel] writing a full game engine for the platform. Video after the break.

Continue reading “Experiments In 3D Graphics Via Excel”