We’ll admit it, in an era when you can get a four channel digital storage oscilloscope with protocol decoding for a few hundred bucks, it can be hard not to see the appeal of analog CRT scopes from decades past. Sure they’re heavy, harder to use, and less capable, but they just look so cool. Who could say no to having one of these classic pieces of gear on their bench?
 [Cody Nybo] certainly couldn’t. Despite the fact that he already has a digital scope, he couldn’t pass up the chance to add a Bell & Howell Schools Model 34 from circa 1973 to his collection. It needed a bit of TLC before it could be brought back into service, but now it’s all fixed up and ready to put in some work. Not bad for a piece of gear with nearly a half-century on the clock.
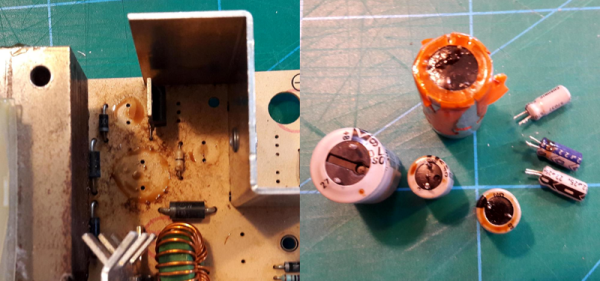
The restoration of the Model 34 was aided by the fact that [Cody] got the original manual and schematics for the scope in the deal, which he was kind enough to scan and upload for the rest of the class to enjoy. Those of you who have worked on older electronics can already guess where the scope needed the most love: all the capacitors needed to be swapped out for fresh ones. He also found a few resistors that were out of spec, and the occasional bad solder joint here and there.
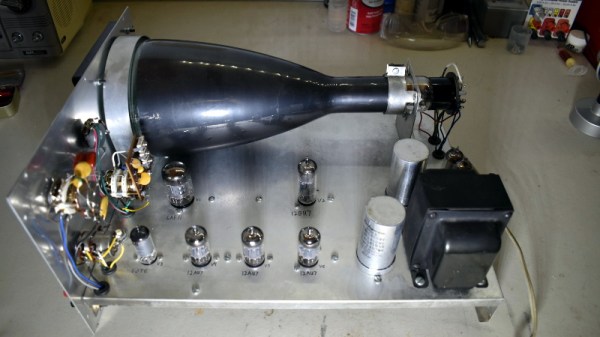
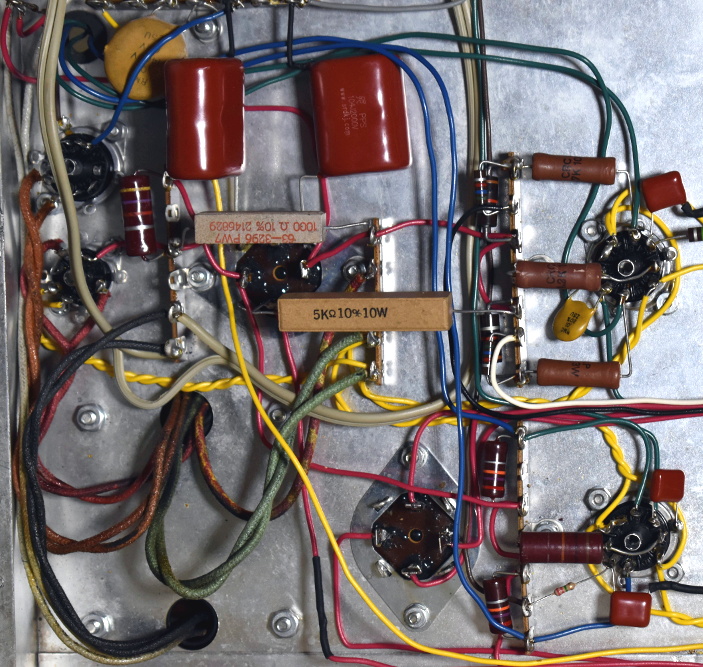
Even if you’re not looking to repair your own middle-aged oscilloscope, his pictures of the inside of Model 34 are fascinating. The scope was sold as a kit, so the construction is surprisingly simple and almost entirely point-to-point. Of course, there’s something of a trade-off at work: [Cody] says it won’t display much more than 2.5 MHz before things start getting wonky. But then again, that’s a more than reasonable frequency ceiling for audio work and most hobbyist projects.
Oscilloscopes have come a long way since the days when they had to draw out their readings on a piece of paper. While newer devices have all but buried the classic analog scope, a beauty like this would still have a place of honor in our lab.