A Laser Audio Transmitter

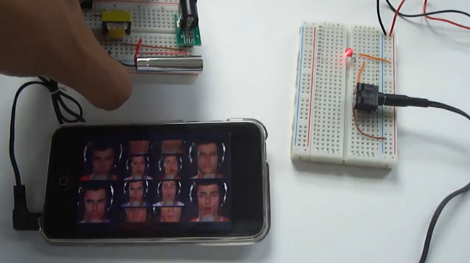
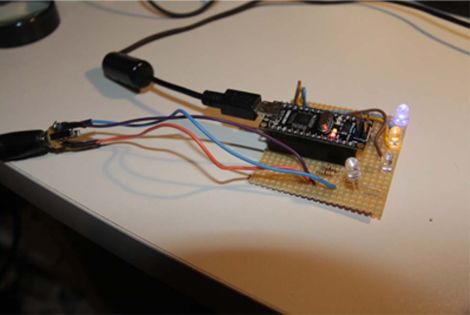
Here’s a way of transmitting audio that makes it virtually impossible for someone else to listen in. Instead of sending radio waves bouncing all over creation, this uses the focused light of a laser to transmit audio. In the image above you can see the silver cylinder which houses the laser diode. It is focusing the beam on a light dependent resistor to the right which looks almost like a red LED due to the intensity of the light.

The simplicity of this circuit is fascinating. On the receiving end there is no more than the LDR, a 1.5V power source, and a headphone jack. The transmitter is not much more complicated than that. It includes an audio output transformer which boosts the resistance of the audio signal. This increase in resistance ensures that the laser diode modulates enough to affect the LDR on the receiving end. The transmitter uses a 3.3V supply. Check out the video after the break to hear the high quality of audio coming through the setup.

Once you’re done playing around with the transmitter you might try turning the laser into a remote control for your stereo.

Continue reading “A Laser Audio Transmitter”

Hackaday Links May 9th 2012

Homecut – CNC Cutting Directory

homecut

So you have a CNC machine that you use as a hobby, but would like to do some actual work on the side? Or maybe you have an idea you’d like made. Homecut is a map directory where you can maybe hook up with the right person.

The Curta Mechanical Calculator

curta calculator

As [leehart] mentioned in our comments section, the Curta mechanical calculator is a truly ingenious piece of engineering. A quick Google search should find all kinds of information on it, but this article could be a good place to start for some mechanical hacking inspiration!

Luxman Amplifier DAC Upgrade

nand-dac

[R. Barrios] wasn’t happy with using the sound card for his HTPC setup, so decided to add a DAC module onto his reciever. The resulting audio quality was very good, and the build came out quite clean.  Check it out if you’re thinking of a hack-upgrade to your stereo equipment.

3D Printable Tilt-Shift Adapter

tilt-shift-lens

A tilt-shift lens a neat piece of equipment that is used to make a large scene look like they were miniatures. It’s a cool effect, but professional lenses to do this can cost thousands of dollars. This Instructable tells you how to go about printing your own. For more info on the technique itself, check out this Wikipedia article.

New 3D Printer on the Block

3d-printer

If you would like to take the plunge into 3D printing, but are looking for somewhere to get a parts kit, the [ORD Bot Hadron 3D Printer] may be worth a look.  The build quality looks great, and the price for the mechanical components is quite reasonable at $399. You’ll need to provide the electronics and extruder. Thanks [comptechgeek]!

DIY Amplifier Minder Turns Off Your Stereo When You Forget

arduino_receiver_minder

[zmashiah] has a nice Nova tube amplifier in his living room, and he often forgets to turn it off once he’s done listening to music. He feels guilty when this happens, as it not only shortens the lifespan of his stereo, but it’s not exactly the greenest behavior either. Rather than let his receiver idle any longer, he built a simple device that automatically turns it off when he forgets.

He wired an Arduino to the line level output of the receiver, sampling the audio every two seconds. When five minutes pass without an audio signal, the Arduino sends an IR command to the receiver, turning it off.

He says he’s aware that it might be overkill to use an Arduino for this application, but that he would rather fork out an extra dollar or two instead of spending hours poring over AVR assembly code. While we’re all for efficiency, we can’t exactly argue with that logic – time is money!

[zmashiah] is kind enough to include his schematics as well as the code for his project, so be sure to check it out if you occasionally forget to turn off your IR-enabled appliances.

Adding Wireless Controls To Vintage Stereo Equipment

marantz_wifi_remote_control

[Jean] was shopping around for a vintage stereo receiver, and happened upon a broken, but repairable Marantz 4240. After getting things back to working order, he thought it would be great if he could use his iPhone to remotely control the unit (PDF Writeup, Schematics and Code).

He scrounged around for parts, and after locating a PIC and a handful of parts from old copiers and printers, he got down to business. He etched some custom boards to house electronic bits, then strapped motors to the volume and source selection knobs. He also rigged up the push button power switch on the receiver, using a small servo and a bit of string.

Now, he can control everything using his iPhone, which communicates with the stereo over WiFi. While the power, volume knob, and input selector can be triggered remotely, he still has the ability to tweak any of these items manually if desired.

We think that this is a great way to add modern amenities to vintage electronics, without ruining the aesthetics of the components. Don’t take our word for it though, check out the video demonstrations [Jean] but together after the jump.

Continue reading “Adding Wireless Controls To Vintage Stereo Equipment”

Control LED Lighting With An Old Stereo Receiver

stereo_controlled_home_lighting

[Marklar] needed an IR receiver for a project he was working on, and his local electronics store was fresh out. He dug through his junk pile and found an old stereo receiver, so he decided to pull the IR module from it before tossing it out. Once he had it taken apart, he figured that he could utilize the wide array of electronic components he found inside, and set off to start a new project.

The control panel housed the components which interested him most of all. Using an Arduino, he was able to easily interface with the rotary encoders as well as the buttons, giving him a cheap and easy way to control his home lighting system. With a bit of programming, he was able to map lighting presets to various buttons, as well as use the rotary encoder to control the LEDs’ brightness and color. As an added bonus, he kept the IR receiver intact and can control his setup wirelessly as well.

Check out the video we have embedded below to see his scavenged control system at work.

[via HackedGadgets]

Continue reading “Control LED Lighting With An Old Stereo Receiver”

RF Robot Controlled From A Terminal Window

This robot can be controlled from the terminal window of your computer. You can see a manilla-colored board mounted between the wheels. This is the RF receiver which has quite a long antenna that we’ve cropped out to get a better look at the bot itself. [Ashish] picked up an RF transmitter/receiver pair for about $4 and after the break you can watch him walk us through the method he’s using for control.

First off, he had to find a way to interface the transmitter with his computer. He decided to use an Arduino because sending data to it from the computer is as simple as writing to /dev/ttyUSB0. The Arduino sketch just listens for incoming characters on the serial connection and pushes them over the RF transmitter.

We like his development methods. In the video he shows the command syntax used to drive and stop the robot. Once he figured that out he wrote a shell script to send the bot on a preprogrammed square path. From there a bit more coding would give him real-time control which could be extended to something like a web-based interface for smartphone control.

Oh, and if you’re wondering about the bot itself it’s a kit robot which normally uses IR control. [Ashish] upgraded to RF since it doesn’t require line-of-sight to work.

Continue reading “RF Robot Controlled From A Terminal Window”

Radios Without Power Sources

[Goodhart] is sharing his process for building a couple different AM radios. It’s surprising how few components he’s using; the first build is just a germanium diode, some wire, and a piezo earpiece. But it strikes us that both of the radios he gives build instructions for have no power source. We’re also amused by the process of selecting the station. His example uses 770 AM, and requires you to take the wire and place it up in a tree with the two ends about 1216 feet apart. We think there’s something a bit off with the math, but with that much conductor to start with there might be enough induced current for you to actually hear something come out the piezo. We don’t think we’ll be trying this anytime soon, but we’d like to hear comments from those of you who do (or already have).