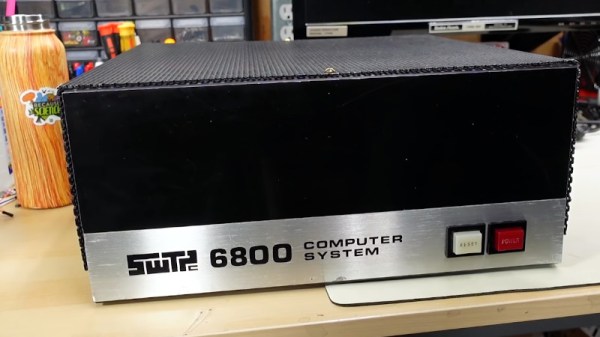
If you read about the history of personal computing, you hear a few familiar names like Microsoft, Apple, and even Commodore. But there were a host of companies that were well known and well regarded back then that are all but forgotten today. Godbout computing, Ohio Scientific, and Southwest Technical Products (SWTP). SWTP is probably best remembered for having a relatively cheap printer and “TV typewriter”, but they also made a 6800-based computer and [Adrian] takes us inside of one.
The 6800 was Motorola’s entry into the microprocessor fray, competing with the Intel 8080. The computer came out scant months after the introduction of the famous Altair 8800. Although the Altair is often credited as being the first hobbyist-grade computer, there were a few earlier ones based on the 8008, but the Altair was the first to be successful.
 The SWTP was notable for its day for its blank appearance. Most computers in those days had lots of switches and lights. The SWTP has a blank front with only a power switch and a reset button. A ROM monitor let you use the machine with a terminal. For about the same price as a bare-bones Altair that had no interfaces or memory, you could pick one of these up with most of the extras you would need. The memory was only 2K, but that was 2K more than you got with an Altair at that price point.
The $450 sounds fairly cheap, but in the early 70s, that was a lot of lawns to mow. Of course, while you’d need to add memory to the Altair, you’d have to add some kind of terminal to the SWTP. However, you’d wind up with something more usable but the total bill was probably going to approach $1,000 to get a working system.
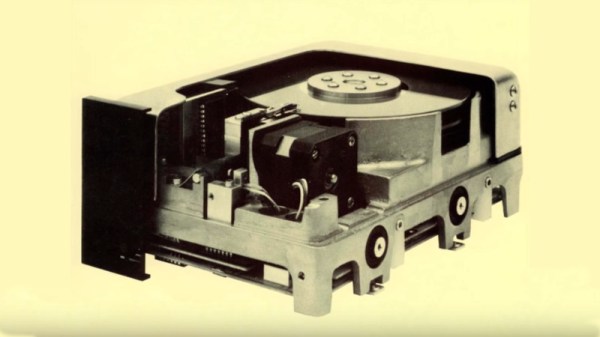
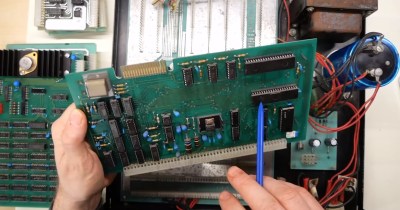
Inside the box were some old-fashioned-looking PC boards and connectors that will look familiar to anyone who has been inside 1970s gear. Will it work? We don’t know yet, but we hope it does. [Adrian] promises that will be in the next video.
It is amazing how far we’ve come in less than 50 years. A postage-stamp sized $10 computer now has enough speed and memory to emulate a bunch of these old machines all at once. The SWTP has been on our pages before. A lot of these old machines and companies are all but forgotten, but not by us!
Continue reading “A Close Look At A Little Known 8-bit Computer” →