How Good Are The Head(amame) 3D Printed Headphones?

3D printing lets the average maker tackle building anything their heart desires, really, and many have taken to using the technology for audio projects. Printable speaker and headphone designs abound. The Head(amame) headphones from [Vector Finesse] are a design that combines 3D printed parts with hi-fi grade components to create a high-end listening experience. [Angus] of Maker’s Muse decided to try printing a set at home and has shared his thoughts on the hardware.

Printing the parts has to be done carefully, with things like the infill settings crucial to the eventual sound quality of the final product. Using a properly equipped slicer like CURA is key to getting the parts printed properly so the finer settings can be appropriately controlled. The recommendation is to print the pieces in PETG, which [Angus] notes can be difficult to work with, and several prints were required to get all the parts made correctly.

Assembly is straightforward enough with kits available with all the fasteners and electronic parts included. Subjectively, [Angus] found the sound quality to be impressive, with plenty of full bass and clearly defined highs. Overall, it’s a positive review in the areas of comfort and sound quality.

Detractors will note that the kit of parts costs over $100 USD alone, and that after hours of work and printing, the user is left with a set of headphones made out of obviously 3D-printed parts. It seems destined to be a product aimed at the 3D printing fanbase. If you want a set of headphones you can customise endlessly in form and color, these are ideal. If you prefer the fit and finish of a consumer-grade product, they may not be for you.

It’s a good look at a design sure to appeal to a wide set of makers out there. We’ve seen 3D printing put to good use in this realm before, too. Video after the break.

Continue reading “How Good Are The Head(amame) 3D Printed Headphones?”

Hands-On: MNT Reforms The Laptop

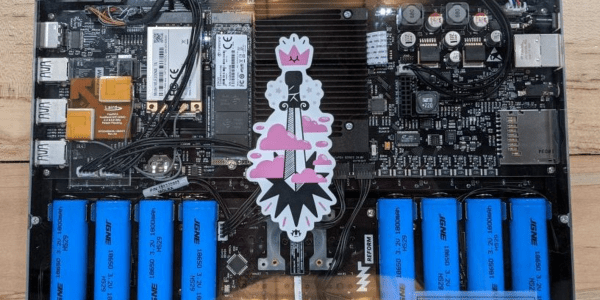
When we met our contact from MNT in the coffee shop, he was quietly working away on his laptop. Jet black and standing thick it was like an encyclopedia that didn’t quite blend in with the sea of silver MacBook lookalikes on the surrounding tables. After going through all the speeds and feeds we eagerly got our 64 piece driver kit out to open it up and see what made this marvel tick, but when the laptop was turned over it became clear that no tools were needed. The entire bottom of the machine was a single rectangle of transparent acrylic revealing everything from sharp white status LEDs on the bare mainboard to individual 18650 LiFePO4 battery cells in a tidy row. In a sense that’s the summary of the entire product: it’s a real laptop you can use to get work done, and every element of it from design to fabrication is completely transparent.

a view of the inside of a MNT Reform laptop, showing screen and keyboard
The MNT Reform

The device pictured here is called the Reform and is designed and manufactured by MNT, a company in Berlin, Germany (note MNT stands for MNT, it’s not an acronym). The Reform is a fully open source laptop which is shipping today and available via distribution through Crowd Supply. If the aesthetic doesn’t make it clear the Reform is an opinionated product designed from the ground up to optimize for free-as-in-freedom: from it’s solid metal chassis to the blob-free GNU/Linux distribution running inside.

We’re here to tell you that we’ve held one, it’s real, and it’s very well built.

Continue reading “Hands-On: MNT Reforms The Laptop”

Review And Teardown Of Economical Programmable DC Power Supply

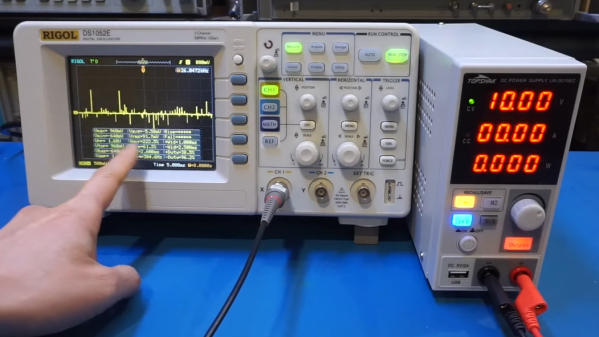
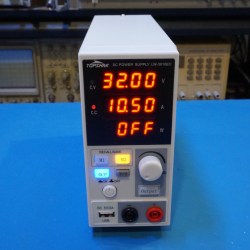
[Kerry Wong] isn’t afraid to get his hands dirty, and is always more than willing to open things up and see what makes them tick. This time, he reviews and tears down the Topshak LW-3010EC programmable DC power supply, first putting the unit through its paces, then opens it up to see how it looks on the inside.

The Topshak LW-3010EC is in a family of reasonably economical power supplies made by a wide variety of manufacturers, which all share many of the same internals and basic construction. This one is both programmable as well as nice and compact, and [Kerry] compares and contrasts it with other power supplies in the same range as he tests the functions and  checks over the internals.

Overall, [Kerry] seems pleased with the unit. You can watch him put the device through its paces in the video embedded below, which ends with him opening it up and explaining what’s inside. If you’ve ever been curious about what’s inside one of these power supplies and how they can be expected to perform, be sure to fire up the video below the page break.

Speaking of power supplies, most of us have ready access to ATX power supplies. They are awfully capable pieces of hardware, and hackable in their own way. Our own Jenny List will tell you everything you need to know about the ATX power supply, and how to put it to new uses.

Continue reading “Review And Teardown Of Economical Programmable DC Power Supply”

Review: Battery Spot Welders, Why You Should Buy A Proper Spot Welder

Making battery packs is a common pursuit in our community, involving spot-welding nickel strips to the terminals on individual cells. Many a pack has been made in this way, using reclaimed 18650 cells taken from discarded laptops. Commercial battery spot welders do a good job but have a huge inrush current and aren’t cheap, so it’s not uncommon to see improvised solutions such as rewound transformers taken out of microwave ovens. There’s another possibility though, in the form of cheap modules that promise the same results using a battery pack as a power supply.

With a love of putting the cheaper end of the global electronic marketplace through its paces for the entertainment of Hackaday readers I couldn’t resist, so I parted with £15 (about $20), for a “Mini Spot Welder”, and sat down to wait for the mailman to bring me the usual anonymous grey package.

Continue reading “Review: Battery Spot Welders, Why You Should Buy A Proper Spot Welder”

Starlink: A Review And Some Hacks

I could probably be described as a SpaceX enthusiast. I catch their launches when I can, and I’ve watched the development of Starship with great interest. But the side-effect of SpaceX’s reusable launch system is that getting to space has become a lot cheaper. Having excess launch capacity means that space projects that were previously infeasible become suddenly at least plausible. One of those is Starlink.

Starlink is SpaceX’s satellite Internet service. Wireless and cellular internet have helped in some places, but if you really live out in the sticks, satellite internet is your only option. And while satellite Internet isn’t exactly new, Starlink is a bit different. Hughesnet, another provider, has a handful of satellites in geostationary orbit, which is about 22,000 miles above the earth. To quote Grace Hopper, holding a nearly foot-long length of wire representing a nanosecond, “Between here and the satellite, there are a very large number nanoseconds.”

SpaceX opted to do something a bit different. In what seemed like an insane pipe dream at the time, they planned to launch a satellite constellation of 12,000 birds, some of them flying as low as 214 mile altitude. The downside of flying so low is that they won’t stay in orbit as long, but SpaceX is launching them significantly faster than they’re coming down. So far, nearly 1,600 Starlink satellites are in orbit, in a criss-crossing pattern at 342 miles (550 km) up.

This hundred-fold difference in altitude matters. A Hughesnet connection has a minimum theoretical latency of 480 ms, and in reality runs closer to 600 ms. Starlink predicts a theoretical minimum of under 10 ms, though real-world performance isn’t quite that low yet. In the few weeks I’ve had the service, ping times have fallen from mid-60s down to 20s and 30s. The way Starlink works right now, data goes up to the closest satellite and directly back to the connected ground station. The long-term plan is to allow the satellites to talk directly to each other over laser links, skipping over the ground stations. Since the speed of light is higher in a vacuum than in a fiber-optic cable, the fully deployed system could potentially have lower latency than even fiber Internet, depending on the location of the endpoint and how many hops need to be made.

I got a Starlink setup, and have been trying out the beta service. Here’s my experience, and a bonus hack to boot.

Continue reading “Starlink: A Review And Some Hacks”

Popping The Hood On The Flux Beamo Laser Cutter

While the K40 has brought affordable laser cutting to the masses, there’s no question that it took a lot of sacrifices to hit that sub-$400 price point. There’s a reason that we’ve seen so many upgrades and improvements made to the base model machine, but for the price it’s hard to complain. That being said, for users who don’t mind spending a bit more money for a more complete out-of-the-box experience, there are other options out there.

One of them is the beamo, from FLUX. [Frank Zhao] recently picked up one of these $1,900 USD laser cutters because he wasn’t thrilled with the compromises made on the K40. Specifically, he really liked the idea of the internal water cooling system. Oddly enough, something about using a garden hose and buckets of water to cool the laser seemed off-putting. Luckily for us, he’s got a technical eye and the free time necessary to do a teardown and objective analysis of his new toy.

The short version of the story is that [Frank] is not only happy with the results he’s getting, but finds the machine to be well designed and built. So if you’re looking for a rant, sorry. But what you will find is a methodical look at each subsystem of the beamo, complete with annotated pictures and the kind of technical details that Hackaday readers crave.

We especially like his attempts to identify parts which might be difficult to source in the future; it looks like the CO2 laser tube might be proprietary, but everything else looks fairly jellybean. That includes the Raspberry Pi 3B that’s running the show, and the off-the-shelf touch screen HDMI display used for the interface. [Frank] did note that FLUX was unwilling to give him the credentials to log into the Pi and poke around, but with direct access to the SD card, it’s not like that will stop anyone who wants to get in.

In a way, laser cutters are in a similar situation today to that desktop 3D printers were in a few years ago. The cheap ones cut so many corners that upgrades and fixes are almost a necessity, and building your own machine is often less expensive than buying a commercial offering with similar specs. While the beamo is still a bit too expensive for the average hobbyist, it’s good to see machines of this caliber are at least coming down out of the 5 figure range.

Review: SanErYiGo SH72 Soldering Iron

When the Miniware TS100 first emerged from China nearly three years ago, it redefined what we could expect from a soldering iron at an affordable price. The lightweight DC-powered temperature controlled iron brought usable power and advanced features in a diminutive package that was easy in the hand, a combination only previously found in much more expensive soldering stations. All this plus its hackability and accessible hardware made it an immediate hit within our community, and many of us have adopted it as our iron of choice.

A surprise has been that it has attracted no serious competitors of a similar type, with the only iron mentioned in the same breath as the TS100 being Miniware’s own USB-C powered TS80. Perhaps that is about to change though, as before Christmas I noticed a new Chinese iron with a very similar outline to the TS100. Has the favourite finally generated a knock-off product? I bought one to find out. Continue reading “Review: SanErYiGo SH72 Soldering Iron”