What happens when you want to integrate a Raspberry Pi into some kind of project that gets turned on and off with mains voltage? Do you power the Pi separately, or make a UPS for it?
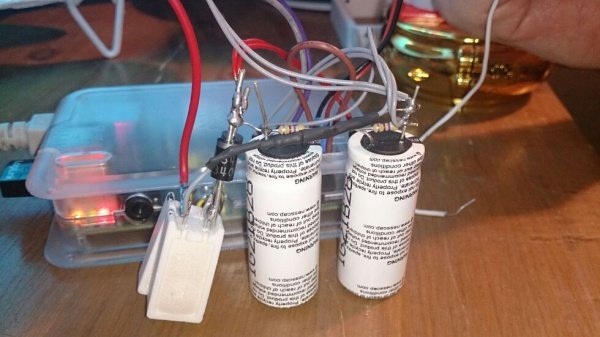
[Lutz Lisseck] decided he wanted to turn his ambient-lamp (Rundbuntplasma) on and off with only the main power switch in his Hackerpsace. He could build a traditional UPS using a battery pack (it’s only 5V after all!) but decided to take it a step further. He picked up a pair of 50F supercapacitors. This way his UPS would last longer than his Pi would! The caps store just enough power that when the main supply is cut, a GPIO notices, tells the Pi, and it begins a shutdown sequence lasting about 30 seconds.
While [Lutz] is using two 2.7V supercapacitors, he mentions it would be a lot cheaper to use a step-up converter instead of putting them in series — but he had the caps on hand so decided to use both.
If you need it to last a bit longer, you could make one with rechargeable batteries…