Cat Feeder Depends On RFID To Keep The Peace At Dinnertime

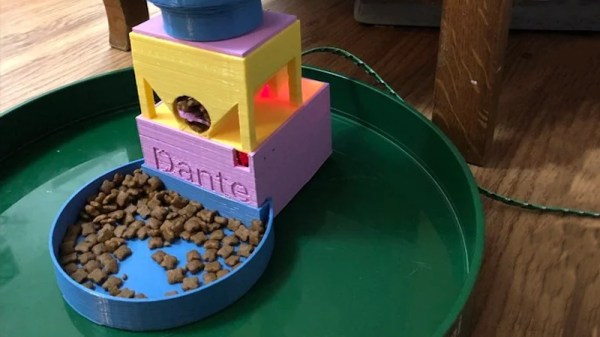
Anyone with more than one cat can tell you that the joy mischief they bring into your life is much more than twice that of a single cat. And if those felines have different dietary needs, you can end up where [Benjamin Krejci] found himself, which resulted in this fancy RFID cat feeder.

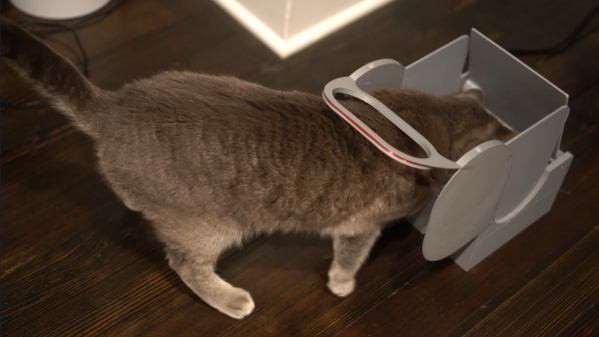
For a little backstory, [Ben]’s furry friends [Luna] and [Fermi] have vastly different eating styles, with the former being a grazer and the latter more of a “disordered eater,” to put it politely. [Fermi] tends to eat until she vomits, which is fun, and muscles her pickier sister away from the bowl if there’s anything left in it. [Ben]’s idea was to leverage [Luna]’s existing RFID chip, which he figured would be a breeze. But the vet-inserted chip is designed to be read by a high-power reader directly in contact with the cat’s skin, which made reliably reading the chip a challenge.

Several round of design iteration resulted in the current configuration, with a large antenna coil poised above and behind the food dispenser. [Luna] has no choice but to put the back of her neck and shoulder blades almost directly in contact with the coil, which makes it easier to read the 134.2-kHz chip with a long-distance RFID module. If [Luna]’s chip is found, the lid on the food bowl opens gently and quietly, so as not to spook the mild-mannered cat. The lid stays open as long as [Luna] is in place thanks to some IR sensors, but as soon as she backs out, the lid comes down to keep [Fermi] from gorging herself.

Hats off to [Ben] for working through the problem and coming up with what looks like a fine solution. We suppose he could have tried something easier like weighing the two cats to distinguish between them, but this seems like a cleaner solution to us.

Printable, Castable Feeders Simplify Pick-and-Place Component Management

It goes without saying that we love to see all the clever ways people have come up with to populate their printed circuit boards, especially the automated solutions. The idea of manually picking and placing nearly-microscopic components is reason enough to add a pick and place to the shop, but that usually leaves the problem of feeding components to the imagination of the user. And this mass-production-ready passive component feeder is a great example of that kind of imagination.

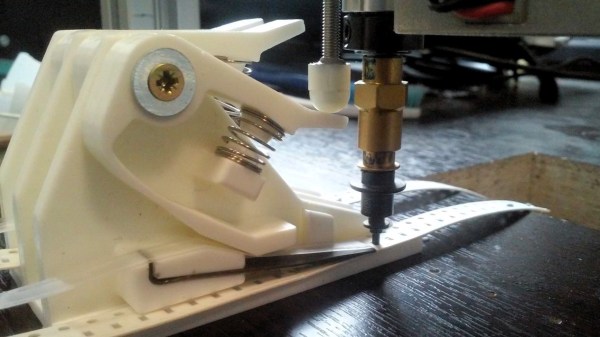
Almost every design we’ve seen for homebrew PnP component feeders have one of two things in common: they’re 3D-printed, or they’re somewhat complex. Not that those are bad things, but they do raise issues. Printing enough feeders for even a moderately large project would take forever, and the more motors and sensors a feeder has, the greater the chance of a breakdown. [dining-philosopher] solved both these problems with a simple design using only two parts, which can be resin cast. A lever arm is depressed by a plunger that’s attached to the LitePlacer tool, offset just enough so that the suction cup is lined up with the component location on the tape. A pawl in the lower arm moves forward when the tool leaves after picking up the part, engaging with the tape sprocket holes and advancing to the next component.

[dining-philosopher] didn’t attack the cover film peeling problem in his version, choosing to peel it off manually and use a weight to keep it taut and expose the next component. But in a nice example of collaboration, [Jed Smith] added an automatic film peeler to the original design. It complicates things a bit, but the peeler is powered by the advancing tape, so it’s probably worth it.

Continue reading “Printable, Castable Feeders Simplify Pick-and-Place Component Management”

A Ploopy Pick And Place

A fair number of hackers reach that awkward age in their careers – too old for manual pick and place, but too young for a full-fledged PnP machine. The obvious solution is to build your own PnP, which can be as simple as putting a suction cup on the Z-axis of an old 3D-printer. Feeding parts into the pick and place, though, can be a thorny problem.

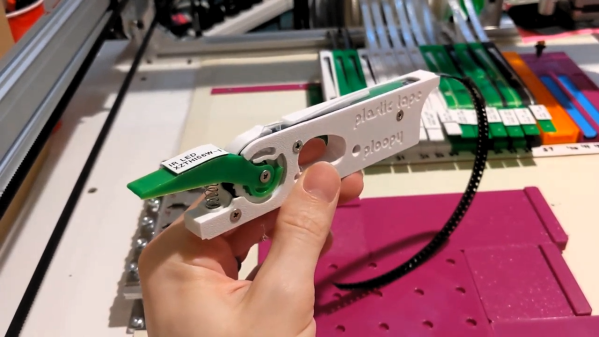
Or not, if you think your way through it like [Phil Lam] did and build these semi-automated SMD tape feeders. Built for 8-mm plastic or paper tapes, the feeders are 3D-printed assemblies that fit into a rack that’s just inside the work envelope of a pick and place machine. Each feeder has a slot in the top for the tape, which is advanced by using the Z-axis of the PnP to depress a lever on the front of the case. A long tongue in the tape slot gradually peels back the tape’s cover to expose a part, which is then picked up by the PnP suction cup. Any machine should work; [Phil] uses his with a LitePlacer. We like the idea that parts stay protected until they’re needed; the satisfyingly clicky lever action is pretty cool too. See it briefly in action in the video below.

It looks like [Phil] built this in support of his popular Ploopy trackball, which is available both as a kit and fully assembled. We think the feeder design is great whether you’re using PnP or not, although here’s a simpler cassette design for purely manual SMD work.

Continue reading “A Ploopy Pick And Place”

A Simple Auger Pet Feeder

Pet feeders are a popular maker project. One can speculate that this shows the great self-confidence common to the maker set, who are willing to trust their own work to keep their animal companions alive for many days at a a time. [Darren Tarbard] is one such maker, who put together this simple auger build.

The project consists of a hopper for dry pet food, into which a screw auger is inserted. Both parts are 3D printed, making them easy to produce at home for the average maker. The build was designed specifically around the parts [Darren] had to hand, namely a 28BYJ-48 stepper motor, which is charged with turning the auger. Running the show is an Arduino, which can be run with whatever suitable timing code is necessary to feed the particular pet in question. There’s also a remixed version that adds a larger food storage dish on top for longer periods of unattended operation, created by [szuchid].

It’s a basic build, but one that would be readily achievable by most makers with little more than some junkbox components and a roll of filament. Of course, if your pet prefers wet food, you might need a different design. Video after the break.

Continue reading “A Simple Auger Pet Feeder”

This Arduino Is Feeding The Fishes

Fish are easy to keep as pets, requiring little more than regular feeding to keep them happy in the short-to-medium term. If you’re going on holiday, it can be nice to know that your pets are being taken care of, but finding someone to take on the chore can be hard. [Trevor_DIY] doesn’t need to worry about that, however – he’s built an automatic feeder to handle the job.

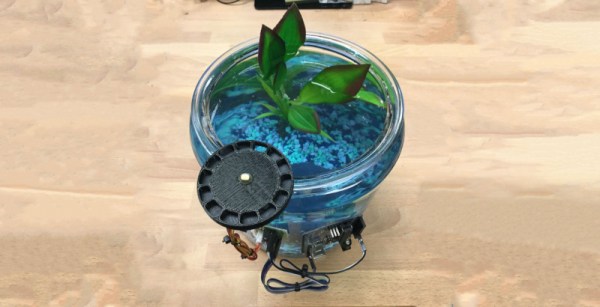
The build uses an Arduino Uno as the brains, with the only additional hardware required being a stepper motor and driver. The stepper motor drives a 3D printed wheel, with 14 slots – each one holding one meal for the fish. This allows the feeder to deliver two meals a day for a full week before requiring attention.

The feeder is configured to feed a breakfast meal, then a dinner meal 8 hours later, and then wait 16 hours before breakfast comes around again. Rather than use a real-time clock, this is simply handled with the Arduino’s built in delay function. While it isn’t super accurate, this should be close enough over a week to keep the fish alive. We’d be interested as to just how far it drifts over time.

Overall, it’s a quick and tidy way to keep the pets going without a lot of fuss. Pet feeders are a popular project, as they solve a common problem faced by owners the world over; this one can even handle wet cat food. Video after the break.

Continue reading “This Arduino Is Feeding The Fishes”

This Arduino Feeds The Dog

Part of the joy of owning a dog is feeding it. How often do you get to make another living being that happy? However, sometimes you can’t be there when your best friend is hungry. [El Taller De TD] built an auto dog feeder using an Arduino and stepper motor. The video and links are in Spanish, but if your Spanish is rusty, YouTube’s caption autotranslation isn’t bad and Google Translate can help you with the web site.

The electronics are reasonably simple: an Arduino, a Bluetooth module, and a stepper motor driver. Mechanically, the motor and some PVC pipe are all you need. There’s a small phone application to drive the Bluetooth using App Inventor.

Continue reading “This Arduino Feeds The Dog”

Active Strain Relief For 3D-Printer Filament

Buying 3D-printer filament is little like eating potato chips: you can’t stop at just one. You start with basic black PLA, then you need a particular color for a special project, then you start experimenting with different plastics, and before you know it, you’ve got dozens of reels lined up. Trouble is, unless you move the in-use reel right over the printer, the filament can get a bit unruly as the printer sucks it up. What to do?

How about building an active strain relief system for your filament collection? That what [Daniel Harari] chose to do, and we have to say that it looks pretty slick. The idea is to keep the filament slack before it enters the printer’s extruder no matter where the reel is positioned relative to the printer. The active bit is a little like a low-force extruder, using a couple of pinch rollers from an old 2D-printer to pay out filament when needed. A clever sensor, consisting of a 3D-printed funnel and a copper wire contact loop, detects when the printer has taken up all the slack in the filament and triggers a payout from the feeder. In a nice touch, the feeder motor is controlled by a couple of 555s rather than a microcontroller. The short clip below shows the feeder being triggered and paying out a little more slack.

In the final analysis, this is just another in a long series of filament management projects, from dry-boxes to filament meters to end-of-spool alarms. It may be overkill, but [Daniel] put a lot of thought into it, which we always appreciate.

Continue reading “Active Strain Relief For 3D-Printer Filament”