Automated Programming And Testing Jig Built With Raspberry Pi

[Doug Jackson] makes word clocks, and he must be doing quite a bit of business. We say that because he put together a programming and test bed for the clock circuit boards.

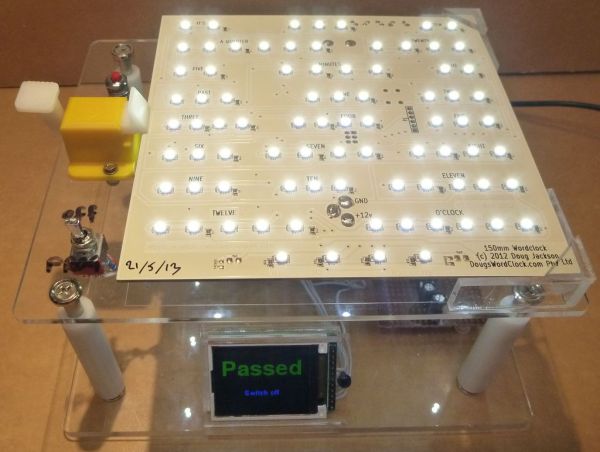
This is a great example to follow if you’re doing any kind of volume assembly. The jig lets the populated PCB snap into place, making all the necessary electrical connections. This was made possible by a package of goods he picked up on eBay which included rubber spacers to separate the board from the acrylic mounting plate, pogo pins to make the electrical connections, and a spring-loaded board clamp seen to the left in this image.

The switch in the lower right connects power to the board and pulls a Raspberry Pi GPIO pin high. The Python script running on the RPi polls that pin, executing a bash script which programs the ATmega169 microcontroller using the GPIO version of AVRdude. We looked through his Python script and didn’t see code for testing the boards. But the image above shows a “Passed” message on the screen that isn’t in his script. We would wager he has another version that takes the hardware through a self test routine.

We first saw one of [Doug’s] word clocks back in 2009 and then again a few months later. The look of the clock is fantastic and it’s nice to see the project is still going strong.

Raspberry Pi Used To Build A Smart Television

In the title of his post [Donald Derek] calls this a Google TV you can build yourself. That’s certainly an over-reach. But the project is still a very impressive smart television built using a Raspberry Pi.

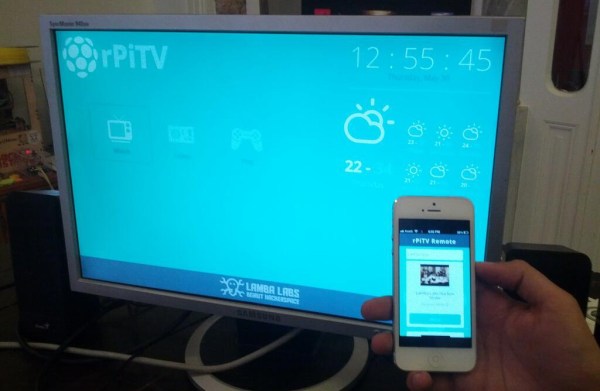
The open source project starts with the Rasbian OS, an RPi version of Debian Linux. Functionality is built up by installing Chromium to display webpages, a script to download YouTube videos, and OMXPlayer to play videos including 1080P HD content. The image above shows the smart phone controller for the system. This is provided by a Node.js configuration that manages communication between the remote and the RPi board.

On the one hand we love that this is open source. On the other, it’s not going to be able to tap into a lot of the content which makes a Google TV so valuable. For instance, you won’t be able to watch Netflix because that service doesn’t work on Linux systems. But you should be able to watch browser-based content like Hulu.

Alarm Clock Uses Raspberry Pi To Poll Google Calendar

rpi-google-calendar-alarm-clock

We know a lot of people love using their smart phone as a bedside alarm clock. The problem is that a mobile phone is mobile by nature and eventually you’ll forget to put it in the bedroom one night. That’s why we like the solution that [Devon Bray] has chosen. He set up his Raspberry Pi as an alarm clock that is set using Google Calendar.

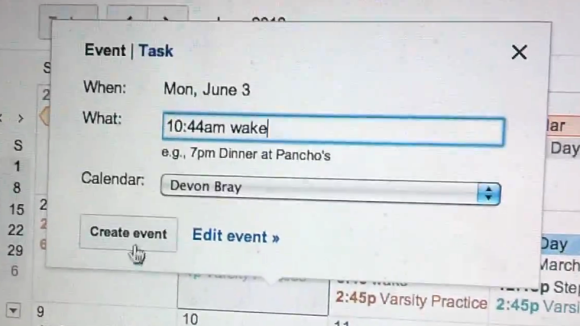
The setup which he shows off in his video is quite simple. The Raspberry Pi is connected to a set of powered computer speakers. It plays a song whenever an appointment called “wake” comes up on his Google Calendar. This is accomplished by using the Google Data APIs Python Client Library (isn’t that a mouthful?).

This only scratches the surface of what is possible. With this in place you could easily add LEDs to the room for a sunrise alarm. But if you’d prefer a more bare-bones hardware side of things that’s possible too.

Continue reading “Alarm Clock Uses Raspberry Pi To Poll Google Calendar”

Hackaday Links: Sunday, June 2nd, 2013

hackaday-links-chain

Who knew you could build your own digital computer out of paperclips? EMSL did a great feature on the guide which was published in 1968.

Trying to keep your Raspberry Pi from overheating? Make it log its core temperature on the web.

[Lennart] must be some kind of Eagle CAD guru. Check out these PCBs that incorporate his logo in a very artsy way.

No need for a tripod when you can just strap the video camera to your safety glasses for some POV project videos.

Turn your Pogoplug E-02 into a Shairport (Airplay clone) music hub. Just follow this guide which installs Arch Linux and all the supporting packages you need.

We don’t have the background to judge the quality of this build. But you have to admit it’s pretty neat to see a radio telescope built using a tin can and an umbrella.

Dead rodent email: get a notification every time your mouse trap springs.

LED Mortar Board Battles Suns Brightness With 21W Of Power

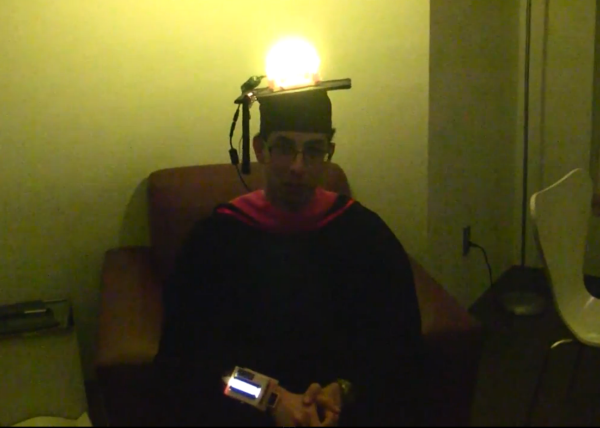
[Jeremy Blum] aimed to be the brightest student at his Master’s graduation ceremony this spring. He designed an LED rig for his mortar board which should battle the sun’s intensity by using up to 21 watts of power. But he didn’t stop with eye-catching intensity. while he was at it he also included some interactive features so the guy behind him has a way to keep from going blind.

One thing that really caught our eye is the 3D printed parts he generated for the project. There’s a nice mounting plate for the LED side of things, and a wrist-mounted enclosure for the Raspberry Pi board. Wait, why does he need an RPi to drive some LEDs? We already mention interactivity which is facilitated by the Pi acting as a WiFi hotspot. Connect to the access point and choose a color. If you’re in the seat behind [Jeremy] you’ll want to choose black! All of this and is explained in his video presentation.

Continue reading “LED Mortar Board Battles Suns Brightness With 21W Of Power”

Raspberry Pi Helps With 2.4GHz Home Automation

Wanting to extend the capabilities of the radio frequency devices in his home [Kalle Löfgren] turned a Raspberry Pi into an RF control hub. We’ve seen some of his home automation work in the past. In his media room he built a universal remote base station which used the same RF board as in this project. The main difference is that before he went with an AVR microcontroller and this time he’s upgrade to a Raspberry Pi board.

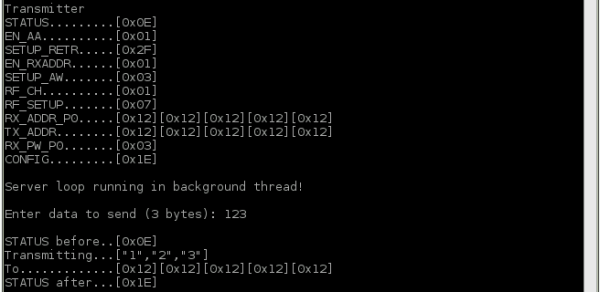
The RPi brings a lot more to the table. Notably, the scripting (whose output is shown above) and networking features. His radio board is an nRF24L01 which he talks to via the SPI protocol. The Raspberry Pi has no problem talking to SPI devices through its GPIO header. [Kalle] just needed to do a bit of setup to configure the pin modes.

A Python script lets him sent commands using his keyboard, but this can also be automated. Combine that with the TCP server script he wrote and it opens up the a wide range of configurations to switch or talk to any device operating on the 2.4 GHz band.

HP16500B Logic Analyzer Controlled With RS-232 And More

hp16500b-logic-analyzer

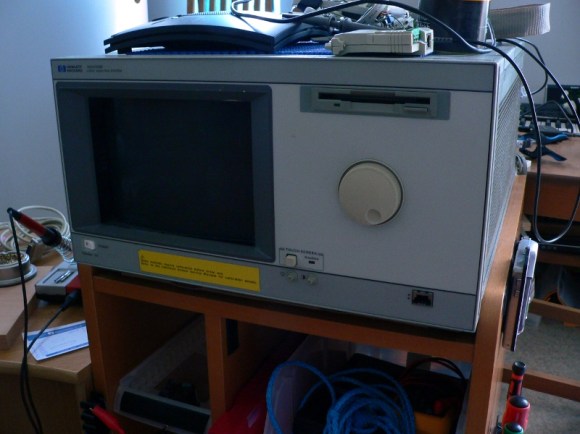
We’re pretty spoiled these days in that hobby electronics has made a lot of cool tools available on a budget. It’s hard to think of a better example than a logic analyzer, which you can get for a day or two of pay. Consumer-level devices just didn’t exist until a few years ago. [Jouko S] has this HP16500B industrial grade logic analyzer in his shop. It’s from the early 1990’s and it’s got a ton of features. Grabbing a still functional yet super-old model used to be the only way for hobbyists. But one thing you won’t find on it is the ability to connect it to your USB port to get screen captures. Younger readers might not recognize the slot at the top for magnetic media called a floppy disk which is the in-built way of recording your sessions. He set out to find an easier way to get color screen captures and ended up adding RS-232 control to the old hardware.

There is a 25-pin port on the back of the old hulk. But it is a female connector and he didn’t have the adapters on hand to make it work with his serial-to-USB converter. During development he used a breadboard and solder-tail connector to patch into the necessary signals. This was all hooked up to a Raspberry Pi which he planned to dedicate to the system. It worked, and he was able to use an interactive terminal for the rest of his sleuthing. With much trial and error he figured out the commands, and wrote some Python code for the Pi side of the equation. He can now pull color screenshots with ease thanks to the utilities available in the Python Imaging Module.