Hackaday Prize Entry: An SD Card Arduino

About a year ago, Intel announced they’d be launching a new platform stuffed into an SD card. Imagine – an entire computer packaged into an SD card, with nine whole pins for power and I/O. Cooler heads prevailed, the Intel Edison was launched, but the idea stuck; why can’t you fit an Arduino in an SD card?

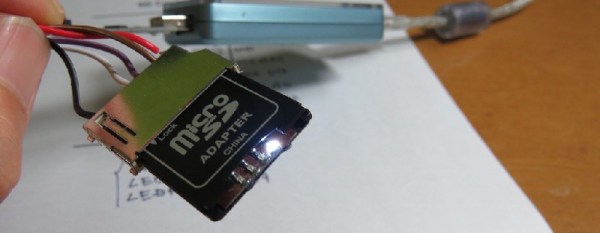
[kodera2t] found out there’s no real reason why you can’t put a small microcontroller inside an SD card. For his Hackaday Prize entry, he created the SDuino, and it’s exactly what it says on the tin: an ATMega328p stuffed into a microSD adapter.

Unlike the other microcontroller stuffed in an SD card platform — the Electric Imp, [kodera] is, for the most part, respecting the standard pinout for SD cards. The MISO and MOSI signals are reversed, of course, one of the grounds on the SD pinout is tied to an analog input pin on the microcontroller, and the chip select on the SD pinout is ignored completely. Other than that, it’s the closest you’re going to get to an SD card with a microcontroller.


The 2015 Hackaday Prize is sponsored by:

Manual Data Recovery With A Hex Editor

Let’s say you use an SD card-base portable audio recorder for work – doing an interview, perhaps. Things go well until one day, you turn the recorder off before stopping the recording. Without pressing that big red Stop button, the file doesn’t close, and you’re left with a very large 0kB file on the SD card. How do you get it back?  There are tools that will do it for you, but they cost money. You can do it yourself with a hex editor, though, and it’s actually pretty easy.

The software required for this feat of data recovery is Roadkil’s Disk Imager to dump all the bits on the SD card to an image file, the free version of ISO Buster to show the block addresses and length of each file, and the hex editor of your choice. The process starts as simply an experiment for hot to create an MP3 file by cutting and pasting bits into a hex editor. A good file was found in the hex editor, copied to a new file, and played. Everything works so far; great.

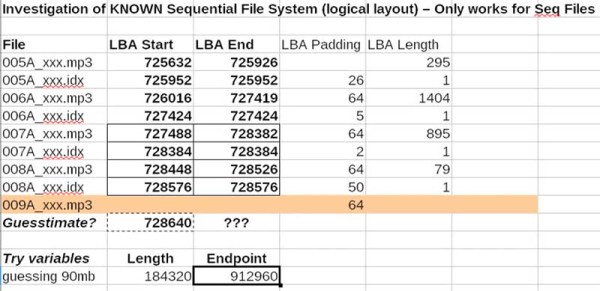
For the actual data recovery, a spreadsheet was created to make an educated guess as to where the lost file should be. Starting at this address, about 90MB of data was copied into a new hex editor window. This is where the recovery hit a snag. Because the SD card was plugged into a Mac before, a bunch of data was written on the card. This went into the first available place on the disk, which just happened to be the header of the lost MP3 file.

That’s not a problem; there’s already the header from an MP3 file sitting in a hex editor from the first experiment to see if this was possible. By copying a few hundred bytes to the front of the lost file, the file was corrected just enough that an MP3 player could reconstruct the file.

It’s not perfect – the first fifty seconds of the interview was garbled. The rest of the interview was saved, though, and that’s much better than losing the entire thing. Thanks [Lewin] for sending this one in.

Continue reading “Manual Data Recovery With A Hex Editor”

File Sharing In Your Pocket

The idea of a pirate box is pretty simple. All you need is a tiny Linux system with a WiFi adapter, a bit of storage space, and the software that will allow anyone to upload a few files to the server and an interface that will let anyone on the network download those files. In practice, though, a pirate box is a mess of wires and power adapters – not the pocketable device a WiFi file sharing box should be.

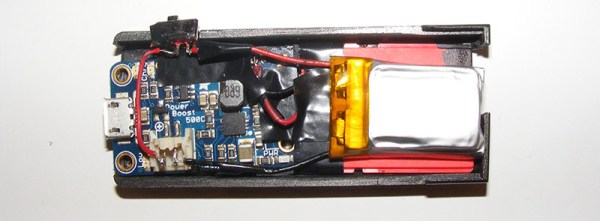
[Chris] came up with a much smaller file sharing beacon. It’s not based on a router; instead, [Chris]’ build uses an ez Share WiFi microSD adapter. It’s a device meant to push pics taken by a digital camera up to the Internet, but by configuring the software just so, up to five users can connect to the adapter and pull files down from a microSD card. The build only requires putting power to the correct pins. A LiPo battery and charge controller takes care of this problem.

There are a few shortcomings to this project – [Chris] doesn’t know how to upload files to the device. Maybe someone sufficiently clever can figure out how to make that work. Still, if you’re ever in a situation where you’d like to share some files with people in the same building, this is the device you need.

Thanks [Jake] for the tip.

Raspberry Pi Backup Scripts

Raspberry Pi

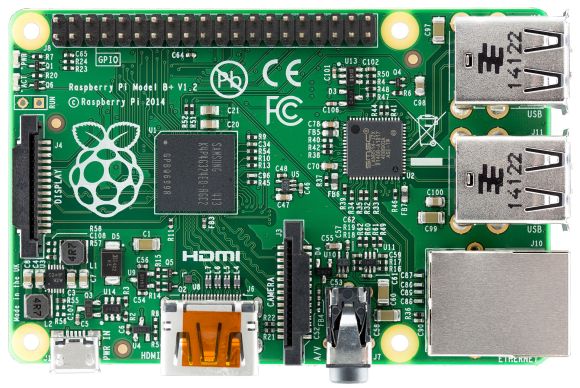
[Matthew’s] recent blog post does a good job explaining the basics of the Raspberry Pi’s file system. The Linux operating system installed on a Pi is generally installed on two different partitions on an SD card. The first partition is a small FAT partition. All of the files on this partition are used for the initial booting of the Pi. This partition also includes the kernel images. The second partition is the root file system and is generally formatted as ext4. This partition contains the rest of the operating system, user files, installed programs, etc.

With that in mind you can deduce that in order to backup your Pi, all you really need to do is backup all of these files. [Matt] has written some scripts to make this a piece of cake (or pie). The first script will simply copy all of the files into a gzipped archive. You can save this to an external SD card, USB drive, or network share.

The second script is perhaps more interesting. This script requires that you have one free USB port and a USB SD card reader. The script will automatically format the extra SD card to contain the two critical partitions. It will then copy the “boot” files to the new boot partition and the root file system files to the new SD card’s root partition. When all is said and done, you will end up with an SD card that is an exact copy of your current running file system.

This can be very handy if you have multiple Pi’s that you want to run the same software, such as in a Pi cluster. Another good example is if you have spent a lot of time tweaking your Pi installation and you want to make a copy for a friend. Of course there are many ways to skin this cat, but it’s always fun to see something custom-built by a creative hacker.

Reverse Engineering A NAND Flash Device Management Algorithm

unsoldered flash chip

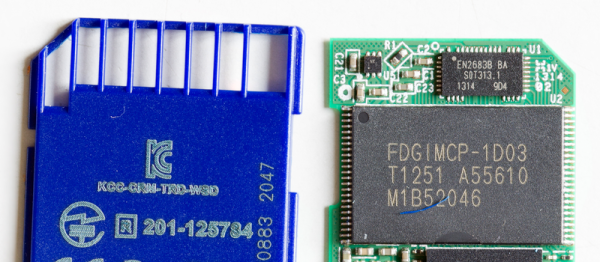
Put your hand under you chin as here comes a 6 months long jaw-dropping reverse engineering work: getting the data back from a (not so) broken SD card. As you can guess from the picture above, [Joshua]’s first step was to desolder the card’s Flash chip as the tear-down revealed that only the integrated SD-to-NAND Flash controller was damaged. The flash was then soldered on a breadboard so it could be connected to a Digilent Nexys-2 FPGA board. [Joshua] managed to find a similar Flash datasheet, checked that his wire-made bus was reliable and generated two 12GiB dump files on his computer.

In order to extract meaningful data from the dumps he first had to understand how SD-to-NAND controllers work. In his great write-up he provides us with a background of the Flash technology, so our readers can better understand the challenges we face with today’s chips. As flash memories integrate more storage space while keeping the same size, they become less reliable and have nifty problems that should be taken care of. Controllers therefore have to perform data whitening (so neighboring blocks of data don’t have similar content), spread data writes uniformly around the flash (so physical blocks have the same life expectancy) and finally support error correcting codes (so damaged bits can still be recovered). We’ll let our users imagine how complex reverse engineering the implementation of such techniques is when you don’t know anything about the controller. [Joshua] therefore had to do a lot of research, perform a lot of statistical analysis on the data he extracted and when nothing else was possible, use bruteforce…

The In-Circuit SD Card Switch

SDISP

For nearly every problem, it’s possible to engineer a solution, even if you’re dealing with an extraordinarily niche problem that might only apply to yourself. [Joel] wanted to be able to program the microSD card in his BeagleBone with a new bootloader or file system without removing the SD card from the target board. This is a peculiar requirement, and it’s highly doubtful a product or even a circuit exists for such a function. This meant [Joel] would need to roll his own board to accomplish the task.

The board is remarkably simple, housing a single microSD socket, two expansion headers for a microSD sniffer for a computer and an embedded board, an FTDI header, and a pair of 4-bit multiplexer/demultiplexers. The operation of the device is fairly straightforward: send a signal down the FTDI cable, and the board switches the onboard SD card from one device to another.

[Joel] has a video of his screen that shows him pulling off in-circuit SD card reading and writing. You can check that out below.

Continue reading “The In-Circuit SD Card Switch”

Say Watt? A Talking Multimeter?

talkingMultimeter

After a request from one of his friends, [Mastro Gippo] managed to put together a talking multimeter to be used by blind persons working in electronics. He wanted a feature-rich meter that had serial output, and recalling this Hackaday article from a few years back led him to find a DT-4000ZC on eBay, which has serial output on a 3.5mm jack. (Though, he actually recommends this knockoff version which comes with excellent documentation).

It turns out there aren’t many talking meter options available other than this expensive one and a couple of discontinued alternatives. [Mastro Gippo] needed to start from scratch with the voice synthesizer, which proved to be as easy as recording a bunch of numbers and packing them onto an SD card to be read by an Arduino running the SimpleSDAudio library.

He found a small, battery-powered external speaker used for rocking out with music on cell phones and hooked it up to the build, stuffing all the electronics into an aluminum case. Stick around after the jump for a quick video of the finished product!

Continue reading “Say Watt? A Talking Multimeter?”