AVR HV Rescue Shield 2

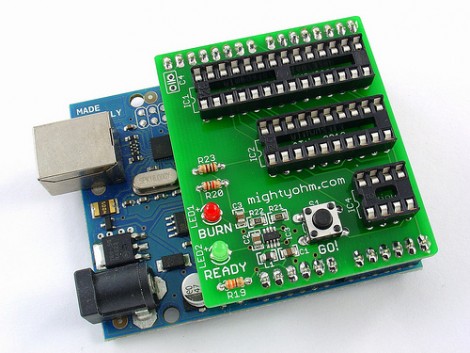
[Jeff Keyzer] has a new version of the HV Rescue Shield available. This tool allows you to use an Arduino to reset the fuse bits on AVR microcontrollers. This is necessary if you make a mistake and disable the reset pin, or choose the incorrect clock settings (this will probably happen to you at some point). In order to bring the chip back to life you’ll need to use High Voltage Programming. The last version of the shield only worked with High Voltage Parallel Programming (HVPP) but this rendition can also use High Voltage Serial Programming (HVSP) for 8-pin chips that don’t have enough inputs for parallel communications.

As we talked about in our AVR Programming Tutorials this is no replacement for a high-end programmer like the STK500 or an AVR Dragon, but if you already have an Arduino a kit will only cost you $20 (or you can etch and build it yourself). We would have liked to see a breakout header for the HVP signals for off-board use. The absence of a breakout header doesn’t preclude this, but since you need the on board boost converter for the 12V signals, and because this shield can’t be used with a breadboard due to pin spacing, it’s hard to patch into signals for non-DIP use. We also think some clever firmware hacking and this could be used for HV programming, like we needed for that LED light bulb.

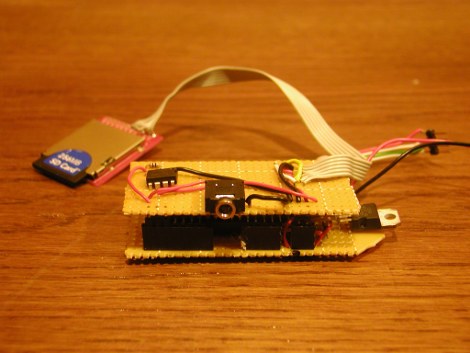
Homemade Music Player

Sadly, this pocket mp3 wav player doesn’t come close to the capabilities of even an iPod generation 1 yet, but you have to give [Owen] props for making it in less than 24 hours. The system consists of a Propeller MCU (cleverly wired to be swappable with “shields” similar to Arduino systems), SD card for song storage, and an LM386 for audio. While the setup is a little dull, and only plays through songs non stop with no controls whatsoever, it certainly is a good start in the right direction for a cheap and simple portable music player. Of course some planned changes are in the works, include an accelerometer (gesture based controls?), etched PCB, docking station, and a case. We’re surprised there is no form of screen planned, considering Owen appears to have a rather good handle on touch interfaces; perhaps he’s waiting for revision 3.

Todays Arduino Moment

We have gotten a number of Arduino tips in the last couple days, and we thought we would combine them for your convenience. The first tip we received was for some hints provided by [Bill] on some digitalWrite() alternatives. Similar to some previous research we covered, this tip also includes some tips on how to make the direct register writing a little easier by using #define to simplify things. Obviously this wont be as idiot-proof as digitalWrite() is, but we think you can handle it.

Our second tip is for a set of OLED displays from 4dsystems sold as Arduino Shields. They have a couple of different sizes from .96″ to 1.7″, depending on your needs and budget. There is no official display library for them yet, but 4dsystems have been kind enough to provide a few resources to work from. Hopefully we’ll see a few great applications from this, maybe a much bigger pixel Mario? A much smaller Game of Life? Feel free to send us your projects, or leave your ideas in the comments!

Mouse Controlled Manipulator Arm

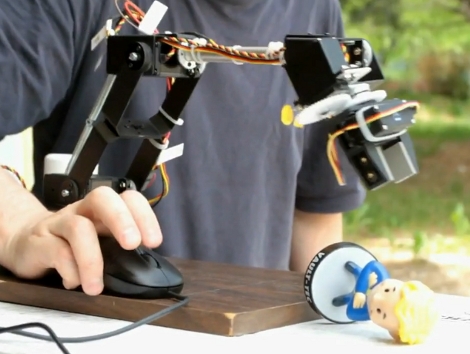
[Oleg] worked out a way to use his USB mouse to control this manipulator arm. Using a Lynxmotion AL5D (we’ve seen the AL5A previously) he drives the six servos with an Arduino servo shield. A USB host shield handles the HID end for connecting the mouse. The video after the break says it all, [Oleg] has no problem picking up that figurine quickly and accurately. Sliding the mouse controls horizontal movement in all directions. The scroll wheel moves the claw up and down. And holding the left or right buttons what using the control wheel closes or rotates the claw. All we can say is: Bigger, BIGGER!

Continue reading “Mouse Controlled Manipulator Arm”

Arduino Webserver

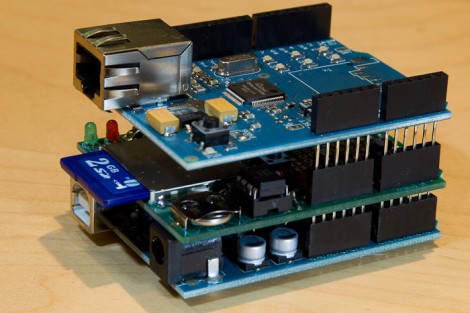
The Arduino platform should be perfect for throwing together a lightweight webserver because of the availability of quality shields that take care of the hardware for you. As [Ovidiu Predescu] found, there are a few hiccups along the way and he’s put together a guide that covers the workarounds. Specifically, using an Ethernet shield and data logging shield at the same time produces a bus conflict which he sidesteps by cutting the CS pin trace on the data logging board and moving it to a different pin. There is also a bug with one of the chips on the Ethernet shield that is fixed using a similar method. So if you’re not just going to etch your own webserver hardware maybe this is the next best thing.

Update: Adafruit Eagle Library, Now With Arduino

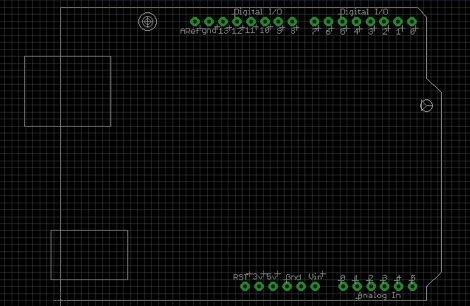
Adafruit Industries has just added an Arduino shield footprint to their EagleCAD library. If you don’t know, the Arduino headers use non-standard pin spacing. Learn to deal with it, there’s too many Arduino shields in production to have any hope for a change in the future. This footprint should make it a lot easier to design your own boards. If you use this package make sure you’re getting the library from their github, they’ve been adding parts regularly. Setting up version control will make sure you always have the latest libraries.

[Thanks pt]

Replacement Refrigerator Controller

[Michael] got his hands on a refrigerator that he intended to store beer in but found that it ran constantly. Instead of buying a new thermostat he and his friend [Doug] set out to build an Arduino-based controller for the fridge.

The finished project will switch 240v so they’ve used a transformer to power the logic circuitry and a solid state relay to handle the load switching, with a Dallas 1820 for temperature data. Because the Arduino offers more capabilities than the average thermostat hack they also decided to tap into its potential by adding an Ethernet shield. We see the Arduino as a prototyping device and so do these folks. Once the bugs in their first PCB prototype are worked out the circuit will use the ATmega328 and do away with the Arduino.

[via @littlebirdceo]