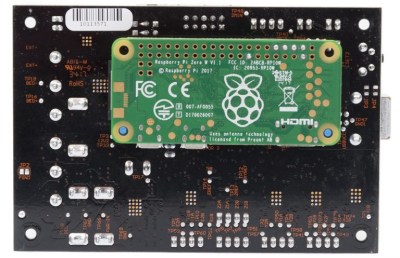
The cool kids these days all seem to think we’re on the verge of an AI apocalypse, at least judging by all the virtual ink expended on various theories. But our putative AI overlords will have a hard time taking over the world without being able to build robotic legions to impose their will. That’s why this advance in 3D printing that can incorporate electronic circuits may be a little terrifying, at least to some.
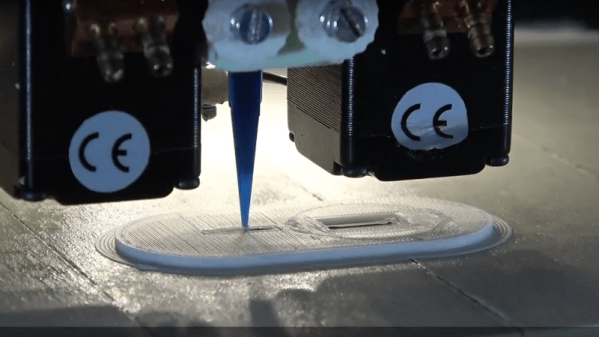
The basic idea that [Florens Wasserfall] and colleagues at the University of Hamburg have come up with is a 3D-printer with a few special modifications. One is a separate extruder than squirts a conductive silver-polymer ink, the other is a simple vacuum tip on the printer extruder for pick and place operations. The bed of the printer also has a tray for storing SMD parts and cameras for the pick-and-place to locate parts and orient them before placing them into the uncured conductive ink traces.
The key to making the hardware work together though is a toolchain that allows circuits to be integrated into the print. It starts with a schematic in Eagle, which joins with the CAD model of the part to be printed in a modified version of Slic3r, the open-source slicing package. Locations for SMD components are defined, traces are routed, and the hybrid printer builds the whole assembly at once. The video below shows it in action, and we’ve got to say it’s pretty slick.
Sure, it’s all academic for now, with simple blinky light circuits and the like. But team this up with something like these PCB motors, and you’ve got the makings of a robotic nightmare. Or not.
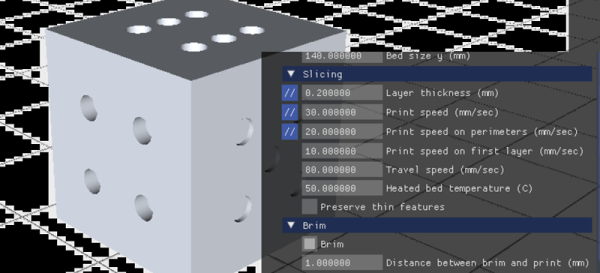
The mechanical and electronic parts of a 3D printer are critical for success, but so is the slicing software. Slic3r and Cura are arguably the most popular, and how they command your printer has a lot to do with the results you can get. There are lots of other slicers out there both free and paid, but it is hard to really dig into each one of them to see if they are really better than whatever you are using today. If you are interested in the performance of IceSL — a free slicer for Windows and Linux — [DIY3DTECH] has a video review that can help you decide if you want to try it. You can see the video below.
IceSL has several modules and can actually do OpenSCAD-like modeling in Lua so you could — in theory — do everything in this one tool. The review, though, focuses only on the slicing aspect. In addition to the desktop client versions, you can use some features online (although on our Linux machine it didn’t work with the latest Chrome beta even with no add ons; Firefox worked great, though).
There are two main applications for managing 3D prints and G-Code generation. Cura is a fantastic application that is seeing a lot of development from the heavy hitters in the industry. Initially developed by Ultimaker, Lulzbot has their own edition of Cura, It’s the default software packaged with thousands of different printers. Slic3r, as well, has seen a lot of development over the years and some interesting hacks. Do you want to print non-planar surfaces? Slic3r can do that. Slic3r and Cura are two sides of the CAM part of the 3D printing coin, although Cura is decidedly the prettier side.
The ability to combine the extensibility of Slic3r with the user interface of Cura has been on our wish list for a while now. It’s finally time. [Josef Prusa] has released PrusaControl, a 3D printing CAM solution that combines the best of Slic3r into a fantastic, great looking package. What are the benefits? What’s it like? Check that out below.
We all know that hacker that won’t use a regular compiler. If he’s not using assembly language, he uses a compiler he wrote. If you don’t know him, maybe it is you! If you really don’t know one, then meet these two. [Nathan Fuller] and [Andy Baldwin] want to encourage you to write your own 3D slicer.
Their post is very detailed and uses Autodesk Dynamo as a graphical programming language. However, the details aren’t really specific to Dynamo. It is like a compiler. You sort of know what it must be doing, but until you’ve seen one taken apart, there are a lot of subtleties you probably wouldn’t think of right away if you were building one from scratch.
3D printers are an exercise in compromise. Generally, you don’t want a lot of mass on your tool head, as that can lead to ringing and other mechanical artifacts on your print. However, direct drive extruders are better for many filaments, and the decision on what printer to build ultimately comes down to a choice between speed, build area, and the ability to print in exotic filaments.
Even in slicing a 3D model, a 3D printing enthusiast must balance the quality of a print versus how long the print will take to squirt out of a nozzle. Now, just about any printer can produce fantastic models at a very high layer height, but no one wants to wait several days for the print to finish.
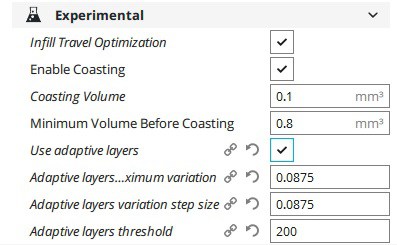
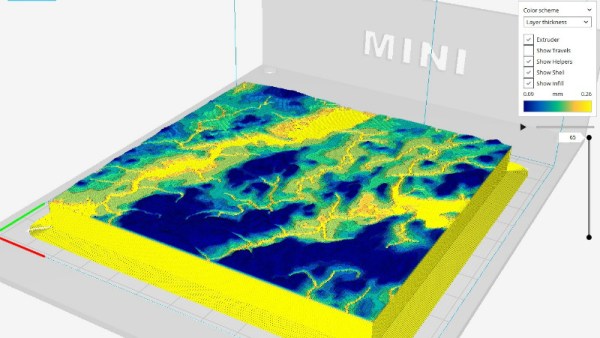
This balance between print time and print quality has, for the last few years, been completely ignored. One of the best solutions to this we’ve seen is variable layer height slicing. Basically, if you’re printing something without much detail, you don’t need small layers in your 3D print. Think of it as printing the neck of a bust at 0.3mm layer height, and the face at 0.1mm.
Yes, there were a few papers from a decade ago laying the conceptual foundations of variable layer height slicing. 3D printers weren’t exactly common back then, though. Recently, Autodesk’s Integrated Additive Manufacturing Team released Varislice for automatic generation of variable layer heights on a 3D printed object. So far, though, there’s no good automated solution for variable layer height slicing, and the tools for manual configuration of variable layer height slicing are terrible.
For the past few months, Prusa Research has been working on their own edition of Slic3r that includes an easy to use interface for variable layer height slicing. This version of Slic3r was just released, and now it’s time for the hands-on. Does variable layer height slicing work?
With proper tuning, any 3D printer can create exceptionally detailed physical replicas of digital files. The time it takes for a printer to print an object at very high detail is another matter entirely. The lower the layer height, the more layers must be printed, and the longer a print takes to print.
Thanks to [Steve Kranz] at Autodesk’s Integrated Additive Manufacturing Team, there’s now a solution to the problem of very long, very high-quality prints. It’s called VariSlice, and it slices 3D in a way that’s only high quality where it needs to be.
The basic idea behind VariSlice is to print vertical walls at a maximum layer height, while very shallow angles – the top of a sphere, for example – are printed at a very low layer height. That’s simple and obvious; you will never need to print a vertical wall at ten micron resolution, and fine details will always look terrible with a high layer height.
The trick, as in everything with 3D printing, is the implementation. In the Instructable for VariSlice, it appears that the algorithm considers the entire layer of an object at a time, taking the maximum slope over the entire perimeter and refining the layer height if it’s necessary. There’s no weird stair stepping, overlapping layers of different thicknesses, or interleaving here. It’s doing automatically what you’d normally have to do manually.
Nevertheless, the VariSlice algorithm is now one of Autodesk’s open source efforts, just like the Ember resin printer used in the example below. The application for this algorithm in filament-based printers is obvious, though. The speed increase for the same level of quality is variable, but the time it takes to print some very specific objects can be up to ten times faster. Whether or not this algorithm can be integrated into Cura or Slic3r is another matter entirely, but we can only hope so.
Makerbot is in the gutter, 3D Systems and Stratasys stock is only a shadow of their 2014 glory, but this is the best year 3D printing has ever had. Machines are now good and cheap, there’s a variety of various thermoplastic filaments, and printing useful objects – instead of just plastic trinkets – is becoming commonplace.
There’s one area of 3D printing that hasn’t seen as much progress, and it’s the software stack. Slicing, the process of turning a 3D object into a Gcode file for a printer has been basically the same for the last few years. Dual extrusion is still a mess, and automated bed leveling is still in its infancy.
One aspect of slicing that has been severely overlooked is infill. Obviously, you don’t want to print plastic trinkets completely solid – only the outside surface matters, and a part with 100% infill is just a waste of plastic. Different slicers have come up with different ways of filling the inside of a print, usually with a grid of squares, triangles, or hexagons.
While the most popular methods of filling in a 3D printed objects do the job of adding a little bit of strength to a print and supporting the top layers of a print, it’s not an ideal solution. The desired strength of the finished part is never taken into account, print artifacts are sometimes visible through the side of a print, and the spacing of the infill grid is completely arbitrary. You can only set a percentage of infill, and telling a slicer to make an internal support grid with 10mm spacing is impossible.
Type A Machines just changed all of this. With the release of their public beta of Cura Type A, the infill for a 3D printed part is also 3D. The dimensions of the infill are predictable, opening the door to stronger and better looking parts.
From the Type A press literature and white paper, this new type of ‘infill’ isn’t; it’s more properly referred to as ‘internal structure’, with proper dimensions between infill features. Instead of a grid of squares or triangles stacked one layer on top of each other, it’s a true structure, with the infill following the perimeter of the 3D printed object.
Generating 3D Infill
Right now, infill is generated in a slicer by specifying a percentage. Zero percent infill means a hollow object, and 100% infill is a completely solid part. These two edge cases are easy, but anything else means the slicer must fill the part with filament in a grid of tessellating shapes, either rectangles, triangles, or hexagons. With current slicers, the dimensions of this internal structure are, for all practical purposes, random. Printing an object with 20% infill might mean a grid of squares with 5mm or 2mm spacing. Telling the slicer to infill a part with a grid of squares spaced 10mm apart is impossible.
Type A Machine’s latest Cura release changes all of this, allowing a designer to set a precise distance between rows and columns of infill. By defining infill in absolute dimensions, this allows for stronger parts using less infill.
Absolute dimensioning is only one feature of the Type A Machine’s latest release of Cura. Even more exciting is the development of 3D internal structure. Instead of stacking layers of squares, triangles, or hexagons on top of each other, Type A Machine’s Cura uses an infill of cubes turned on their side. While each individual layer of infill looks like a series of triangles and irregular hexagons, when assembled into a printed 3D object, this infill forms a true 3D structure.
The closest comparison to this sort of structure is the difference between graphite and diamond. Both of these materials are made out of the same element, carbon. The physical structure of graphite is just, 1-atom-thick layers of graphene, producing a relatively weak material. Diamond, on the other hand, has a true 3D structure and is one of the hardest materials known to man. While adding 3D structure to the infill of 3D printed objects won’t make the objects any stronger, it will drastically reduce delamination, and be much more resistant to stresses in all three dimensions.
While Type A Machines has done some great work here, it does mean there’s yet another version of Cura to deal with. Type A Machine’s Cura, in addition to the LulzBot edition and the original are now the defacto standard for turning 3D objects into printed parts. Having an open source solution is great, but forking the development this much surely can’t be ideal.