Some kids dream about getting a pony, others dream about a small form factor violin-style MIDI controller. [Brady Y. Lin] was one of the latter, and now, with the skills he’s learning at Northwestern, he can make that dream a reality — and share it with all of us as an open source hardware project.
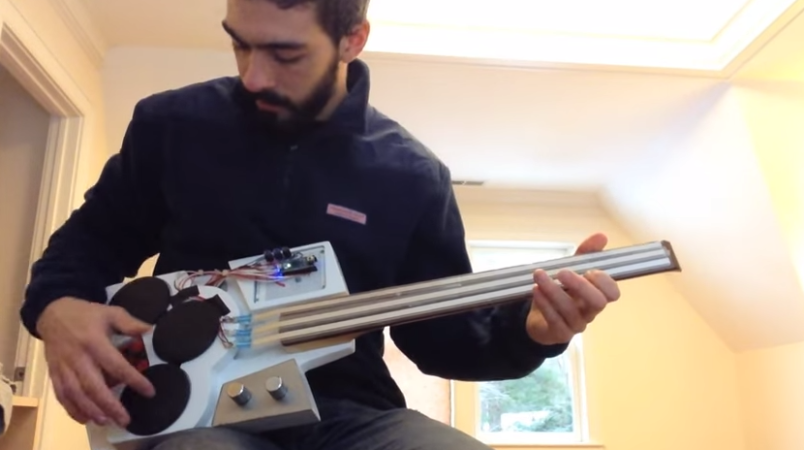
The dream instrument’s name is Stradex1, and it’s a lovely bit of kit. The “fretless” neck is a SoftPot linear potentiometer being sampled by an ADS1115 ADC — that’s a 16-bit unit, so while one might pedantically argue that there are discreet frets, there’s 2^15 of them, which is functionally the same as none at all. Certainly it’s enough resolution for continuous-sounding pitch control, as well as vibrato, as you can see at 3:20 in the demo video below. The four buttons that correspond to the four strings of a violin aren’t just push-buttons, but also contain force sensors (again, sampled by the 16-bit ADC) to allow for fine volume control of each tone.
A few other potentiometers flesh out the build, allowing control over different MIDI parameters, such as what key [Brady] is playing on. The body is a combination of 3D printed plastic and laser-cut acrylic, but [Brady] suggests you could also print the front and back panels if you don’t happen to have a laser cutter handy.
This project sounds great, and it satisfies the maker’s inner child, so what’s not to love. We’ve had lots of MIDI controllers on Hackaday over the years — everything from stringless guitars to wheel-less Hurdy-Gurdies to say nothing of laser harps galore — but somehow, we’ve never had a MIDI violin. The violin hacks we have featured tend to be either 3D printed or comically small.
If you like this project but don’t feel like fabbing and populating the PCB, [Brady] is going to be giving one away to his 1000th YouTube subscriber. As of this writing, he’s only got 800, so that could be you!
Continue reading “A Childhood Dream, Created And Open Sourced”


