Soldering Your Own Soldering Iron

A device that even DIY enthusiasts don’t usually think to DIY is the humble soldering iron. Yet, that’s exactly what one Hackaday.io user did by building a USB-powered soldering pen with better performance than a $5 Chinese soldering pen.

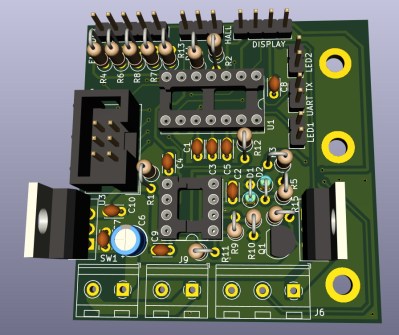
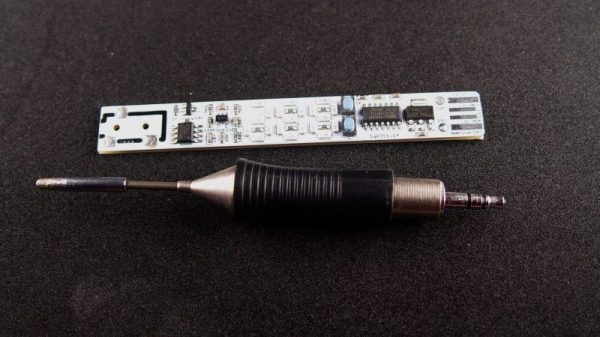
The project draws inspiration from another Weller RT tip-based soldering pen by [vlk], although this project has a simpler display than an OLED. Slovakia-based maker [bobricius] was inspired by the DiXi ATSAMD11C14-based development board. The project uses the same 32-bit ATMEL ARM microcontroller with a USB bootloader, which makes updating the firmware a lot easier.

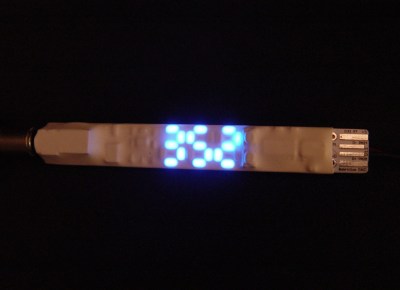
Two buttons control the heat (+/-) and the jack for the Weller RT soldering tip controls the power out with PWM. For the display, 20 Charlieplexed 3014 LEDs are used to show the temperature from 0-399. The last missing LED is left out since 5 GPIO pins can only drive 20 LEDs.

Assuming that the main heating controls stay the same as [vlk]’s project, the pen uses a current sensor and heating controller for PID control of a heating module, which connects to the SMT connector for the Weller RT soldering iron tip. The temperature sensor uses a an op-amp for amplification of the signal from a type K thermocouple.

While there aren’t currently GERBER files for the PCB yet, the project is based on the open-source OLED display soldering pen project by [vlk], whose schematic for the device is published.

Continue reading “Soldering Your Own Soldering Iron”

The Miniware TS100 As A USB-C Soldering Iron

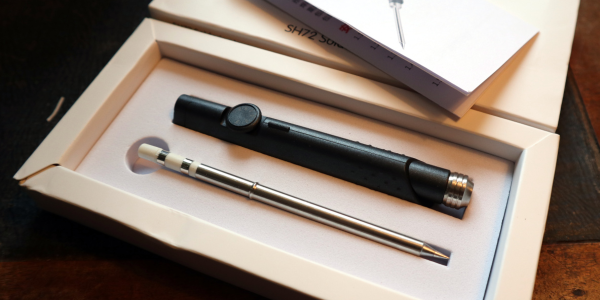
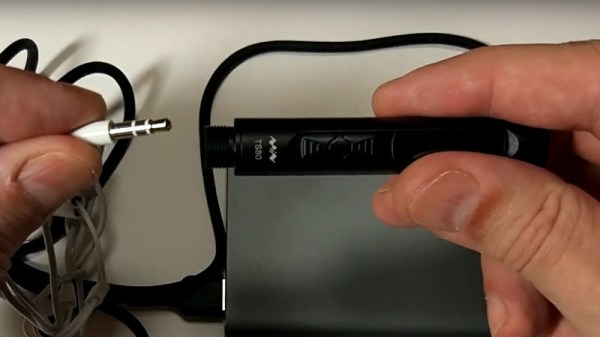
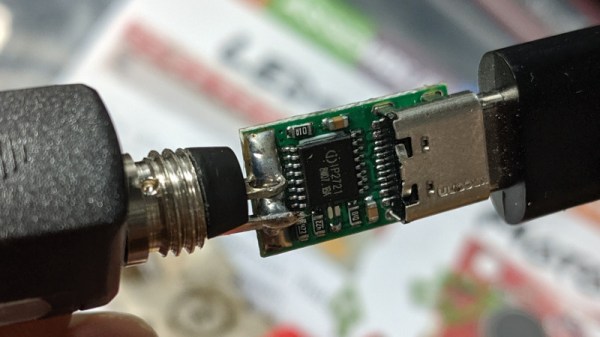
Many readers will be familiar with the Miniware TS100 soldering iron, a lightweight temperature-controlled iron that is giving significantly more expensive soldering tools a run for their money. There is another model in the range, the TS80, which though it uses different tips than its sibling has the main distinguishing feature of USB-C power rather than a DC barrel jack. A cadre of users still prefer the TS100 for this reason, as an iron that can run from almost any low voltage DC power source. Any except USB-C, that is, an omission that [thinkl33t] has rectified with a USB-C adapter for the older model.

To achieve this, he’s used a readily-available ZYPDS USB-to-DC module and attached it to a barrel jack. For now, it’s simply held on by solder with a bit of heat-shrink over the top. [Thinkl33t] observes that this may not prove to be strong enough and he’ll eventually have to put it on a bit of cable. It’s a simple enough hack, but it serves as a quick introduction to these parts which perform the necessary USB-C magic to deliver a DC supply, as well as to highlight the relative scarcity of higher-power USB supplies.

At the moment there’s an inevitable move to USB-C All The Things, but it’s a trend that it seems many manufacturers of power sources have yet to catch up with. When a typical TS-80 owner finds their shiny new USB-C battery bank is, in reality, an older 5V USB bank with a USB-C connector fitted, it’s no wonder that their friends prefer the TS100. We hope that coming years will see a greater range of USB-C power options, but until then we like the versatility of the barrel jack on the TS100. Especially now that it can so readily be made to take USB-C power.

We reviewed the TS100 back in 2017, and two years of using it since then have not changed our opinion of it.

Thanks to the several tipsters including [thinkl33t]  himself who sent us this.

Solder Ninja Dabbles In USB Power Arcana

USB first hit the scene in the 1990s, and was intended to simplify connecting peripherals to PCs and eliminate the proliferation of various legacy interfaces. Over 20 years later, it’s not only achieved its initial goals, but become a de facto standard for charging and power supply for all manner of personal electronic gadgets. If you asked someone back in 1995 whether or not you could build a USB-powered soldering iron, they’d have politely asked you to leave the USB Implementers Forum. But times change, and Solder Ninja is just that!

With a maximum power draw of 40 W, the Solder Ninja required careful design to ensure practicality. It supports a variety of USB power standards, including USB-BC 1.2, USB Quick Charge, and USB Power Delivery. This enables it to draw the large amounts of current required for the heating element. To make it easy to use with a variety of chargers out in the wild, it displays the current negotiated voltage and maximum current draw. This enables the user to understand the varying performance of the device, depending on the charger it’s plugged into.

Given the multitude of different USB power standards, we imagine [Nicolas] has the patience of a saint to perfect a project like this. We’ve seen similar builds before, too. Video after the break.

Continue reading “Solder Ninja Dabbles In USB Power Arcana”

Field Expedient Soldering Iron Will Do In A Pinch

If you think [Dubious Engineering]’s moniker is just a name, have a look at the pretty terrible soldering iron hacked out of a lighter in the video below. No one is suggesting this is a good idea but in an emergency, maybe it would come in handy. We liked the use of a chopstick and the formation of a heat exchanger with the copper wire coil. It was a mild disappointment that you had to drill out the chopstick, but we think you could have figured out a different method with a little thought.

The use of duct tape, of course, lends it instant hacker credibility. We suppose this might be useful not just after the robot uprising, but if you had to make a few quick solder joints far away from power and you don’t have a battery-operated iron.

Continue reading “Field Expedient Soldering Iron Will Do In A Pinch”

A USB -C Soldering Iron For Weller Tips

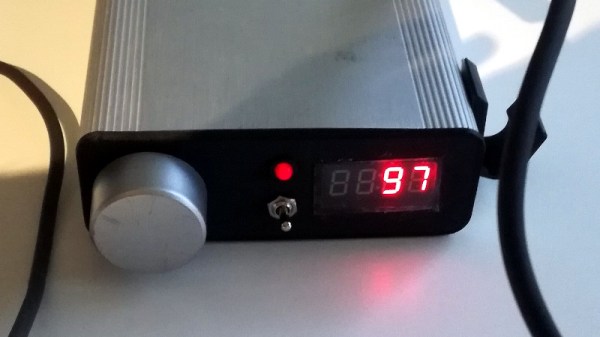
There was a time when a decent temperature controlled soldering iron took the form of the iron itself and a box of electronics, but now it’s just as likely to be a miniaturised affair with the temperature controller built into a slim and lightweight handle. Irons such as the Miniware TS series have become firm favourites, displacing a traditional soldering station for many.

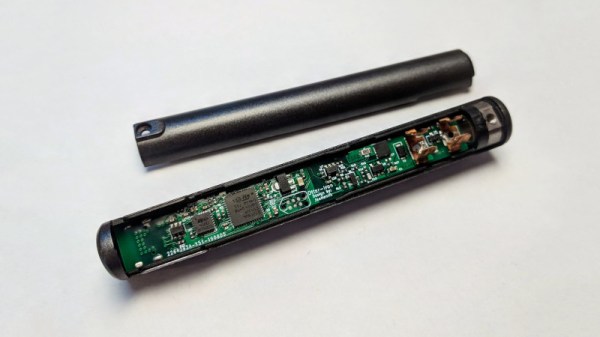
[Thomas.lepi] has combined the best of both worlds, with a TS-style microprocessor-driven handle driving the familiar Weller RT elements. Its interface is very simple, but through its USB power socket a serial port provides opportunities for adjustment. Providing control is an STM32F042G6U6 ARM Cortex M0 microcontroller, with USB power control coming from an STUSB4500QTR .

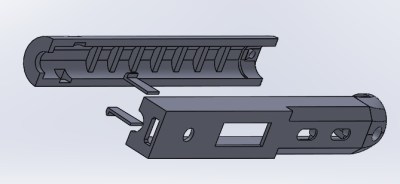
If you are used to irons such as the Miniware TS100 then this one with its smartly 3D-printed case will be very straightforward to use. Whether or not the ready availability of the TS100 or its USB-C sibling would remove the need to build this iron is up to you, but then again that’s hardly the point. The Weller tips are some of the better ones of their type, so perhaps that might make this project worth a second look.

Continue reading “A USB -C Soldering Iron For Weller Tips”

The Solderdoodle Open Source Iron Rides Again

Over the last year or so, cordless portable soldering irons have become all the rage. In fact, at this point a good number of Hackaday readers out there have likely traded in their full-size AC irons for a DC iron that’s only slightly larger than a pen. But before the big boom in portable irons, in the ye olden days of 2014, we brought you word of the open source Solderdoodle created by [Isaac Porras]. Based upon the Weller BP645 and featuring a 3D printed case, the DIY iron was designed to be charged from a standard USB port.

Now, [Isaac] is back with an updated version he calls the Solderdoodle Plus. It’s still based on the heating element from the Weller BP645, but now boasts twice the power, an improved 3D printed case, an intuitive touch-based user interface, and even some LED blinkenlights for good measure. As with the original Solderdoodle the hardware and software for the device are open source and you’re invited to build your own, though kits are also available through an already fully-funded Kickstarter campaign.

[Isaac] says that the temperature control functions on traditional corded soldering irons waste energy due to the large thermal mass they have to bring up to temperature. But with less thermal mass and a system of variable duty cycle pulsed power, he says the Solderdoodle Plus can do the same work as an old-school 60 watt iron while only consuming 10 watts. This allows the iron to maintain a constant 500°C for over an hour on the dual internal Panasonic NCR18500A lithium-ion batteries, and means you can charge it up with nothing more exotic than a micro USB cable.

Continue reading “The Solderdoodle Open Source Iron Rides Again”

DIY Arduino Soldering Iron Hits Version 2.0

A few months ago we brought word that [Electronoobs] was working on his own open source alternative to pocket-sized temperature controlled soldering irons like the TS100. Powered by the ATMega328p microcontroller and utilizing a 3D printed enclosure, his version could be built for as little as $15 USD depending on where you sourced your parts from. But by his own admission, the design was held back by the quality of the $5 replacement soldering iron tips he designed it around. As the saying goes, you get what you pay for.

But [Electronoobs] is back with the second version of his DIY portable soldering iron, and this time it’s using the vastly superior HAKKO T12 style tip. As this tip has the thermocouple and heating element in series it involved a fairly extensive redesign of the entire project, but in the end it’s worth it. After all, a soldering iron is really only as good as its tip to begin with.

This version of the iron deletes the MAX6675 used in V1, and replaces it with a LM358 operational amplifier to read the thermocouple in the T12 tip. [Electronoobs] then used an external thermocouple to compare the LM358’s output to the actual temperature at the tip. With this data he created a function which will return tip temperature from the analog voltage.

While the physical and electrical elements of the tip changed substantially, a lot of the design is still the same from the first version. In addition to the ATMega328p microcontroller, version 2.0 of the iron still uses the same 128×32 I2C OLED display, MOSFET, and 5V buck converter from the original iron. That said, [Electronoobs] is already considering a third revision that will make the iron even smaller by replacing the MOSFET and buck converter. It might be best to consider this an intermediate step before the DIY iron takes on its final form, which we’re very interested in seeing.

The first version of the DIY Arduino soldering iron garnered quite a bit of attention, so it seems there’s a decent number of you out there who aren’t content with just plunking down the cash for the TS100.

Continue reading “DIY Arduino Soldering Iron Hits Version 2.0”