If you’ve used a desktop 3D printer in the past, you’re almost certainly done battle with “strings”. These are the wispy bits of filament that harden in the air, usually as the printer’s nozzle moves quickly between points in open air. Depending on the severity and the material you’re printing with, these stringy interlopers can range from being an unsightly annoyance to triggering a heartbreaking failed print. But where most see an annoying reality of pushing melted plastic around, [Adam Kumpf] of Makefast Workshop sees inspiration.
 Noticing that the nozzle of their printer left strings behind, [Adam] wondered if it would be possible to induce these mid-air printing artifacts on demand. Even better, would it be possible to tame them into producing a useful object? As it turns out it is, and now we’ve got the web-based tool to prove it.
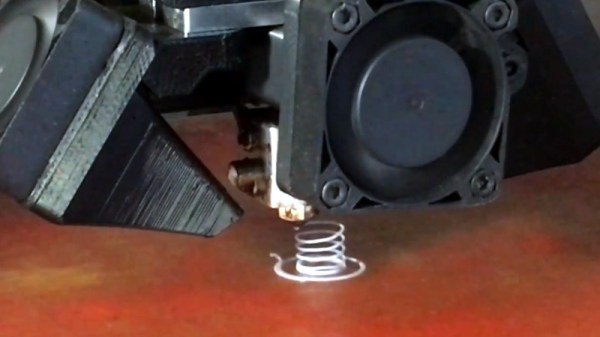
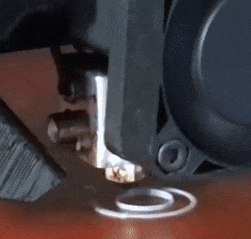
As [Adam] explains, you can’t just load up a 3D model of a spring in your normal slicer and expect your printer to churn out a useful object. The software will, as it’s designed to do, recognize the object can’t be printed without extensive support material. Now you could in theory go ahead and print such a spring, but good luck getting the support material out.
The trick is to throw away the traditional slicer entirely, as the layer-by-layer approach simply won’t work here. By manually creating GCode using carefully tuned parameters, [Adam] found it was possible to get the printer to extrude plastic at the precise rate at which the part cooling fan would instantly solidify it. Then it was just a matter of taking that concept and applying it to a slow spiral motion. The end result are functional, albeit not very strong, helical compression springs.
But you don’t have to take their word for it. This research has lead to the creation of an online tool that allows you to plug in the variables for your desired spring (pitch, radius, revolutions, etc), as well as details about your printer such as nozzle diameter and temperature. The result is a custom GCode that (hopefully) will produce the desired spring when loaded up on your printer. We’d love to hear if any readers manage to replicate the effect on their own printers, but we should mention fiddling with your printer’s GCode directly isn’t without its risks: from skipping steps to stripped filament to head crashes.
The results remind us somewhat of the 3D lattice printer we featured a couple of years back, but even that machine didn’t use standard FDM technology. It will be interesting to see what other applications could be found for this particular technique.
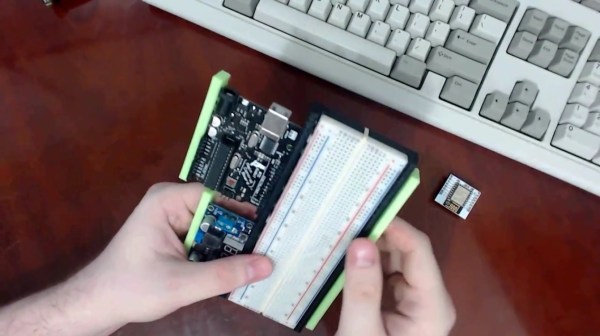
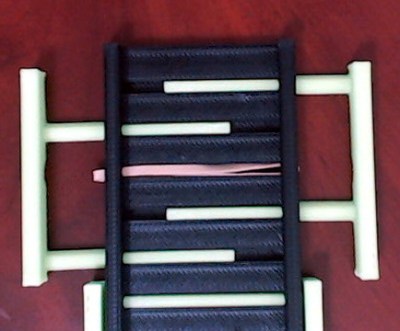 While [Pat]’s inspiration came from the aforementioned Stickvise, the new 3d-printed vice is just what you’ll need before you’re ready to do the soldering. The vice is spring-loaded using rubber bands. The base is sized to fit a standard breadboard in the center with clamping arms on either side to hold dev boards such as an Arduino. This innovative yet simple de”vice” grips boards well enough that you won’t be chasing them around your desk, knocking wires out of place, anymore.