STM32 Driving A PCIe Video Card

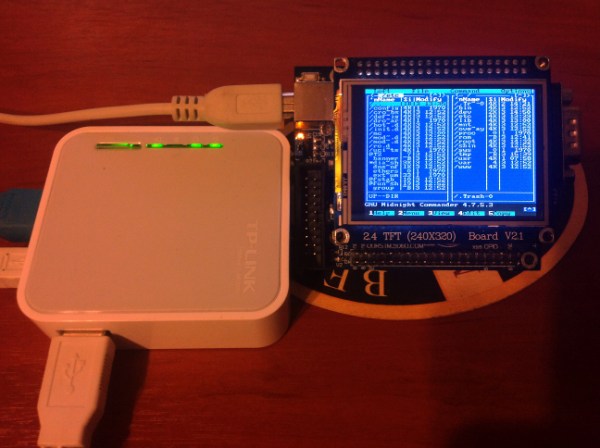
[Gpuhackr] chose his username to explain exactly how he spends his time. For instance, here he’s using an STM32 Discovery board to drive an AMD Radeon HD 2400 graphics card. The ARM microcontroller isn’t actually using the PCIe interface on the card. Instead, [Gpuhackr] has patched into the debugging interface built into the card itself. This isn’t quite as straight forward as it sounds, but if you do the wiring carefully it’s a pretty intersting way to connect an ARM to an LCD monitor.

This project would be almost impossible if it weren’t for the open source code which AMD has released. This lets him implement the card’s 3D rendering features. The demo directly programs the UVD Xtensa CPU which is on the video card. It draws a cube with color gradients on each side. The cube spins while the debug information is overlaid on the screen. In this case the ARM chip/board is really being used as a programmer to upload some custom firmware. But we think a real code-ninja could implement a communications protocol to open up a simple way to drive the card in real-time.

[Thanks uMinded]

STM32 F4 Discovery Tutorial Using Open Source Tools

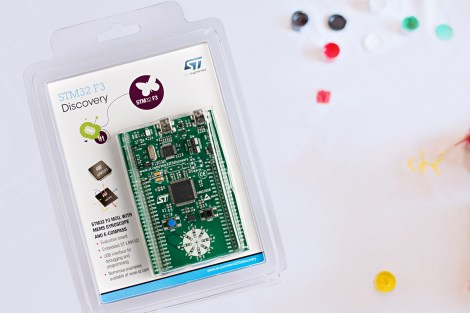
[Pulko Mandy] got his hands on the new STM32 F3 Discovery board. He’s a fan of the open source tools just like we are, so he posted a guide covering the use of an open source toolchain with the F3 hardware.

This board was just announced earlier this month but there is already support for it in OpenOCD. It’s not all that different from the F4 board, which we would think made the process a bit easier. [Pulko] is using the Sourcery CodeBench Lite toolchain, which works for pretty much all of the ARM chips out there. It is GCC based and comes with GDB for debugging (along with all the other tools you would expect). He did created his own Linker script and startup code. These are crucial for ARM so it’s nice that he provided them for us. He finishes up the guide by showing how OpenOCD can be used to flash the code to the chip and how it works with the debugger.

[Photo source]

Beginner’s Look At On-Chip Debugging

As your embedded applications get more complicated an On-Chip Debugger will save you a lot of time when things don’t run quite right. On-Chip Debugging (OCD) is just what it sounds like — a way to run your program on the target chip that lets you pause execution to examine values and change them if need be. The Arduino has no built-in method of using OCD, but the AVR chips used by the boards do. The caveat is that you need a proper AVR programmer to access the Debug Wire protocol, or a JTAG interface for some of the larger chips. In this case I’m going to be using an STM32 Discovery Board to give you an overview of OCD. But this will work the same way for any chip that has hardware debugging capabilities. Many IDE’s have debugging support built right in so that you can use a nice GUI as you work. But often these are just a front end for the command line tools I’ll be using. Join me after the break and we’ll get started.

Continue reading “Beginner’s Look At On-Chip Debugging”

Classic Game Of Snake On An ARM Controller

Every now and again we take a break from looking at all of your awesome projects and get to work on our own. I thought I’d take a minute to show off my game of Snake. It’s a classic that I remember playing on a graphing calculator (TI-83) back in high school. I had never written my own version and decided it would be a good reason to spend some more time on the ARM platform.

The dev board I’m using is the STM32 F0 Discovery board. Once I had a usable template for compiling the code on a Linux box everything else just started to fall into place. The screen is from a Nokia 3595. Several years back I cut off the keypad and made a breakout board for it. It’s pretty dim but it’s small and uses SPI so it tends to be my go-to display for prototyping. But I did get my hands on an SSD1289 TFT screen (after writing about this project) for about $16 and I’ve had some success with that. It uses a parallel interface so it’s not as easy to hook up and I’ve had some crosstalk issues when running at 24 MHz.

But I digress. Check out the demo video of my simple game after the break. There are more details about my programming choices at post link above. You will see this hardware again soon. I’m working on an On Chip Debugging primer and these ARM dev boards are perfect for it!

Continue reading “Classic Game Of Snake On An ARM Controller”

STM32 F3 Discovery Dev Board Includes Some Extras

ST Microelectronics keeps kicking out development boards to show off their new ARM processor line. Yesterday they issued a press release announcing the STM32 F3 Discovery Board. As their naming scheme implies, this carries an ARM Cortex-M3 processor, but compared to the F0 Discovery board (which we loved) it’s got several extra goodies built into it.

We took a look at the F3 Discovery product page and it doesn’t look like you can order these quite yet. But click-through to the pricing and you’ll see they’ve set it at $10.90. Digikey lists the board at that price point, Mouser lists it at about $16, but neither supplier has any available. We also didn’t see a link for free boards like when the F0 model was released. If you do come across a giveaway link please tip us off about it.

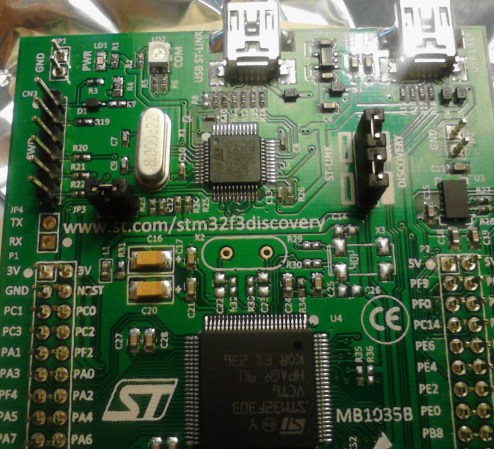
Okay, now let’s discuss those extras. We think this dev kit could be used as an IMU for applications like a quadcopter or a self-balancing robot. That’s because it has a gyroscope and an accelerometer. It’s also got ten LEDs, eight of which are arranged on that white circle. We’d guess that layout is for displaying orientation data from the IMU sensors. There’s also a second USB port to use when developing USB applications for the chip.

Like the other boards in the Discovery family this has the STlinkV2 built-in to use as a programmer. We don’t know if OpenOCD has support for the F3 chipset yet, which is what we’ve been using to program STM chips in a Linux environment.

An STM32 Processor Powers This PC

This 32-bit computer is a project [Bogdan Marinescu] built as a contest entry. Sadly he didn’t win, but he did do an excellent job of documenting the build. Having seen several other home built PC projects we’re familiar with the challenges that go into such a thing, and he found some great solutions to each of them.

He started with an STM32F103ZET6 chip. This is an ARM Cortex-M3 processor which brings a lot of power to the playing field. That being said, generating a VGA signal would pretty much zap the usefulness of the chip for other processes so he offloaded that work on a separate Propeller chip. A microSD card serves as storage for the machine, which runs eLua (embedded Lua programming language). There is 1 MB of external RAM and a PS/2 port for keyboard interface. The system is networked thanks to an ENC28J60 Ethernet controller. Don’t miss the video after the break where you can see several demos running on the system.

Continue reading “An STM32 Processor Powers This PC”

ARM-based Debugging Tool Aims To Improve On The Bus Pirate Performance

The Bus Pirate is a fantastic development tool. It does an amazing job at a lot of different things. And as it has matured, community support has driven it to new areas beyond the original design. This is where its hardware holds back performance a little bit. For instance, as an I2C or SPI sniffer it has limited capture speed. That’s the type of thing that this board could improve upon. It’s a debugging tool based on an STM32 F4 microcontroller. That’s an ARM Cortex-M4 chip which runs at 168 MHz, and has 192 KB of SRAM.

[TitanMKD] has been working on the design but it is still just in digital form. Since there’s no prototype there is also no firmware for the device. That’s a tall mountain to climb and it’s one of the reasons we’re featuring the project now. [Titan’s] plan is to model this after the Bus Pirate interface. We think it’s a good idea since a lot of folks have already learned the syntax. We didn’t see a contact form on his site, but if you’re interested in contributing to the project you might want to leave a comment here or on his project page (linked above).