Son Of Rothult

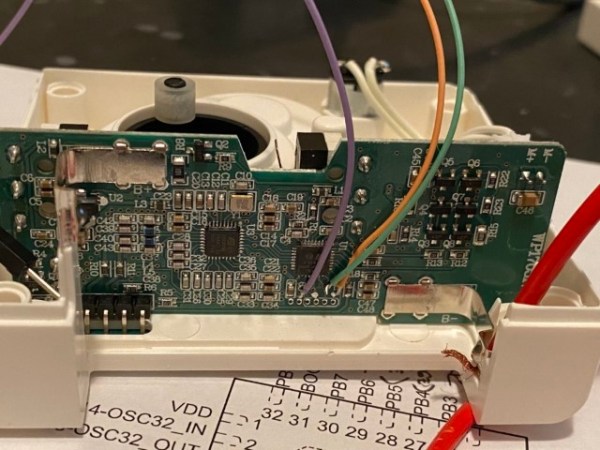
We are continuously inspired by our readers which is why we share what we love, and that inspiration flows both ways. [jetpilot305] connected a Rothult unit to the Arduino IDE in response to Ripping up a Rothult. Consider us flattered. There are several factors at play here. One, the Arduino banner covers a lot of programmable hardware, and it is a powerful tool in a hardware hacker’s belt. Two, someone saw a tool they wanted to control and made it happen. Three, it’s a piece of (minimal) security hardware, but who knows where that can scale. The secure is made accessible.

The Github upload instructions are illustrated, and you know we appreciate documentation. There are a couple of tables for the controller pins and header for your convenience. You will be compiling your sketch in Arduino’s IDE, but uploading through ST-Link across some wires you will have to solder. We are in advanced territory now, but keep this inspiration train going and drop us a tip to share something you make with this miniature deadbolt.

Locks and security are our bread and butter, so enjoy some physical key appreciation and digital lock love.

Wiping Robots And Floors: STM32duino Cleans Up

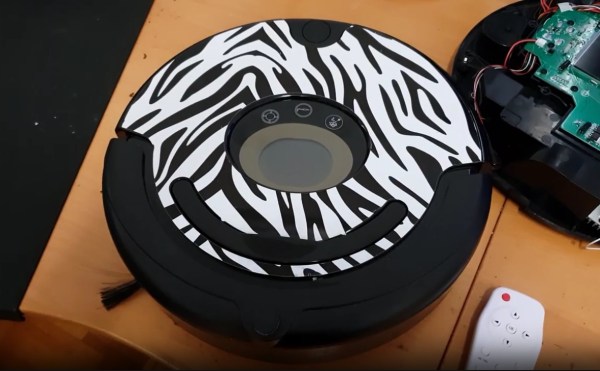
Ever find yourself with nineteen nameless robot vacuums lying around? No? Well, [Aaron Christophel] likes to live a different life, filled with zebra print robots (translated). After tearing a couple down, only ten vacuums remain — casualties are to be expected. Through their sacrifice, he found a STM32F101VBT6 processor acting as the brains for the survivors. Coincidentally, there’s a project called STM32duino designed to get those processors working with the Arduino IDE we either love or hate. [Aaron Christophel] quickly added a variant board through the project and buckled down.

Of course, he simply had to get BLINK up and running, using the back-light of the LCD screen on top of the robots. From there, the STM32 processors gave him a whole 80 GPIO pins to play with. With a considerable amount of tinkering, he had every sensor, motor, and light under his control. Considering how each of them came with a remote control, several infra-red sensors, and wheels, [Aaron Christophel] now has a small robotic fleet at his beck and call. His workshop must be immaculate by now. Maybe he’ll add a way for the vacuums to communicate with each other next. One robot gets the job done, but a whole team gets the job done in style, especially with a zebra print cleaner at the forefront.

If you want to see more of his work, he has quite a few videos on his website demonstrating the before and after of the project — just make sure to bring a translator. He even has a handy pinout for those looking to replicate his work. If you want to dive right in to STM32 programming, we have a nice article on how to get it up and debugged. Otherwise, enjoy [Aaron Christophel]’s demonstration of the eight infra-red range sensors and the custom firmware running them.

PlatformIO And Visual Studio Take Over The World

In a recent post, I talked about using the “Blue Pill” STM32 module with the Arduino IDE. I’m not a big fan of the Arduino IDE, but I will admit it is simple to use which makes it good for simple things.

I’m not a big fan of integrated development environments (IDE), in general. I’ve used plenty of them, especially when they are tightly tied to the tool I’m trying to use at the time. But when I’m not doing anything special, I tend to just write my code in emacs. Thinking about it, I suppose I really don’t mind an IDE if it has tools that actually help me. But if it is just a text editor and launches a few commands, I can do that from emacs or another editor of my choice. The chances that your favorite IDE is going to have as much editing capability and customization as emacs are close to zero. Even if you don’t like emacs, why learn another editor if there isn’t a clear benefit in doing so?

There are ways, of course, to use other tools with the Arduino and other frameworks and I decided to start looking at them. After all, how hard can it be to build Arduino code? If you want to jump straight to the punch line, you can check out the video, below.

Continue reading “PlatformIO And Visual Studio Take Over The World”

The $2 32-Bit Arduino (with Debugging)

I have a bit of a love/hate relationship with the Arduino. But if I had two serious gripes about the original offering it was the 8-bit CPU and the lack of proper debugging support. Now there’s plenty of 32-bit support in the Arduino IDE, so that takes care of the first big issue. Taking care of having a real debugger, though, is a bit trickier. I recently set out to use one of the cheap “blue pill” STM32 ARM boards. These are available for just a few bucks from the usual Chinese sources. I picked mine up for about $6 because I wanted it in a week instead of a month. That’s still pretty inexpensive. The chip has a lot of great debugging features. Can we unlock them? You can, if you have the right approach.

The Part

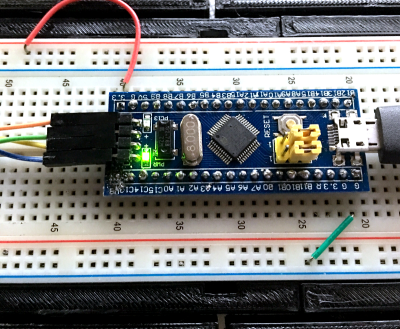
For a few bucks, you can’t complain about the hardware. The STM32F103C8T6 onboard is a Cortex-M3 processor that runs at 72 MHz. There’s 64K of flash and 20K of RAM. There’s a minimicro-USB that can act as a programming port (but not at first). There’s also many 5 V-tolerant pins, even though this a 3.3 V part.

You can find a lot more information on this wiki. The board is a clone–more or less–of a Maple Mini. In fact, that’s one way you can use these. You can use the serial or ST-Link port to program the Maple bootloader (all open source) and use it like a Maple. That is, you can program it via the USB cable.

From my point of view, though, I don’t want to try to debugging over the serial port and if I have the ST-Link port already set up, I don’t care about a bootloader. You can get hardware that acts as a USB to ST-Link device inexpensively, but I happen to have an STM32VLDISCOVER board hanging around. Most of the STM32 demo boards have an ST-Link programmer onboard that is made to use without the original target hardware. On some of the older boards, you had to cut traces, but most of the new ones just have two jumpers you remove when you want to use the programmer to drive another device.

The “blue pill” designation is just a common nickname referring to the Matrix, not the pharmaceuticals you see on TV ads. The board has four pins at one edge to accommodate the ST-Link interface. The pin ordering didn’t match up with the four pins on the STM32VLDISCOVER, so you can’t just use a straight four-pin cable. You also need to bring power over to the board since it will have to power the programmer, too. I took the power from the STM32VLDISCOVER board (which is getting its power from USB) and jumpered it to my breadboard since that was handy.

Continue reading “The $2 32-Bit Arduino (with Debugging)”