An embedded MEMS sensor might be lots of fun to play with on your first foray into the embedded world–why not deploy a whole network of them? Alas, the problem with communicating with a series of identical sensors becomes increasingly complicated as we start needing to handle the details of signal integrity and the communication protocols to handle all that data. Fortunately, [Artem], [Hsin-Liu], and [Joseph] at MIT Media Labs have made sensor deployment as easy as unraveling a strip of tape from your toolkit. They’ve developed SensorTape, an unrollable, deployable network of interconnected IMU and proximity sensors packaged in a familiar form factor of a roll of masking tape.
Possibly the most interesting technical challenge in a string of connected sensor nodes is picking a protocol that will deliver appreciable data rates with low latency. For that task the folks at MIT Media labs picked a combination of I²C and peer-to-peer serial. I²C accomodates the majority of transmissions from master to tape-node slave, but addresses are assigned dynamically over serial via inter-microcontroller communication. The net effect is a fast transfer rate of 100 KHz via I²C with a protocol initialization sequence that accommodates chains of various lengths–up to 128 units long! The full details behind the protocol are in their paper [PDF].
With a system as reconfigurable as SensorTape, new possibilities unfold with a solid framework for deploying sensors and aggregating the data. Have a look at their video after the break to get a sense of some of the use-cases that they’ve uncovered. Beyond their discoveries, there are certainly plenty others. What happens when we spin them up in the dryer, lay them under our car or on the ceiling? These were questions we may never have dreamed up because the tools just didn’t exist! Our props are out to SensorTape for giving us a tool to explore a world of sensor arrays without having to trip over ourselves in the implementation details.
No doubt many of you have spent a happy Christmas tearing away layers of wrapping paper to expose some new gadget. But did you stop to spare a thought for the “sticky-back plastic” holding your precious gift paper together?
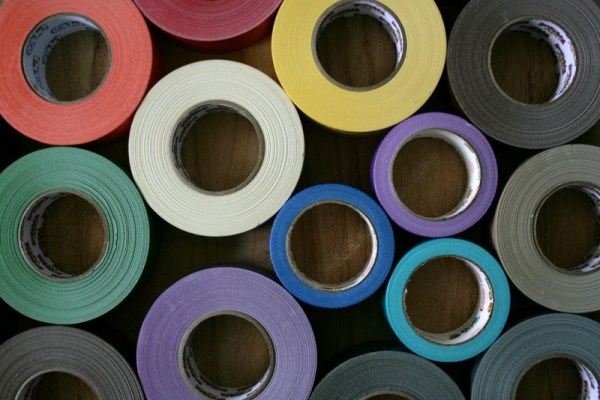
There are a crazy number of adhesive tapes available, and in this article I’d like to discuss a few of the ones I’ve found useful in my lab, and their sometimes surprising applications. I’d be interested in your own favorite tapes and adhesives too, so please comment below!
But first, I’d like to start with the tapes that I don’t use. Normal cellulose tape, while useful outside the lab, is less than ideally suited to most lab applications. The same goes for vinyl-based insulating tapes, which I find have a tendency to fall off leaving a messy sticky residue. When insulation is necessary, heatshrink seems to serve better.
The one tape I have in my lab which is similar to common cellulose tape however is Scotch Magic Tape. Scotch Magic tape, made from a cellulose acetate, and has a number of surprising properties. It’s often favored because of it’s matte finish. It can easily be written on and when taped to paper appears completely transparent. It’s also easy to tear/shape and remove. But for my purposes I’m more interested in it’s scientific applications.
Here’s a neat trick you can try at home. Take a roll of tape (I’ve tried this with Scotch Magic tape but other tapes may work too) to a dark room. Now start unrolling the tape and look at interface where the tape leaves the rest of the roll. You should see a dim blue illumination. The effect is quite striking and rather surprising. It’s called triboluminescence and has been observed since the 1950s in tapes and far earlier in other materials (even sugar when scraped in a dark room will apparently illuminate). The mechanism, however, is poorly understood.
It was perhaps this strange effect that led researchers to try unrolling tape in a vacuum. In 1953 a group of Russian researchers attempted this and bizarrely enough, were able to generate X-rays. Their results were unfortunately forgotten for many years, but were replicated in 2008 and even used to X-ray a researcher’s finger! As usual Ben Krasnow has an awesome video on the topic:
In my lab however I mostly use Scotch tape to remove surface layers. In certain experiments it’s valuable to have an atomically flat surface. Both Mica and HOPG (a kind of graphite) are composed of atomically flat layers. Scotch tape can be used to remove the upper layers leaving a clean flat surface for experimentation.
Researchers have also modified this technique to produce graphene. Graphene is composed of single carbon layers and has a number of amazing properties, highly conductive, incredibly strong, and transparent. For years producing small quantities of graphene provided difficult. But in 2004 a simple method was developed at the University of Manchester using nothing but bulk ordered graphite (HOPG) and a little Scotch tape. When repeatedly pressed between the Scotch tape, the Graphite layers can be separated until eventually only a signal layer of graphene remains.
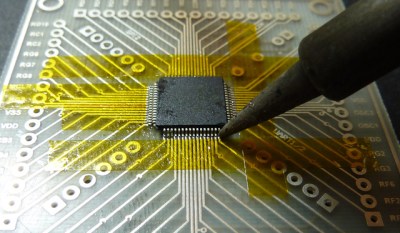
The other non-conductive tape I use regularly in my lab is of course Kapton tape. While Kapton is a Dupoint brand name, it’s basically a polyimide film tape which is thermally stable up to 400 degrees C. This makes it ideal for work holding in electronics (or masking out pins) when soldering. You can also use it for insulating (though it’s inadvisable for production applications). Typically polyimide tape is available under a number of dubious synonyms (one example is Kaptan) from a variety of Chinese suppliers at low cost.
Carbon tape is conductive in all axes. This means it you can create a electrical connection by simply taping to your devices. It’s resistance however is somewhat high. I’ve most commonly come across this when using electron microscopes. Carbon tape is used both to keep a sample in place and create an electrical connection between the sample and the sample mount.
Carbon tape, applied to a SEM mount.
Other conducting tapes are available with lower resistance, creating a electrical connection without soldering is valuable in a number of situations. Particularly when heat might damage the device. One example of this is piezoelectric materials. Not only does solder often bond poorly to ceramic materials, but it may also depole the material removing its piezoelectric properties. I tend to use conductive epoxies in these situations, but conductive tapes appear to be an attractive option.
Aluminum tape is commonly used for (heat) insulation in homes. It’s therefore very cheap and easily available. As well as conducting heat aluminum tape of course also conducts electricity. Around the lab this can be pretty handy. While the adhesive is not conductive, making it less attractive for connection parts, I’ve found aluminum tape great of sealing up holes in shielded enclosures. It also makes a great accompaniment to aluminum foil which is used to provide ad-hoc shielding in many scientific environments. Copper tape is also easily obtained, though slightly more expensive.
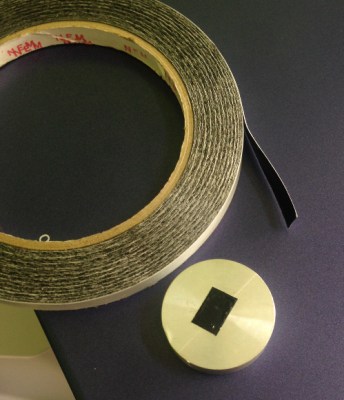
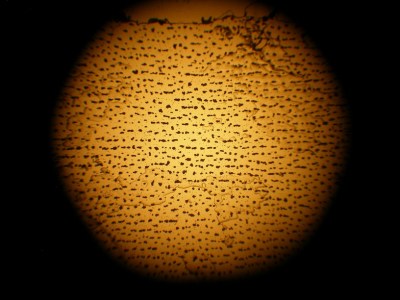
Z tape under a microscope
A much less common, but far cooler conductive tape is so called Z tape. This tape is composed of regular double-sided tape impregnated with spaced conductors. The result is a tape that conducts in only one direction (from the top to the bottom). This makes it similar in structure to a zebra strip, commonly used to connect LCDs. Z tape is unfortunately pretty expensive, a short 100mm strip can cost 5 dollars. What exactly 3M had in mind when creating Z tape is unclear. But it can be used for repairing FPC connectors on LCDs or in other situations where soldering is impractical.
One of the more awesome applications is Jie and Bunnie’s circuit sticker project. The kits are designed to allow kids to assemble circuits simply by sticking components together. Z tape is ideal for this, as it allows multiple connections to be made using the same piece to tape.
I couldn’t write an article on tape without mentioning the somewhat apocryphal “Invisible Electrostatic Wall” incident. A report at the 17th Annual EOS/ESD Symposium describes a “force field” like wall that appeared during the production of polypropylene film. While the story seems slightly dubious, it reminds us of the surprising applications and utility of tapes.
Next time you’re sending off a package or ripping open a package, spare a thought for the humble tape that holds it together.
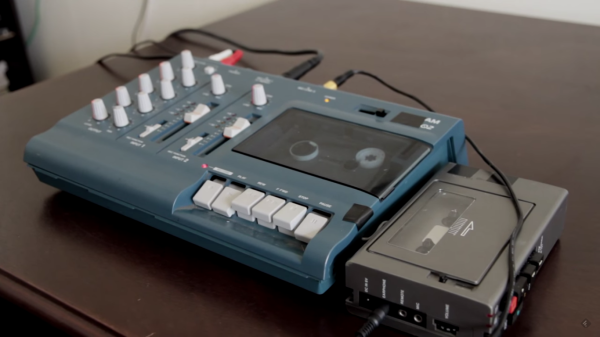
A lot of digital processes are named after an old analog device that they’ve since replaced. It’s not uncommon to “tape” a show nowadays, for example, even though the recording work is actually done by a digital video recorder. Sometimes, though, the old analog devices have a certain je ne sais quoi that is desirable even in today’s digital world. This is certainly the case with [Dima]’s tape loop echo which is actually made with a physical tape loop.
The process of building the tape loop hardware is surprisingly non-technical. By positioning a recording head and a playback head right next to one another, a delay is introduced. An echo is created by mixing the original live sound signal with this delayed signal coming from the tape By varying the speed of the tape or altering several other variables, many different-sounding effects can be achieved.
Although in practice it’s not as simple as it sounds (the device required a lot of trial-and-error), the resulting effect is one that Pink Floyd or Beck would surely be proud of. Analog isn’t the only way to go though, there are plenty of digital effects that are easily created, and some with interesting mounting options as well.
Way back in the previous century, people used to use magnetized strips of tape to play music. It might be hard to believe in today’s digital world, but these “cassette” tapes were once all the rage. [Steve] aka [pinter75] recently found a Bang & Olufsen stereo with this exact type of antequated audio playback device, and decided to upgrade it with something a little more modern.
Once the unit arrived from eBay and got an electronic tune-up, [pinter75] grabbed a Galaxy S3 out of his parts drawer and got to work installing it in the old cassette deck location. He used a laser cutter to make a faceplate for the phone so it could be easily installed (and removed if he decides to put the tape deck back in the future).
The next step was wiring up power and soldering the audio output directly to the AUX pins on the stereo. Once everything was buttoned up [pinter75] found that everything worked perfectly, and mounted the stereo prominently on his wall. It’s always great when equipment like this is upgraded and repaired rather than thrown out.
Here’s a way to explore new spaces in untraditional manners: a sonophore, or a glove equipped with a tape heads meant to explore spaces with magnetic tape tracing the walls.
This project is a followup to the analogue tape glove from a few years ago. In that project, aligned strips of magnetic tape cover a canvas, leaving anyone wearing the glove to track their hand horizontally swiping across different tracts, or vertically listening to each track.
This project takes a glove similar to the analogue tape glove, but the tape is spread out along the walls of the installation. There’s no way of knowing what strange voices are contained on the tapes; the only way to know is to explore the space.
Video of the project below. It’s a Vimeo, so you know it’s artistic.
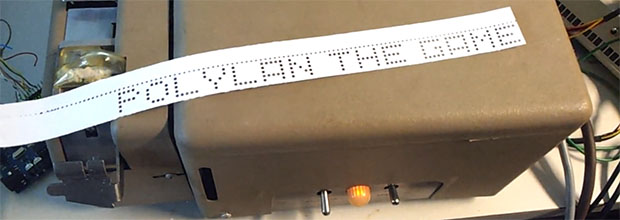
Back before the days of 8 inch floppy disks, storing computer programs was much more primitive than even a stack of punch cards. The earliest general purpose computers used paper tape, a strip of paper with punched holes designating a 0 or a 1. Thankfully for the computer scientists of the day, these paper tapes weren’t created by hand. No, the Friden SP-2 tape punch took care of the duties of punching holes in these tapes. When [Max] rescued one of these tape punch machines from a trash bin, he knew what he needed to do: connect it to an Arduino so he could create his own paper tapes.
[Max] found a veroboard with a bunch of transistors inside the machine that was added by a previous owner. After finding the manual for the machine he connected it to an Arduino, holding each of the eight control pins high to punch the tape, and then holding another pin high to advance the tape. With this, he was able to punch letters instead of binary code into his paper tape.
[Max] also added an Ethernet shield to his Arduino that checks his email. If an email shows up in a special folder, it outputs the subject line to the tape punch machine, giving him an entirely retro ticker tape machine, built with vintage 60s hardware.
There are a pair of videos of [Max]’s tape punch machine in action below, along with a gallery of the glamorous gut shots of this incredible machine.
[Armin] recently pulled out his Commodore 64 and looked back on the projects he did as a kid. The surprising thing is that we’re not talking quite as far in the past as you might image. He was 13 in 2002 and the family didn’t have a PC. But more than a decade before his father had purchased a C64 and [Armin] dug into the manual to teach himself how to code. This week he connected the old hardware to his video capture card to give us a demonstration on what he accomplished.
He had seen Windows 95 at the local computer club and figured why not program a clone of the software for the machine at hand? He called it Windows 105 (because that number is higher than 95) and worked out ways to mimic programs like DOS, Corel Draw, Notepad, and some of the programs from Microsoft Office. They didn’t include all the functionality of the real thing, but the look was there.
The story does have a happy ending. [Armin’s] parents saw what he was doing and managed to pick up a PC for him to play with. Now he’s a professional programmer looking back on the formative years that got him there. We’ve embedded one of his demo videos after the break for your enjoyment.