Improvising An EPROM Eraser

Back in the old days, when we were still twiddling bits with magnetized needles, changing the data on an EPROM wasn’t as simple as shoving it in a programmer. These memory chips were erased with UV light shining through a quartz window onto a silicon die. At the time, there were neat little blacklights in a box sold to erase these chips. There’s little need for these chip erasers now, so how do you erase and program a chip these days? Build your own chip eraser using components that would have blown minds back in the 70s.

[Charles] got his hands on an old 2764 EPROM for a project, but this chip had a problem — there was still data on it. Fortunately, old electronics are highly resistant to abuse, so he pulled out the obvious equipment to erase this chip, a 300 watt tanning lamp. This almost burnt down the house, and after a second round of erasing of six hours under the lamp, there were still unerased bits.

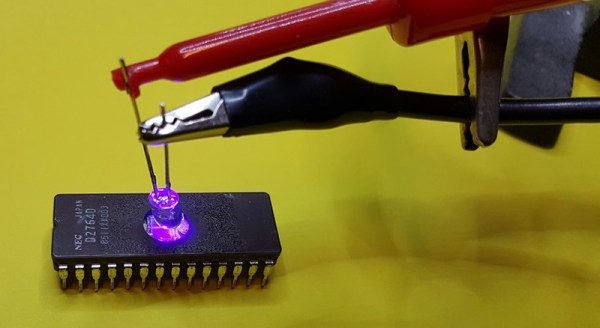
Our ability to generate UV light has improved dramatically over the last fifty years, and [Charles] remembered he had an assortment of LEDs, including a few tiny 5mW UV LEDs. Can five milliwatts do what three hundred watts couldn’t? Yes; the LED had the right frequency to flip a bit, and erasing an EPROM is a function of intensity and time. All you really need to do is shine a LED onto a chip for a few hours.

With this vintage chip erased, [Charles] slapped together an EPROM programmer — with a programming voltage of 21V — out of an ATMega and a bench power supply. It eventually worked, allowing [Charles]’ project, a vintage liquid crystal display, to have the right data using vintage-correct parts.

UV Sensitive Filament As A Persistent Display

Some of the hacks we feature are modifications of existing devices, others are ground-up builds of entirely new ones. And then there are the experiments, things that have to be worth trying because they just might work. In this final category we have [Matt]’s work with  UV sensitive plastic to form the basis of a simple persistent display, which has created something best described as a proof-of-concept that shows promise, and definitely proves that he had an idea very much worth trying.

The idea makes use of a plastic that changes colour from white to purple when exposed to UV light. He 3D printed a waffle-like structure to locate over a 3×3 grid of UV LEDs, which he could then illuminate under the control of an Arduino Mini Pro. A short illumination changes the colour of the plastic above it, creating a “pixel” that persists for several seconds. In this he has created a working proof of concept for a very simple 3×3 matrix display, albeit rather an unwieldy one. The advantage the idea offers is that a relatively long time of display can be achieved for a relatively short LED illumination, giving a potential for power saving.

The proof-of-concept itself isn’t particularly useful, but from this idea it’s possible a larger display could be practically made. An array of surface-mount LEDs could perhaps illuminate a larger array of plastic to a greater resolution, it’s definitely an idea that was worth trying, and which shows promise for further pursuit. If you’d like to see it in action he’s posted a video, which we’ve placed below the break.

Continue reading “UV Sensitive Filament As A Persistent Display”

DIY Illuminator For UV Fluorescence Photography

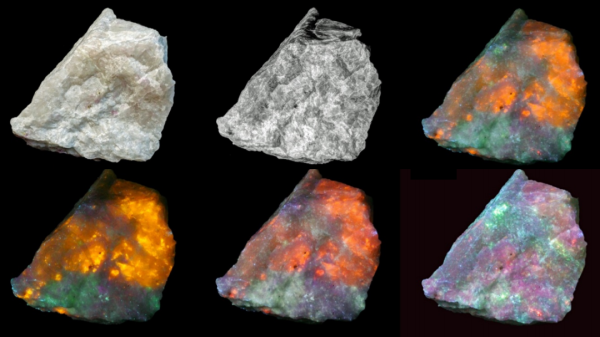
The image shown is the mineral Hackmanite, which fluoresces under ultraviolet lighting. However, not all UV is created equal, and that makes a difference if you’re into UV imaging. The image for this article is from [David Prutchi] and shows the striking results of using different wavelengths of UV. [David] goes into detail on how to make your own DIY Long, Medium, and Short-wave UV Illuminator complete with part numbers and wiring diagram. The device isn’t particularly complicated; the real work was determining the exact part numbers and models of lamp, filters, and ballasts required to get the correct results. [David] has done that work and shared it for anyone interested in serious UV fluorescence photography, along with a white paper on the process.

We’ve seen [David]’s work before. We featured his DIY short-wave UV imager in the past, and his DOLPi camera project was a 2015 Hackaday Prize finalist. It’s clear he really knows his stuff, and genuinely enjoys sharing his discoveries and work.

Seeing The Truly Invisible With DIY Shortwave UV Imaging

We’ve all seen how to peel IR filters off digital cameras so they can see a little better in the dark, but there’s so much more to this next project than that. How about being able to see things normally completely outside the visual spectrum, like hydrogen combustion or electrical discharges?

UV Electrical Discharge

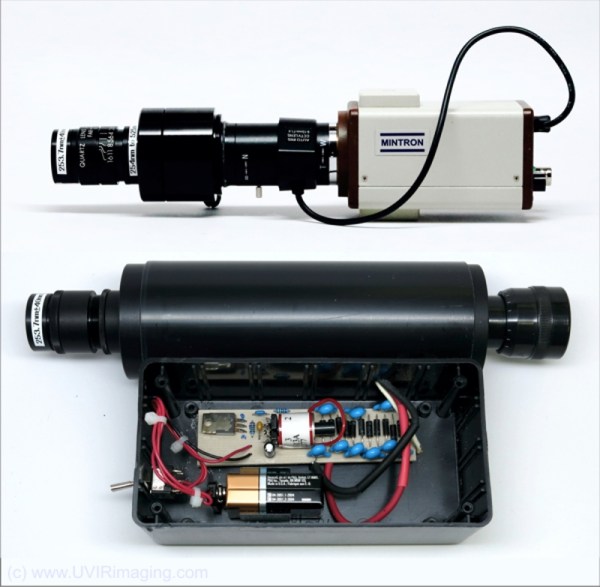
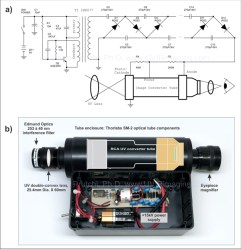
[David Prutchi] has just shared his incredible work on making his own shortwave ultraviolet viewers for imaging entirely outside of the normal visible spectrum – in other words, seeing the truly invisible. The project has not only fascinating application examples, but provides detailed information about how to build two different imagers – complete with exact part numbers and sources.

UV-Viewer-SmallIf you’re thinking UV is a broad brush, you’re right. [David Prutchi] says he is most interested in Solar Blind UV (SBUV):
Solar radiation in the 240 nm to 280 nm range is completely absorbed by the ozone in the atmosphere and cannot reach Earth’s surface…

Without interference from background light, even very weak levels of UV are detectable. This allows ultraviolet-emitting phenomena (e.g. electrical discharges, hydrogen combustion, etc.) to be detectable in full daylight.

There is more to the process than simply slapping a UV filter onto a camera, but happily he addresses all the details and the information is also available as a PDF whitepaper. [David Prutchi] has been working with imaging for a long time, and with his sharing of detailed build plans and exact part numbers maybe others will get in on the fun. He’s also previously shared full build plans for a Raspberry Pi based multispectral imager, [David’s] DOLPHi Polarization Camera was a finalist in the 2015 Hackaday Prize, and he spoke at the Hackaday SuperConference about the usefulness of advanced imaging techniques for things like tissue analysis in medical procedures, and landmine detection for the purposes of cleaning up hazardous areas.

Legit Hack Creates TEA Laser Power By Mr. Wimshurst

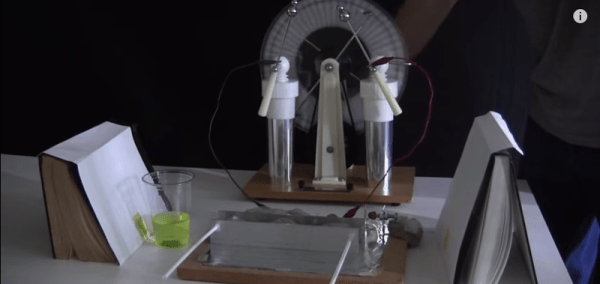
It’s a bit scary what you can make with stuff found in the average household, provided you know what you’re doing. How about a TEA laser? Don’t have a high-voltage power supply to run it? Do what [Steven] of rimstar.org did, and power it with a homemade Wimshurst machine.

TEA lasers give off ultraviolet light. In order to see the beam, [Steven] aims it through a glass of water tinted with highlighting-marker juice and onto a sheet of white paper. [Steven] originally used his homemade 30kV DC power supply to light up his TEA laser. He made the laser itself from aluminium foil, angled aluminium, transparency sheets, some basic hardware components, and a 100kΩ resistor.

Although the components are simple, adjusting them so that the laser actually works is quite a feat. [Steven] says he burned holes through several transparencies and pieces of foil before getting it right. Using a Wimshurst machine to power the TEA laser takes another level of patience. It takes about 25 cranks of the static electricity-producing machine to build up enough energy to attempt lasing.

Want to make your own TEA laser, perhaps in a different configuration? [Steven]’s design was based on one of [sparkbangbuzz]’s lasers, which we covered several years ago.

Continue reading “Legit Hack Creates TEA Laser Power By Mr. Wimshurst”

A Flashlight For Any Occasion

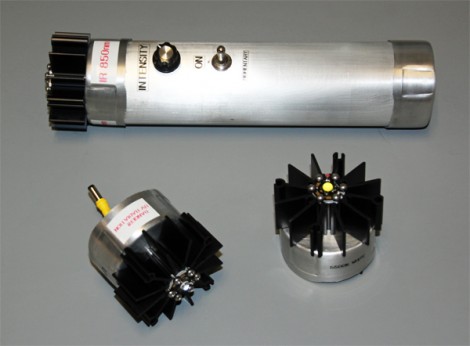
Whether you’re trying to light your path, build your own night vision, or do some tanning at home, this flashlight has you covered. [David Prutchi] designed the high power flashlight with three swappable heads.

He built the base unit out of aluminum pipe. It’s got plenty of room for the four 9V batteries that act as the power source. The driver circuit is just a bit smaller than one of those batteries, and to bring the whole thing together [David] and his helper added a potentiometer, toggle switch, and quick connector which makes head swaps a breeze. The heads themselves are all LED based, with one for visible light, another for infrared, and the final module outputs ultraviolet. We joke about tanning with it, but at 10 Watts you should be more worried about accidental damage to your vision.

The finished product is shown checking the security ink on some Canadian Currency. This would also make a nice secondary light source for your night vision monocle.

Building A UV Exposure Box

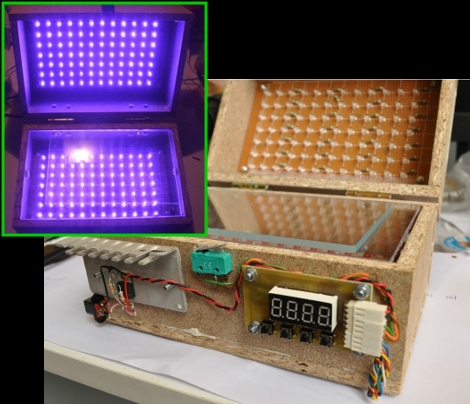
There are two methods of using etchant resist when making circuit boards. We use the toner transfer method that requires ironing on laser toner to the copper, but you can also use chemical resist that reacts to ultraviolet light. [Bogdan] decided to start doing more of the latter so he built a UV exposure box to make the process easier.

It is possible to use flourescent light bulbs for this, but he decided to use UV LEDs, a method we’ve also seen before. But there’s always room to innovate, and [Bogdan] built-in a couple of nice features that are new to us. Because the UV light can be bad for your eyes, he included a set of red visible-light LEDs on the bottom half of the box that are used to align two layers of exposure mask when making double-sided boards. There’s also a switch that automatically shuts off the UV light when the box is opened. And as the coup-de-grace, he added a programmable timer to regulate the exposure, using his newly created box when etching the PCB for it.