This Weekend: Vintage Computer Festival Zurich

This weekend, November 18th and 19th, the greatest vintage computer conference in Europe is going down. It’s the Vintage Computer Festival Europe, and if you’re around Zurich this weekend, we highly recommend that you check it out.

On deck for this year’s VCF Europe is an incredible amount of amazing retrotechnology. A demonstration of high-resolution graphics without using computer memory will be found in a few Tektronix storage tube terminals (their Wikipedia entry is phenomenal, by the way). There will be a few Olivetti microcomputers on display demonstrating Italy’s contribution to the computer revolution. A PDP 6 will be recreated, and a 1964 IBM 360/30 will be revived. There will be discussions on using logarithms as a basis for computers. [Oscar], creator of the PiDP-8/I will be bringing his latest project, an exquisite miniature recreation of a PDP-11/70, with a molded enclosure and purple toggle switches.

This is a retrocomputer conference where an Apple I is the least interesting computer on display, an extremely difficult feat to pull off. VCFe will be held at Rote Fabrik in Zurich, and tickets are five units of the local currency per day. You can check out the festival on Twitter, Google+, and the main website.

Build One, Get Two: CPLD And STM32 Development On A Single Board

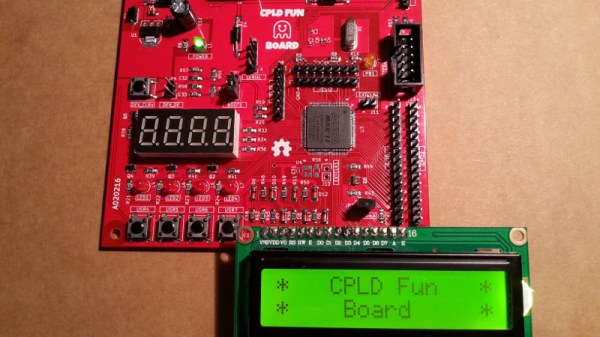
Programmable logic devices have claimed their place in the hobbyist world, with more and more projects showing up that feature either a CPLD or their bigger sibling, the FPGA. That place is rightfully earned — creating your own, custom digital circuitry not only adds flexibility, but opens up a whole new world of opportunities. However, this new realm can be overwhelming and scary at the same time. A great way to ease into this is combining the programmable logic with a general purpose MCU system that you already know and are comfortable with. [Just4Fun] did just that with the CPLD Fun Board, a development board connecting an Arduino compatible STM32F103 Cortex-M3 controller to an Altera MAX II CPLD.

The PCB itself has some standard development board equipment routed to the CPLD: LEDs, buttons, a seven-segment display, and additional GPIO. The rest of the CPLD’s pins are going straight to the STM32 and its SPI, I2C and UART pins. Let’s say you want to create your own SPI device. With the CPLD Fun Board, you can utilize all the pre-existing libraries on the STM32 and fully focus on the programmable logic part. Better yet, every connection from MCU to CPLD has its own pin header connection to attach your favorite measurement device for debugging. And in case you’re wondering — yes, you can attach external hardware to those connectors by setting either MCU or CPLD pins to Hi-Z.

The downside of all this is the need for proprietary design software and a dedicated programmer for the CPLD, which sadly is the everyday reality with programmable logic devices. [Just4Fun] did a great job though writing up a detailed step-by-step tutorial about setting up the environment and getting started with the board, but there are also other tutorials on getting started with CPLDs out there, in case you crave more.

If You Want To Spend On A Microscope

A quick check of the usual Chinese websites will yield USB microscopes for a very low price. However, many of these are little more than webcams with some cheap optics. Not that they can’t be useful, but they probably won’t compete with an expensive instrument like a Dino-Lite. [Shahriar] looks at the latest offerings from Dino-Lite and shows how they can be useful when examining electronics. You can see the video below, but be warned: these little microscopes are not cheap. The entry-level model starts at about $100 and they go up  — way up — from there.

Still, many of us spend as much or more on necessary gear and these days a microscope for inspecting tiny circuits is pretty handy. In addition to the optical instruments, [Shahriar] also looks at a stepper motor-driven microscope stage, which is interesting.

Continue reading “If You Want To Spend On A Microscope”

A Dreamcast VMU With A Secret

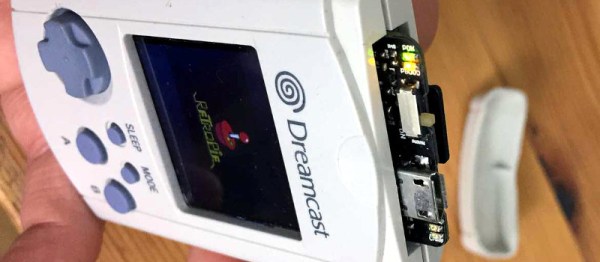
Since the Raspberry Pi range of boards first appeared back in 2012, we’ve seen them cleverly integrated into a host of inventive form factors. Today we bring you the latest offering in this space, [Kite]’s Raspberry Pi Zero W installed in the case of a Sega Dreamcast VMU. The result is a particularly nicely executed build in which the Pi with a few of its more bulky components removed or replaced with low-profile alternatives sits on the opposite side of a custom PCB from a small LCD display.

The PCB contains the relevant buttons, audio, and power supply circuitry, and when installed in a VMU shell makes for a truly professional quality tiny handheld console. In a particularly nice touch the Pi’s USB connectivity is brought out alongside the SD card on the end of the Zero, under the cap that would have originally protected the VMU’s connector. Some minimal paring away of Sega plastic was required but the case is surprisingly unmodified, and there is plenty of space for a decent-sized battery.

The VMU, or Visual Memory Unit, makes an interesting choice for an enclosure, because it is a relic of one of console gaming’s dead ends. It was the memory card for Sega’s last foray into the console market, the Dreamcast, and unlike those of its competitors it formed a tiny handheld console in its own right. Small games for the VMU platform were bundled with full titles, and there was a simple multiplayer  system in which VMUs could be linked together. Sadly the Dreamcast lost the console war of the late 1990s and early 2000s to Sony’s PlayStation 2, but it remains a console of note.

VMUs are not the most common of gaming survivors, but we’ve shown you one or two projects using them. There was an iPod conversion back in 2010, and much more recently some mind-blowing reverse engineering and emulation on the original VMU hardware.

Thanks [Giles Burgess] for the tip.

Less Than Production, More Than One-Offs

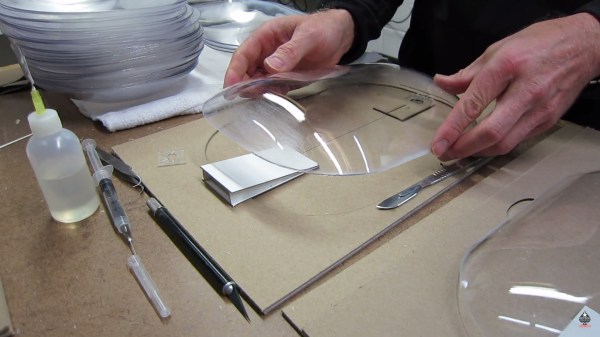
We build things we think are cool. Sometimes, other people agree with us and they want a copy of what we’ve built. If you’re lucky enough to have an enviable product but you’re not ready for full-scale manufacturing, you may be looking at a low-volume production run. [Eric Strebel] walks us through one such instance where he makes some custom color swatches for a show. Video after the break.

[Eric Strebel] is an industrial designer so he plays to his strengths by designing the swatch shape, jig, tool, and hangers. He hires out the painting, laser cutting, and CNC machining. This may seem like a simple statement but some of us have a hard time paying other people for things we’re capable of learning. In some cases, we just have to pay the professionals to do it correctly and keep our focus.

The mentality of small runs in this video is perfect for people who sell on Tindie or want to make more than a handful of consistently nice parts. Our own [Lewin Day] recently talked about his experience with a run of 200 mixers called gMix.

Continue reading “Less Than Production, More Than One-Offs”

High Speed Chronograph Looks Like Pro Gear

It can be hard enough to take a good photograph of a running kid or pet, and if we’re being honest, sometimes even stationary objects manage to elude our focus. Now imagine trying to take a picture of something moving really fast, like a bullet. Trying to capture the moment a fast moving projectile hits an object is simply not possible with a human behind the shutter button.

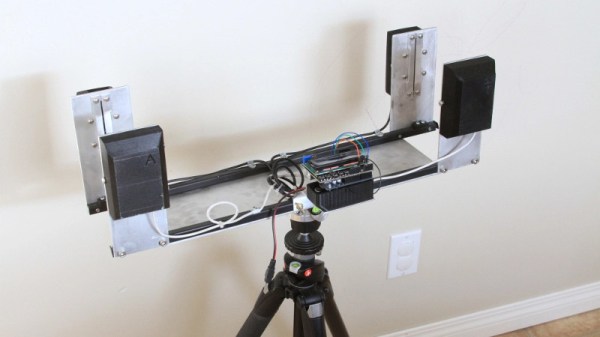
Enter the ballistic chronometer: a device that uses a set of sensor gates and a highly accurate timer to determine how fast an object is flying through it. Chronometers that operate up to a couple hundred meters per second are relatively common, but [td0g] had something a little faster in mind. He’s come up with an optical setup that he claims can capture objects moving as fast as Mach 2. With this chronometer tied into a high-speed flash rig, [td0g] is able to capture incredible shots such as the precise instant a bullet shatters a glass of water.

Because he couldn’t find any phototransistors with the sub-microsecond response time necessary to detect a small object moving at 1,000 m/s, [td0g] ended up using LEDs in a photoconductive configuration, where 27 VDC is applied backwards against the diode. Careful monitoring of voltage fluctuations across the diode allows for detection of changes in the received light level. To cut down on interference, [td0g] used IR LEDs as his light sources, reasoning there would be less ambient IR than if he used something in the visual range.

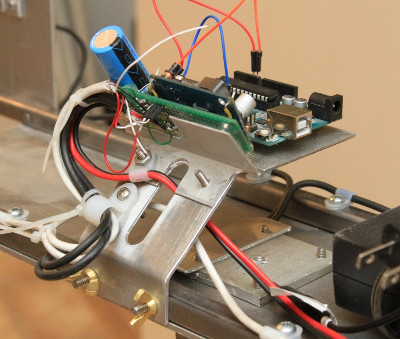
What really impresses with this build is the attention to detail and amount of polish [td0g] put into the design. From the slick angled bracket that holds the Arduino and LCD to the 3D printed covers over the optical gates, the final device looks like a professional piece of equipment with a price tag to rival that of a used car.

For the future, [td0g] plans on upgrading to faster comparators than he LM339’s he has installed currently, and springing for professionally done PCBs instead of protoboard. In its current state this is already a very impressive piece of kit, so we’d love to see what it looks like when it’s “finished”.

If you don’t need something quite this high end but still would like to see how fast something is going, we have covered chronometer builds to fit every budget.

Maria Goeppert-Mayer: The Other Nobel Prize Winner

Maria Goeppert-Mayer was one of only two women to win the Nobel prize for physics thus far, the other being Marie Curie. And yet her name isn’t anywhere near as well known as Marie Curie’s. She also worked on the Manhattan Project and spent time during her long career with Enrico Fermi, Max Born, Edward Teller, and many other physics luminaries.

She was “other” in another way too. She followed her husband from university to university, and due to prevailing rules against hiring both husband and wife, often had to take a non-faculty position, sometimes even with no salary. Yet being the other, or plus-one, seemed to give her what every pure scientist desires, the freedom to explore. And explore she did, widely. She was always on the cutting edge, and all the time working with the leading luminaries of physics. For a scientist, her story reads like it’s too good to be true, which is what makes it so delightful to read about.

Continue reading “Maria Goeppert-Mayer: The Other Nobel Prize Winner”