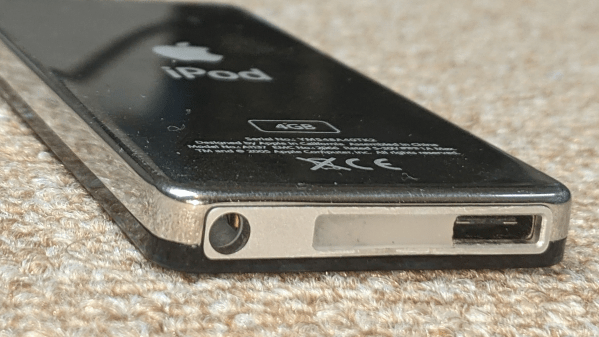
Some hacks serve a critical need, while others are just for the challenge or fun of it. We suspect the latter was the real reason [David Buchanan] converted a first generation iPod Nano from its original 30 pin connector to USB-C.
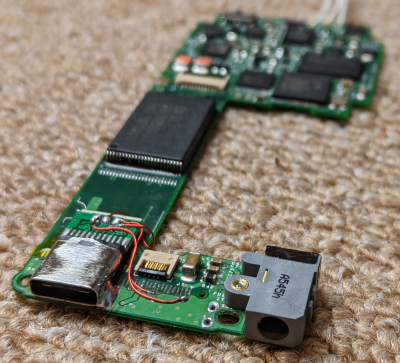
[David] bought the iPod with a dead battery, so when he opened the iPod to get the old battery out, he noticed there was enough space to fit a USB-C connector. The original Apple 30 pin connector runs USB 2.0 through four of the pins, so [David] used the original USB cable and identified the appropriate pins and traces with a continuity tester. The connector was destructively removed with side cutters, ripping off all but one of the pads in the process. A hot air station might have made things easier, but we assume he did not have one on hand. The USB-C connector was scavenged from a cheap USC-C to USB Micro adaptor and mounted by soldering the housing directly to the PCB’s ground plane. The three remaining terminals were soldered to the traces with enamel wire.
With the new battery installed, [David] confirmed that both charging and data transfer worked. The IC that handles the button and scroll pad interfered slightly with the new connector, so he filed away some of the IC’s excess. Any open pads close to the new connector was covered with Kapton tape to avoid shorts. The large hole in the enclosure for the 30 pin connection was partly filled in with five-minute epoxy. The final assembled product looks almost factory produced and works as it’s supposed to, so we call this a win.
Retrofitting USB-C connectors in various electronic devices has become a popular hack over the past two years. We’ve seen it done on everything from Thinkpads to soldering irons. Continue reading “Retrofitting USB-C To An IPod Nano”