VFD Tube Calculator Shows Off Wide Array Of Skills

With all the tools and services available to us these days, it’s hard to narrow down a set of skills that the modern hacker or maker should have. Sure, soldering is a pretty safe bet, and most projects now require at least a little bit of code. But the ability to design 3D printable parts has also become increasingly important, and you could argue that knowledge of PCB design and production is getting up there as well. With home laser cutters on the rise, a little 2D CAD wouldn’t hurt either. So on, and so on.

If you ever wanted an example of the multitude of skills that can go into a modern hardware project, take a look at this gorgeous Vacuum Fluorescent Display (VFD) tube calculator built by [oskar2517]. As fantastic as the final product is, we were particularly impressed with everything it took to get this one over the finish line.

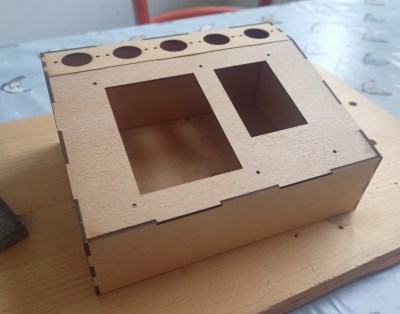
A .7 mm walnut veneer covers the pieced together plywood frame.

It’s got it all: 3D printed parts, a laser cut wooden frame, a custom PCB, and even a bit of old school woodworking. To top it all off, the whole thing has been meticulously documented.

But what’s perhaps most impressive here is that [oskar2517] was approaching most of these techniques for the first time. They had never before worked with IV-12 tubes, designed an enclosure in 3D, had parts laser cut, applied wood veneer, or designed a custom PCB. They did have solid experience writing code in C at least, which did make developing the Arduino firmware a bit easier.

Although they might look outwardly similar, VFD tubes like the IV-12 are easier to work with than Nixie tubes thanks to their lower operating voltage. That said, a look through our archives shows that projects using Nixies outnumber VFD tubes by nearly four to one, so there’s no shortage of folks willing to take on the extra effort for that sweet warm glow.

Classic Calculator Goes RPN, With New Brain

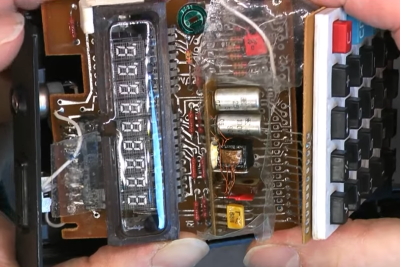
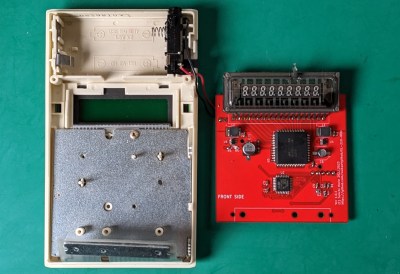
In the era of the smartphone, an electronic calculator may seem a bit old-hat. But they continue to hold a fascination in our community, both when used for their original purpose, and as objects for hardware hacking in their own right. After their first few years when they were a rare and exclusive gadget, they were manufactured in such huge numbers as to be readily available for the curious hacker. [Suikan] has taken one of these plentiful models and done something special for it, creating a new mainboard, and a firmware which transforms it into a reverse Polish, or RPN, scientific calculator.

The Sharp EL210 and EL215 were ubiquitous early-1980s calculators without scientific functions, and with a VFD display. We remember them being common during our schooldays, and they and similar models can still be found on a trawl through thrift stores.

On the board is one of the STM32 microcontrollers and a Maxim VFD driver, and fitting it is simply a case of soldering the Sharp’s VFD to it, placing it in the calculator, and attaching the keyboard. The firmware meanwhile uses the orange C key from the original calculator as a function key, alternating between standard and scientific operations.

If you’re curious about RPN, we’ve taken a look at it here in the past.

Don’t Look Up, Or You’ll See The Time From This VFD Projection Clock

Ceiling clocks were a bit of a thing back in the days when clock radios were a fixture of nightstands. The idea was to project the time onto the ceiling so you’d only have to roll over onto your back and open your eyes to check the time, instead of potentially disturbing your slumber by craning your neck around to see the front of the clock.

As we recall, what sounded like a good idea was iffy in practice, with low-end optics and either weak incandescent bulbs or blazing LEDs. This nifty VFD projection clock by [Thomas Shupfs] seeks to fix those problems, and from the look of it does a pretty good job. It takes advantage of something else that fell out of favor with consumers — analog photography — by tapping into the ready supply of unwanted lenses. He paired that up with an IVL2-7/5 vacuum fluorescent display inside a 3D printed case with a cone-shaped extension to hold the lens at the right distance above the display. [Thomas] says that the STM32 software only supports JSON-RPC over USB at this time, and includes a couple of Python programs with examples of how to set the time and check the accuracy of the clock.

[Thomas] compares the clock head-to-head against his old LED projection clock, as seen in the featured image above; we flipped it for a better idea of what it would look like from bed. We’ve got to say the soft blue glow of the VFD would be a lot more pleasant to wake up to than the bright red LED projection. But this soft white projection clock is nice too.

Thanks to [skymab] for the tip.

2023 Cyberdeck Challenge: KOAT0 Portable Terminal

We’ve had cyberdecks as part of the scenery for long enough now that there are a series of common elements that appear across many different builds. The Raspberry Pi, for instance, or the mechanical keyboard, with a 3D printed body. [RobsonCuto]’s KOAT0 Portable Terminal has some of those in a particularly slim and neat design. The orange and grey color scheme is great really pops. Where this deck really shines though, is the display.  He’s eschewed LCDs or OLEDs, even CRTs, and gone for an unusual choice in a dot-matrix VFD.

The VFD in question is commonly available on AliExpress where it appears to be used for displaying Chinese characters. It’s not an obvious choice for a cyberdeck, so once the tidy-looking case is complete the real challenge in this project becomes how to drive it from the Pi. To that end, he appears to have some kind of text output working but still needs to complete a framebuffer driver. We applaud the effort and we really like the display.  We’re curious as to how its meager resolution might best be used in a Linux device.

All in all, this is a ‘deck we’d be happy to use ourselves if it were an option. We particularly like the on-the-arm style of use, and we’re pretty sure it’s the first time we’ve seen one of these displays on these pages.

Jet Engine Tachometer Turned Into Unique CPU Utilization Meter

When you’ve got a piece of interesting old aviation hardware on your desk, what do you do with it? If you’re not willing to relegate it to paperweight status, your only real choice is to tear it down to see what makes it tick. And if you’re lucky, you’ll be able to put it to work based on what you learned.

That’s what happened when [Glen Akins] came across a tachometer for a jet airplane, which he promptly turned into a unique CPU utilization gauge for his computer. Much of the write-up is concerned with probing the instrument’s innards to learn its secrets, although it was clear from the outset that his tachometer, from Kollsman Instruments, was electrically driven. [Glen]’s investigation revealed a 3-phase synchronous motor inside the tach. The motor drives a permanent magnet, which spins inside a copper cup attached to the needle on the tach’s face. Eddy currents induced in the cup by the spinning magnet create a torque that turns the needle against the force of a hairspring. Pretty simple — but how to put the instrument to work?

[Glen]’s solution was to build what amounts to a variable frequency drive (VFD). His power supply is based on techniques he used to explore aircraft synchros, which we covered a while back. The drive uses a trio of MCP4802 8-bit DACs to generate three phase-shifted sine waves via direct digital synthesis with an RP2040. The 3-phase signal drives the motor and spins the dial, with 84-Hz corresponding to full-scale deflection.

The video below shows the resulting CPU utilization gauge — which just queries for the current load level and sends it to the RP2040 over serial — in action. It’s not exactly responsive to rapid changes, but that’s to be expected from a mechanical system. And compared to exploring such a nice instrument, it really doesn’t matter.

Continue reading “Jet Engine Tachometer Turned Into Unique CPU Utilization Meter”

More Drill Press Mods: Adding A VFD Means No More Belt Changes

A decent drill press is an essential machine tool for almost any kind of shop, and marks a significant step up in precision compared to a hand drill. The ability to drill square, true holes is one thing, but the added power over what’s possible with a portable tool is the real game changer. If only you didn’t have to switch around those damn belts to change speeds, though.

You don’t, of course, if you go through the effort to add a variable frequency drive to your drill press like [Midwest Cyberpunk] did, along with some other cool mods. The donor tool for these mods came from — where else? — Harbor Freight. Some will quibble with that choice, but the tool was pretty cheap, and really all [Midwest] was interested in here was some decent castings and a quill with acceptable runout, since the entire power train of the tool was slated for replacement. The original motor gave way to a beefy Baldor 3-phase/240-volt motor controlled by a VFD mounted on a bracket to the left of the drill press head, allowing the stock belt and step pulley transmission to be greatly simplified. Continue reading “More Drill Press Mods: Adding A VFD Means No More Belt Changes”

This Retro Game Console Puts Vacuum Fluorescent Display To Good Use

Small in size, low-resolution, blocky segments, and a limited color palette — all characteristics of the typical vacuum fluorescent display, any of which would seem to disqualify them as the display of choice for a lot of applications. But this is Hackaday, and we don’t really pay much attention to what we’re supposed to do, but rather to what’s fun and cool to do. So when we see something like a VFD game console, we just have to sit up and take notice.

In a lot of ways, the design of [Simon Boak]’s Arduino-based VFD console is driven by his choice of display. The Noritake Itron GU20X8-301 VFD is a “tricolor” display with eight rows of 20 rectangular pixels. Each pixel is composed of six short linear segments, with alternating red and blue colors. Turning on either set of segments yields one of the two base colors, while turning on both yields a sorta-kinda whitish color, if you squint a bit.

[Simon] chose a two-piece design for his console, with a separate controller and display. The controller holds the Arduino Nano and all the controls, plus a piezo buzzer for fun. The display case connects to the controller with a ribbon cable and holds the VFD power supply and driver. To celebrate the retro look of the VFD, both cases are decked out with woodgrain side panels. [Simon] chose appropriately blocky games for the console, like Snake, Conway’s Game of Life, and the venerable snow demo. We’d imagine Pong would be a good choice too, as well as perhaps Tetris if the display were flipped on its side.

We really like the look of this console, and we appreciate putting an otherwise obsolete display to use in a creative way. If you want to learn a little more about these displays, check out this love letter to the VFD.

Continue reading “This Retro Game Console Puts Vacuum Fluorescent Display To Good Use”