From Vacuum Cleaner Hacking To Weather Station Reverse Engineering

spectrum

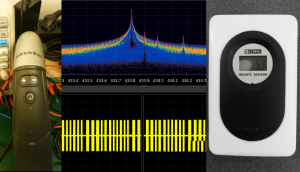
[Spock] wanted to do a little reverse engineering of his Miele brand remote control vacuum cleaner, so he broke out his DVB-T SDR dongle to use as a spectrum analyser. Sure enough, he found a 433.83Mhz signal that his vacuum cleaner remote control was using, but to his surprise, he found a stray QAM256 signal when he expected an ASK  only one.

After a little detective work, [Spock] eventually tracked it down to a cheap weather station he had forgotten about. The protocol for the weather station was too compelling for him to go back to his vacuum cleaner, though. After downloading an rc-switch Arduino library and making a quick stop at his local radio shack to get a 433.92 radio receiver to decode the signal, he reverse engineered the weather station so he could digitally record the temperature output. The Arduino rc-switch library proved unable to decode the signal, but some Python work helped him get to the bottom of it.

With software defined radio becoming more accessible and common place, hacks like these are a nice reminder just how wired our houses are becoming.

Fail Of The Week: Reverse Engineering A Wireless Energy Monitor

fotw-wireless-energy-monitor-reverse-engineering

[Afonso] picked up a cheap energy use monitor a few years back. He really like the data it displays about his home’s electricity, using a sensor to gather this info and a display that communicates with it wirelessly. But there is no option to log or dump the data. He set out to reverse engineer the wireless protocol in order to extend the use of the system. As the name of this column implies, he failed to get this working.

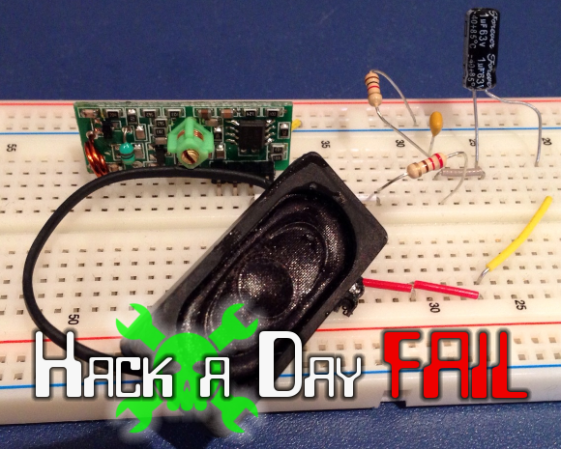
The hardware above is a 433Mhz transceiver that he rigged up as test hardware. It sounds like he’s assuming the monitor works on this band, which could have been his first misstep (we really don’t know). The speaker is there to give audible confirmation that he’s receiving something from the transmitter. This is where things start to get pretty weird. White noise was coming from the speaker, but when he stepped away from the bench it stopped. He was able to measure a regular pattern to the noise, and proceeded to place the speaker next to his computer MIC so that he could record a sample for further analysis.

Fail of the Week always aims to be a positive experience. In this case we’d like to have a conversation about the process itself. We agree that connecting a speaker (or headphones) should help get your foot in the door because your ear will recognize a rhythmic pattern when it is received. But with this noise, measuring the timing and recording a sample we’re not so sure about. Given the situation, how would you have soldiered on for the best chance at successfully sniffing out the communication scheme used by this hardware? Leave a comment below!


2013-09-05-Hackaday-Fail-tips-tileFail of the Week is a Hackaday column which runs every Wednesday. Help keep the fun rolling by writing about your past failures and sending us a link to the story — or sending in links to fail write ups you find in your Internet travels.

Ultrasonic Anemometer For An Absurdly Accurate Weather Station

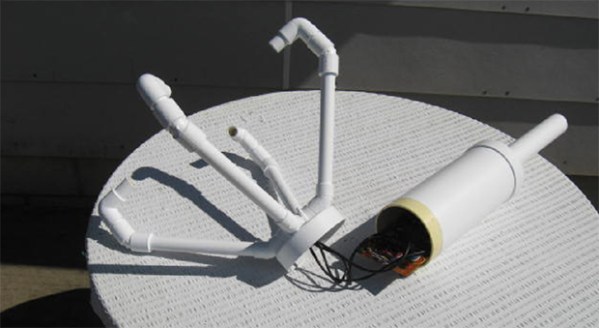
With his meteorological interests, [Carl] builds weather stations. Temperature and humidity sensors are a dime a dozen, but with his DIY ingenuity, [Carl] has built some very interesting and complicated devices. The latest of which is an ultrasonic wind sensor that uses the time of flight of ultrasonic pulses to detect how fast the wind is blowing.

[Carl]’s sensor uses four ultrasonic transducers aligned to North, South, East, and West to detect the wind speed. By measuring the time it takes an ultrasonic pulse to travel between the sensors indoors, Subtracting the in-situ measurement gives him the time of flight for each axis, and thus the wind speed.

It’s an impressive display of engineering that comes with an amazingly detailed design report. After three months of operation, [Carl] has found his ultrasonic anemometer is better than the traditional mechanical ‘egg-cup’ anemometer at measuring low wind speeds. The only real problem with the build is the fact the design makes a great bird perch, but some fine steel wire quickly corrected that problem.

Converting A Weather Station Kit For Wireless Data Harvesting

converting-weather-station-for-wireless-data-collection

Everyone loves getting something you can play with as a Christmas gift. [Thomas] was the lucky recipient of an Elektor USB weather station kit. But the fun didn’t end once he had assembled everything. He went on to hack the device for wireless data collection.

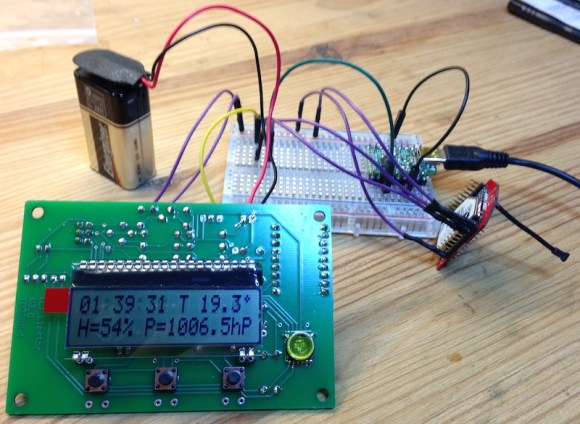
Shown above is the weather station board connected to the transmitter. The red board with a tiny antenna to the right is a Rovio RN-VX module. It is capable of transmitting serial data to its twin on the receiving end of the setup. The weather station is pretty easy to connect to the transmitter since it feeds serial data to an FTDI USB chip. [Thomas] simply connected power and ground, then added a jumper from the board’s TX pin to the Rovio’s RX pin. The receiving end uses a serial-to-USB converter — getting a signal for its RX pin from the TX pin on the Rovio receiver board.

We know from other projects that these radio modules can connect to a WiFi AP. Perhaps a future revision of [Thomas’] hack will allow the weather station to communicate with his server over the network, doing away with the need for a standalone receiver.

Weather Station Graphs History On Webpage

weather-station

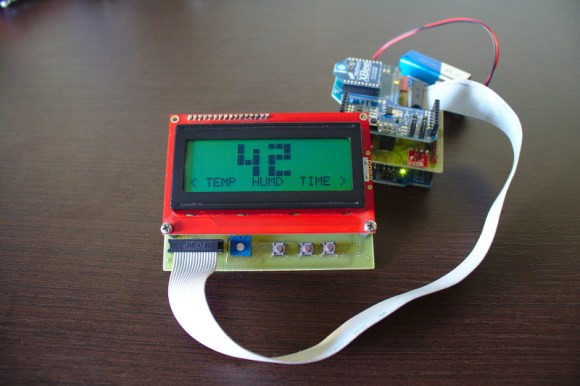
Kudos go out to [Jose] for his work getting so many different components to talk to each other in this Arduino weather station that using a Raspberry Pi to display the data online.

The components shown above make up the sensor package. There’s an Arduino with a custom shield that interfaces the barometric pressure sensor, real-time clock chip, a digital temperature sensor, and a humidity sensor. On top of that shield is an XBee shield that lets this push data back to the base station. [Jose] also rolled in an LCD character display and a few buttons so that the user may view weather data without heading to the web.

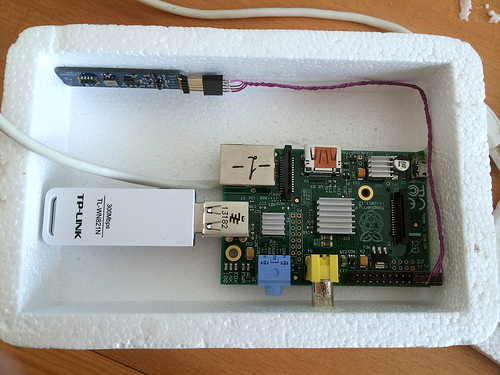
A Raspberry Pi board makes up the other half of the XBee pair. It harvests the incoming data from the radio module using a USB to Serial converter cable. You can see the data log on the webpage linked above. Just choose the “LIVE” menu option and click on “Daily” to get a better overview of humidity and pressure changes.

Hackaday Links: December 13th, 2012

Cardboard box computer

links-cardboard-box-computer

[Alistair] chapman had a Laptop with a broken screen sitting in his parts bin. He knew he had an LCD panel on hand that would probably work with it, but it wouldn’t fit in the case. His solution was to transplant all the computer parts into a cardboard box from a motherboard.

This violin is garbage

links-landfill-instruments

The kids in this orchestra live in a villiage built on top of a landfill. But they make the most out of what they have. This orchestra is composed of instruments built from garbage and they seem to work pretty well. [Thanks Bruce]

More LED mystery puzzles

links-led-puzzle

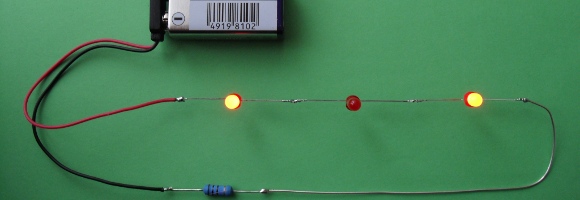
[Henryk] is at it again. He puts together some very impressive circuits that play tricks on your engineering mind. His latest is three LEDs in series. Look closely and you’ll see they’re not performing as expected. Watching the solution to one of his previous puzzles will help you figure out how he’s doing it. His work is simply amazing.

Netbook framed as a dedicated weather station

links-netbook-weather-display

Not wanting to get rid of old but still working hardware, [Retro Toaster] built a dedicated weather station by mounting the screen, keyboard, and track pad in a picture frame.

Current and voltage testing your USB projects

links-USBTesterFront

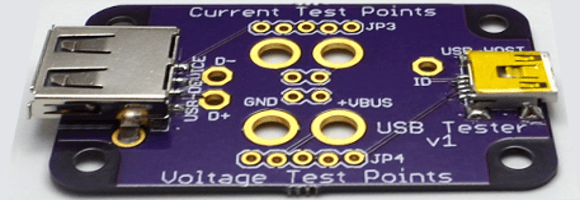
This dev board is a pass-through for USB devices. It makes voltage and current testing your device quite simple.

tempescope_in_bookshelf

An Extemely Unique Weather Display

Most home weather displays use an LED screen or other moderately interesting methods of showing you what’s going on outside. The [Tempescope], however, takes an entirely different route, actually recreating a tiny weather environment on your bookshelf!

This active weather device is controlled via an Arduino as well as a pump, ultrasound diffuser, and other assorted components connected to a computer. It was originally meant to display, or more accurately recreate (precreate?) tomorrow’s weather. What is even more interesting is that using [World Weather] software, it’s able to simulate the weather on any place on earth.

Early in this article [Ken] lists the art of [bonsai] as one of his inspirations. He’s open to suggestions as to how to expand this device, which can be seen after the break. We (I at least) would think it was awesome if there was actually a bonsai tree in the environment in keeping with its influences. Certainly our readers can give him some feedback as well! Continue reading “An Extemely Unique Weather Display”