bending the wood

Better Kerf Cuts With A CNC Bit

Bending wood is a complex affair. Despite the curves inherent in trees, most wood does not naturally want to bend. There are a few tricks you can use to bend it however, such kerf cutting and steaming. [JAR made] has a clever hack to make better kerf cuts using a CNC bit.

Typically kerfs are cut with a table saw or a miter saw set to trench. Many laser-cut box generations use kerfs to allow the piece to bend. The downside is that the cuts are straight cuts that are the same thickness throughout. This means that when the wood is bent into its shape, there are large gaps that need to be filled if you want the wood to look continuous. The hack comes in by using a router (not the networking kind) with a 6.2-degree taper. This means that the kerfs that it makes are angled. By placing the right amount of cuts and spacing them out equally, you get a perfectly rounded curve. To help with that even spacing, he whipped up a quick jig to make the cuts repeatable. Once all the cuts were made, the time to bend came, and [JAR made] used some hot water with fabric softener to assist with the bend. His shelves turned out wonderfully.

He makes the important statement that this CNC bit isn’t designed with this use case in mine and the chances of it snapping or breaking are high. Taking precautions to be safe is key if you try to reproduce this technique. Perhaps you can bust out some framing lumber and bend it into some beautiful furniture.

Continue reading “Better Kerf Cuts With A CNC Bit”

Making Something Gorgeous From Framing Lumber

Here at Hackaday, we typically cover things that blink, bleep, and occasionally they might even bloop. However, the name of the site is Hackaday. We’re about being clever, reusing things in new ways, and most importantly celebrating interesting projects. While not a traditional project that would grace the front page, we would argue that this nightstand made from framing lumber clearly belongs.

Framing lumber is infamous for being squirrely, weird, and heavily knotted. Most serious furniture makers avoid using the cheap stuff and opt for more expensive harder woods. Here in the US, the big box hardware stores carry cheap fast-grown soft pine that has significant amounts of warp and twist inherent in the wood. The process of getting it straight with right-angle corners is involved and even once it has been cut, the internal stresses inside the wood are released, rendering the board twisted and warped again over time. The timelapse process of planing, jointing, and cutting in the video has an almost therapeutic aspect to it. The results are two wonderful pieces of useful furniture that would look at home in most rooms.

The craftsmanship evident in the build is noteworthy but more impressive is the process of taking cheap and unfit materials and making something beautiful out of them. Perhaps if you’re inspired and decide to make your own nightstand this weekend, you can add some touch-sensitive electronics to it. Video after the break.

Continue reading “Making Something Gorgeous From Framing Lumber”

A Gorgeous Desk With AMD Inside

We’re the first to admit that we don’t see much woodworking here at Hackaday. But this desk with a PC inside from [John Heisz] is just too gorgeous not to share.

The build is mostly cherry veneered half-inch plywood and real cherry. There are dozens of angles and complex pieces that all fit together in a valuable and powerful desk. The centerpiece of the desk is the air intake grill with a 2019 Apple Mac Pro-like finish. [John] mentions that he previously did it by hand with just a parked drill bit and some patience, but he vastly prefers the automated way. Two cubbies flank the center vent, made from plywood with cherry veneers glued on. A USB hub is hidden at the back in one of the cubbies, exposing all the I/O for the AMD-powered desktop PC hidden inside. The top of the desk is hinged to allow easy access to the PC. [John] asserts that he made the coolest desk in the known universe. We don’t know if we can say it’s the coolest, but we certainly appreciate the process and expertise that made it.

After you’ve finished your new desk build inspired by [John]’s project, perhaps you might be interested in a levitating turbine desk toy to seal the deal. Video after the break.

Continue reading “A Gorgeous Desk With AMD Inside”

Swiss Army Knife Of Power Tool Carts

When you’re into woodworking in a serious way, you’re going to eventually want some power tools. With such efficiency of operation, things can go pear-shaped quickly, with wood dust getting absolutely everywhere. It’s not always practical (or desirable) to work outdoors, and many of us only have small workshops to do our making in. But woodworking tools eat space quickly. Centralized extraction is one solution, but all that fixed rigid ducting forces one to fix the tool locations, which isn’t always a good thing. Moveable tool carts are nothing new, we’ve seen many solutions over the years, but this build by [Peter Waldraff] is rather slick (video embedded below,) includes some really nice features in a very compact — and critically — moveable format.

By repurposing older cabinets, [Peter] demonstrates some real upcycling, with little going to waste and the end result looks great too! There is a centralized M-Class (we guess) dust extractor with a removable vacuum pipe which is easily removed to hook up to the smaller hand-held tools. These are hidden in a section near the flip-up planer, ready for action. An auto-start switch for the small dust extractor is wired-in to the smaller tools to add a little ease of use while reducing the likelihood of forgetting to switch it on. We’ve all done that.

For the semi-fixed larger tools, such as the miter and table saws, a separate, higher flow rate moveable dust extractor can be wheeled over and hooked up to the integrated plenum chamber, which grabs the higher volume of dust and chips produced.

A nice touch was to mount the miter saw section on sliding rails.  This allows the whole assembly to slide sideways a little, giving more available width at the table saw for ripping wider sheets. With another little tweak of some latches, the whole miter section can flip over, providing even more access to the table saw, or just a small workbench! Cracking stuff!

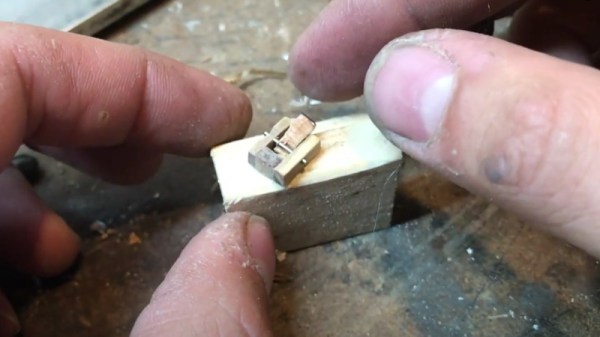
Need some help getting good with wood, [Eric Strebel] has some great tips for you! And if you’re needs are simpler and smaller, much much smaller, here’s a finger-sized plane for you.

Continue reading “Swiss Army Knife Of Power Tool Carts”

All Hail Your New Giant 555 Timer Overlord

You asked for it, and now you’ve got it. It’s taken more than a decade of accumulated complaining, but this gigantic 555 timer IC has finally gathered enough psychokinetic energy to take corporeal form and demand fealty from the readers of Hackaday.

Or not. The less exciting explanation is that creator [Rudraksha Vegad] was looking for a way to combine his interests in discrete electronic components and woodworking. The result is an incredible build that’s more than just a conversation starter; this desktop-sized version of the iconic integrated timer circuit is fully functional. You can even hook it up to a breadboard, assuming you’ve got some alligator clips handy.

Lifting the lid on this wooden “chip” uncovers an intricate hand-wired array of discrete components that stand in for the microscopic goings on inside the real thing. He’s even gone through the trouble of recreating the symbols for the comparators and flip-flops that you’d see in a diagram of a 555 using wooden shapes to elevate their respective components. It might not fit the classical definition, but surely this must count as some form of circuit sculpture.

[Rudraksha] credits several other projects for not just inspiring him to create his own mega 555, but for helping him wrap his head around the internal workings of everyone’s favorite IC. Using components he salvaged from old hardware, he says the project ended up being very educational for him. These days, when most makers are more likely to reach for a microcontroller than a logic chip, spending some quality time with transistors and passives can be quite illuminating.

Continue reading “All Hail Your New Giant 555 Timer Overlord”

wood strength tester

Shop-Built Rig Measures Strength Of Wood Accurately

Wood is an incredibly versatile material, but like everything else, it has its limits. Build a chair from weak wood and the worst that can happen is probably not that bad. But if you build machine tools from wood, the stakes for using the wrong wood can be a bit higher.

That’s the thinking behind the wood strength testing setup [Matthias Wandel] came up with. Previously, he had a somewhat jury-rigged test setup with a hydraulic bottle jack to apply force to the test piece and a bathroom scale to make measurements. That setup was suboptimal, so version two used a jackscrew to apply the force, but the bathroom scale still left the measurements open to interpretation. Version three, the topic of the video below, went with strain gauges and an A/D converter connected to a Raspberry Pi to automate data collection. The jackscrew was also integrated into the test setup with a stepper motor and, of course, [Matthias]’ famous wooden gears.

While the test rig is pretty simple in design, there’s a lot of subtlety to the calibration to make sure that it’s measuring the test material itself and not just compliance within the mechanism. It’s just another in a long line of data-gathering exercises that [Matthias] seems to groove on, like his recent woodshop electrical explorations.

Continue reading “Shop-Built Rig Measures Strength Of Wood Accurately”

Zac shows off his sound diffusion panels

Taking The Bark Out Of Reverb With Wood Scraps

For the past few years, many have become used to having virtual meetings in their homes. Spaces like kitchen tables, couches, spare bedrooms, and hammocks in the yard have all become “offices”. As you can imagine, many of these spaces aren’t well known for their acoustic qualities. [Zac] built a sound diffusion art piece out of scrap pieces of wood to help his office sound better when recording.

Reverb is caused by sound bouncing off hard, flat surfaces like drywall. These reflections are picked up by the microphone and lead to a noticeable drop in perceived sound quality. There are generally two ways to kill reverb in a space: diffusion and absorption. Diffusion is the technique that [Zac] is going for, with thousands of faces at different angles and locations, it breaks up the harsh reflections into millions of tiny reflections. Absorption is usually accomplished with foam and other typically soft substances.

[Zac] happened to have a large pile of offcuts and extra material from past projects of various wood species, making it easy to make a visually interesting piece. He used a table saw to rip them to a consistent width and a drum sander reduced them all to the same depth. Next, the long sticks were cut with a miter saw into 5 different lengths, leaving him with thousands of little pieces of wood. The hard part began when he had to glue several thousand pieces to a plywood backer board with CA glue. Sanding, finishing with poly, and a french cleat made the three pieces ready to hang on the wall.

Overall, the effect is stunning. While we’d love more hard data on the improvement, it certainly does sound better anecdotally. If you’re interested in more woodworking, take a look into making an inlay without a CNC. Video after the break.

Continue reading “Taking The Bark Out Of Reverb With Wood Scraps”