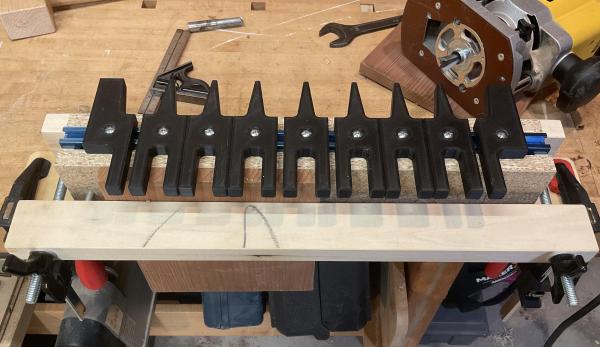
A wood-and-plastic jig to make dovetail joints

3D Printed Template Makes Perfect Dovetail Joints

Dovetail joints on a piece of furniture are one of those features that make it say “master carpenter” rather than “IKEA”. Traditional hand-made dovetails require accurate measurements and even more accurate sawing and chiseling, skills that may take years to develop. A slightly less artisanal method is to use a router and a dovetail template; the router makes perfectly straight cuts while the template makes sure it goes only where it needs to go.

If you haven’t got one of those templates yet, check out [Guy Perez]’s design for an adjustable dovetail template that’s easy to produce with a 3D printer. It consists of ten separate pieces mounted on a T-rail, which enables them to slide sideways and thereby generate pins and tails of varying widths. The T-rail is mounted on a wooden body with an integrated clamp to hold the target piece, as well as an endstop to provide a reference for all measurements.

As you can see in the video embedded below, the resulting jig is easy to use and should result in near-perfect dovetails each time. [Guy] made the CAD files available as well as detailed instructions on their design, so you can easily adjust them if you need pieces with a different tail angle or want to use thicker wood.

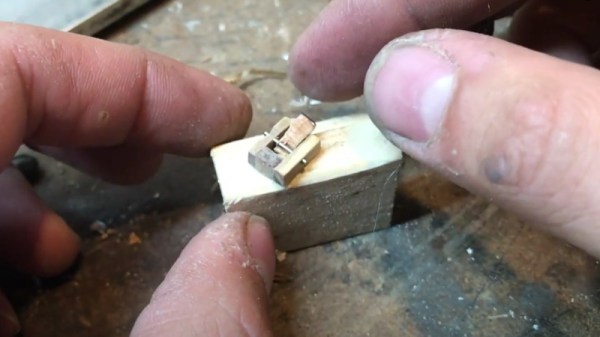
While this jig will make cutting ordinary dovetail joints a lot easier, you can still show off your manual skills by making an impossible mallet. Want to join metal bits instead? Check out this cute little dovetail cube.

Continue reading “3D Printed Template Makes Perfect Dovetail Joints”

Multiband Crystal Radio Set Pulls Out All The Stops

Most crystal radio receivers have a decidedly “field expedient” look to them. Fashioned as they often are from a few turns of wire around an oatmeal container and a safety pin scratching the surface of a razor blade, the whole assembly often does a great impersonation of a pile of trash whose appearance gives little hope of actually working. And yet work they do, usually, pulling radio signals out of thin air as if by magic.

Not all crystal sets take this slapdash approach, of course, and some, like this homebrew multiband crystal receiver, aim for a feature set and fit and finish that goes way beyond the norm. The “Husky” crystal set, as it’s called by its creator [alvenh], looks like it fell through a time warp right from the 1920s. The electronics are based on the Australian “Mystery Set” circuit, with modifications to make the receiver tunable over multiple bands. Rather than the traditional galena crystal and cat’s whisker detector, a pair of1N34A germanium diodes are used as rectifiers — one for demodulating the audio signal, and the other to drive a microammeter to indicate signal strength. A cat’s whisker is included for looks, though, mounted to the black acrylic front panel along with nice chunky knobs and homebrew rotary switches for band selection and antenna.

As nice as the details on the electronics are, it’s the case that really sells this build. Using quarter-sawn oak salvaged from old floorboards. The joinery is beautiful and the hardware is period correct; we especially appreciate the work that went into transforming a common flat washer into a nickel-plated escutcheon for the lock — because every radio needs a lock.

Congratulations to [Alvenh] for pulling off such a wonderful build, and really celebrating the craftsmanship of the early days of radio. Need some crystal radio theory before tackling your build? Check out [Greg Charvat]’s crystal radio deep dive.

Bring Precision To The Woodshop With An Electronic Router Lift

One of the knocks that woodworkers get from the metalworking crowd is that their chosen material is a bit… compliant. Measurements only need to be within a 1/16th of an inch or so, or about a millimeter, depending on which side of the Atlantic you’re on. And if you’re off a bit? No worries, that’s what sandpaper is for.

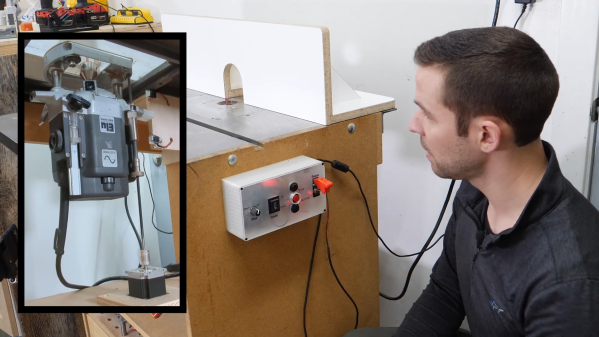
This electronic router lift is intended to close the precision gap and make woodworking a bit less subjective. [GavinL]’s build instructions are clearly aimed at woodworkers who haven’t dabbled in the world of Arduinos and stepper motors, and he does an admirable job of addressing the hesitancy this group might feel when tackling such a build. Luckily, a lot of the mechanical side of this project can be addressed with a commercially available router lift, which attaches to a table-mounted plunge router and allows fine adjustment of the cutting tool’s height from above the table.

What’s left is to add a NEMA 23 stepper to drive the router lift, plus an Arduino to control it. [GavinL] came up with some nice features, like a rapid jog control, a fine adjustment encoder, and the ability to send the tool all the way up or all the way down quickly. Another really nice touch is the contact sensor, which is a pair of magnetic probes that attach temporarily to the tool and a height gauge to indicate touch-off. Check the video below to see it all in action.

One quibble we have with [GavinL]’s setup is the amount of dust that the stepper will be subjected to. He might need to switch out to a dustproof stepper sooner rather than later. Even so, we think he did a great job bridging the gap between mechatronics and woodworking — something that [Matthias Wandel] has been doing great work on, too.

Continue reading “Bring Precision To The Woodshop With An Electronic Router Lift”

The octagonal wooden box described in the project. On the left, outer surface of the box is shown, with "Say Friend And Come In" inscription, as well as a few draings (presumably from Lord of The Rings) and two metallic color stars that happen to serve as capacitative sensor electrodes. On the right, underside of the lid is shown, with all the electronics involved glued into CNC-machined channels.

Say Friend And Have This Box Open For You

Handcrafted gifts are special, and this one’s no exception. [John Pender] made a Tolkien-inspired box for his son and shared the details with us on Hackaday.io. This one-of-a-kind handcrafted box fulfills one role and does it perfectly – just like with the Doors of Durin, you have to say ‘friend’ in Elvish, and the box shall unlock for you.

This box, carefully engraved and with attention paid to its surface finish, stands on its own as a gift. However, with the voice recognition function, it’s a project complicated enough to cover quite a few fields at once – woodworking, electronics, and software. The electronics are laid out in CNC-machined channels, and LED strips illuminate the “Say Friend And Come In” inscriptions once the box is ready to listen. If you’re wondering how the unlocking process works, the video embedded below shows it all.

Two solenoids keep the lid locked, and in its center is a Pi Zero, the brains of the operation. With small batteries and a power-hungry board, power management is a bit intricate. Two capacitive sensors and a small power management device are always powered up. When both of the sensors are touched, a power switch module from Pololu wakes the Pi up. It, in turn, takes its sweet time, as fully-fledged Linux boards do, and lights up the LED strip once it’s listening.

Continue reading “Say Friend And Have This Box Open For You”

Tech In Plain Sight: Tough As Nails

When you think of machines you see around you every day, you probably think about your car, computer, or household appliances. However, the world is full of simple machines. One simple machine in particular, the inclined plane, shows up a lot. For example, think of the humble nail. If you are a woodworker or even a homeowner you probably have bags of them. They certainly are all around you if you are indoors and maybe even if you are outdoors right now. Nails have been the fastener of choice for a very long time and they are a form of a wedge which is a type of inclined plane.

What else can you say about nails? Turns out, there is a lot to know. Like other fasteners, there are nails for very specific purposes. There are even nails with two heads and — no kidding — nails with two points. Exactly what kind of nail you need depends on what you are doing and what’s important to you.

Continue reading “Tech In Plain Sight: Tough As Nails”

bending the wood

Better Kerf Cuts With A CNC Bit

Bending wood is a complex affair. Despite the curves inherent in trees, most wood does not naturally want to bend. There are a few tricks you can use to bend it however, such kerf cutting and steaming. [JAR made] has a clever hack to make better kerf cuts using a CNC bit.

Typically kerfs are cut with a table saw or a miter saw set to trench. Many laser-cut box generations use kerfs to allow the piece to bend. The downside is that the cuts are straight cuts that are the same thickness throughout. This means that when the wood is bent into its shape, there are large gaps that need to be filled if you want the wood to look continuous. The hack comes in by using a router (not the networking kind) with a 6.2-degree taper. This means that the kerfs that it makes are angled. By placing the right amount of cuts and spacing them out equally, you get a perfectly rounded curve. To help with that even spacing, he whipped up a quick jig to make the cuts repeatable. Once all the cuts were made, the time to bend came, and [JAR made] used some hot water with fabric softener to assist with the bend. His shelves turned out wonderfully.

He makes the important statement that this CNC bit isn’t designed with this use case in mine and the chances of it snapping or breaking are high. Taking precautions to be safe is key if you try to reproduce this technique. Perhaps you can bust out some framing lumber and bend it into some beautiful furniture.

Continue reading “Better Kerf Cuts With A CNC Bit”

Making Something Gorgeous From Framing Lumber

Here at Hackaday, we typically cover things that blink, bleep, and occasionally they might even bloop. However, the name of the site is Hackaday. We’re about being clever, reusing things in new ways, and most importantly celebrating interesting projects. While not a traditional project that would grace the front page, we would argue that this nightstand made from framing lumber clearly belongs.

Framing lumber is infamous for being squirrely, weird, and heavily knotted. Most serious furniture makers avoid using the cheap stuff and opt for more expensive harder woods. Here in the US, the big box hardware stores carry cheap fast-grown soft pine that has significant amounts of warp and twist inherent in the wood. The process of getting it straight with right-angle corners is involved and even once it has been cut, the internal stresses inside the wood are released, rendering the board twisted and warped again over time. The timelapse process of planing, jointing, and cutting in the video has an almost therapeutic aspect to it. The results are two wonderful pieces of useful furniture that would look at home in most rooms.

The craftsmanship evident in the build is noteworthy but more impressive is the process of taking cheap and unfit materials and making something beautiful out of them. Perhaps if you’re inspired and decide to make your own nightstand this weekend, you can add some touch-sensitive electronics to it. Video after the break.

Continue reading “Making Something Gorgeous From Framing Lumber”